DBDeploy User Guide:One-Click Database Deployment
发布日期
DBDeploy Software Overview
- Database One-Click Deployment Software (DBDeploy) is a tool software specifically designed to simplify database deployment processes, developed for the iOS platform. Users can easily download and use it through Apple's App Store.
- DBDeploy aims to lower the technical barriers of database deployment, enabling non-DBA (Database Administrator) IT professionals to quickly and efficiently complete database installation and configuration. Whether you are a developer, DevOps engineer, or technology enthusiast, you can easily handle complex database deployment tasks with DBDeploy.
- DBDeploy supports multiple mainstream databases, including but not limited to MySQL, PostgreSQL, Oracle, SQL Server, etc., and is compatible with various mainstream operating system environments such as Windows, Linux, and Unix platforms.
- The software's features lie in its extremely simple user interface and clear operational logic. Users do not need to master complex command-line operations or write tedious scripts; they can complete database installation, configuration, and optimization through an intuitive graphical interface by following guided steps.
- DBDeploy also has built-in AI-powered intelligent parameter recommendation functionality that can automatically adjust configurations based on the user's environment and requirements, further improving deployment efficiency.
Software Download
- Open Apple App Store and search for DBDeploy to download, or click the link: DBDeploy Download Link
Software Usage Instructions
I. Main Interface
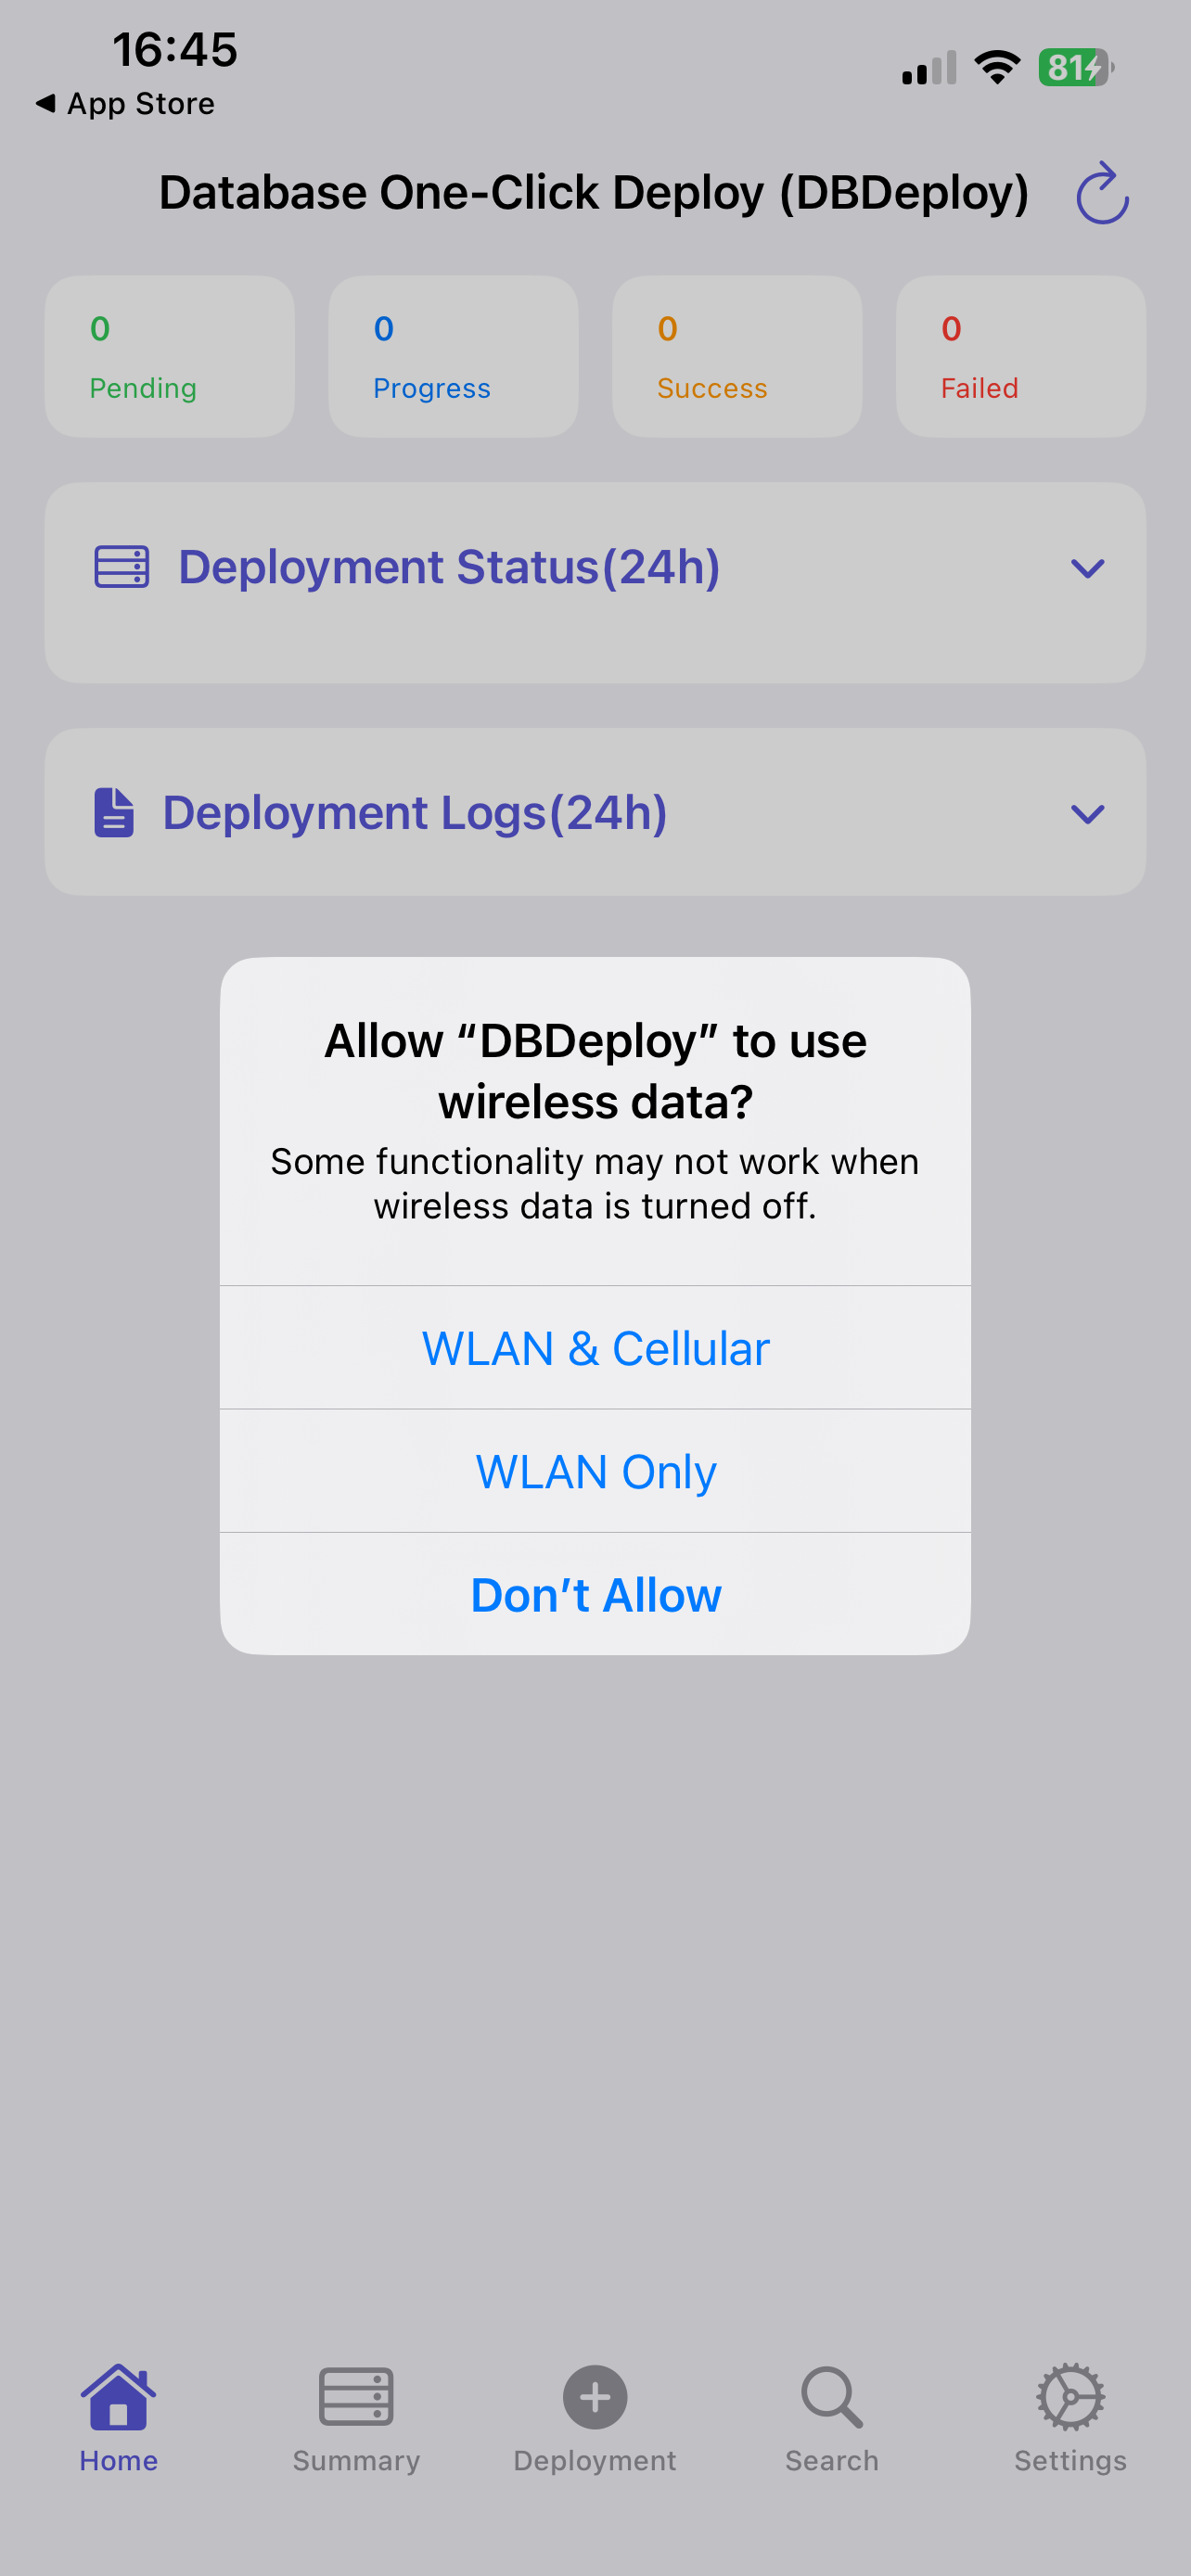
When the software runs for the first time, it requires network permissions. Please set to allow "WLAN & Cellular":
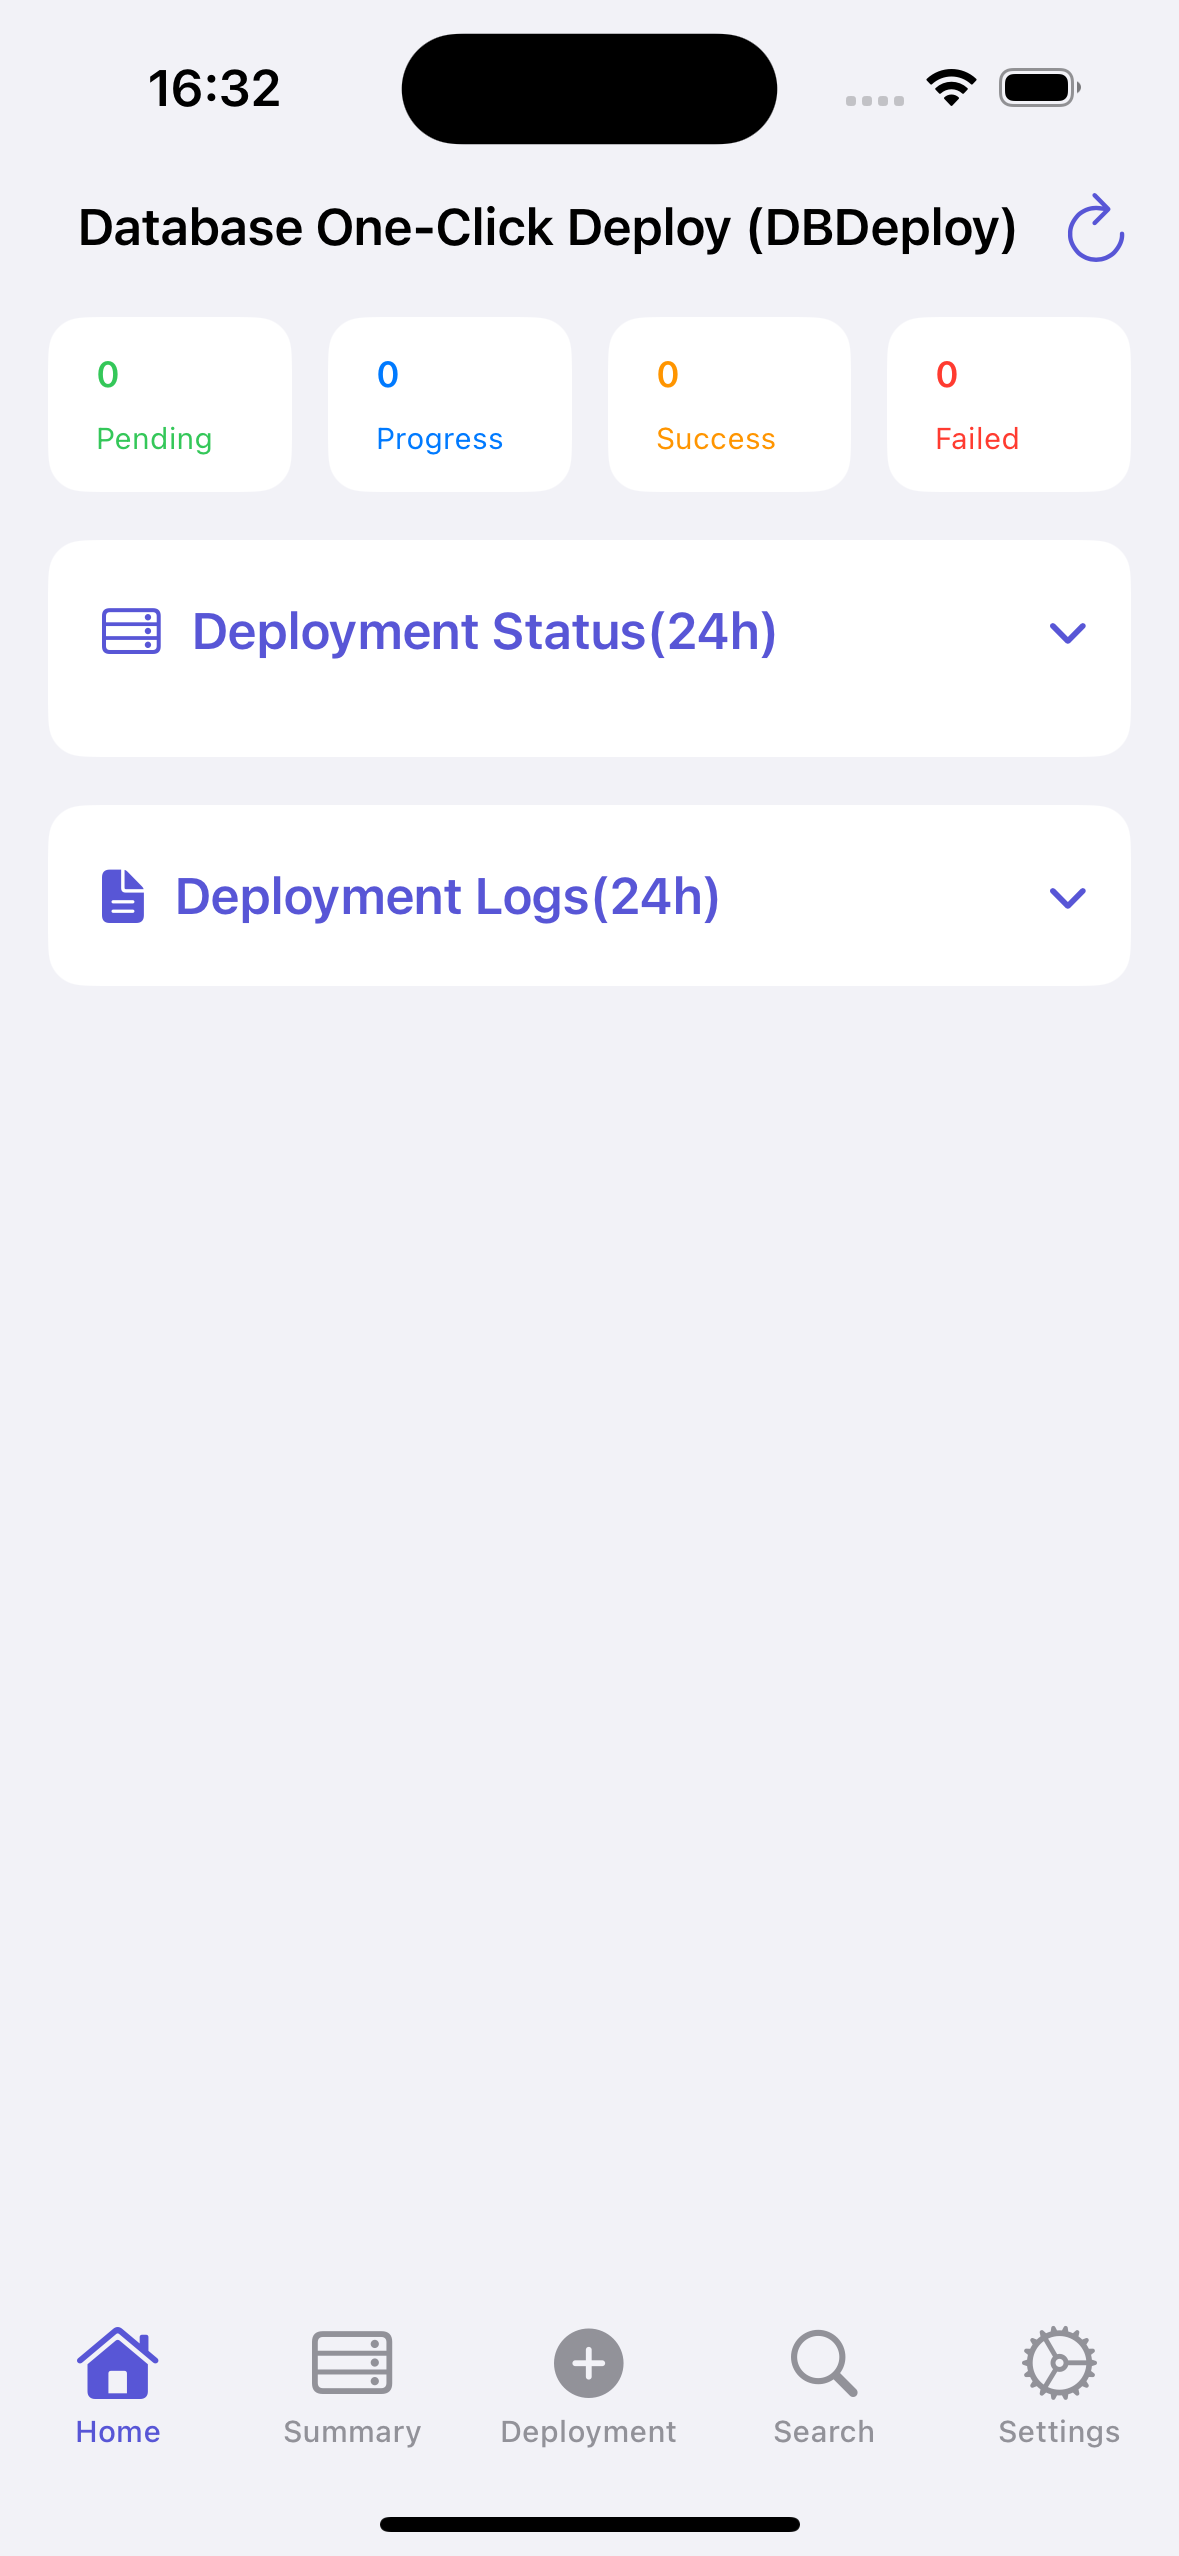
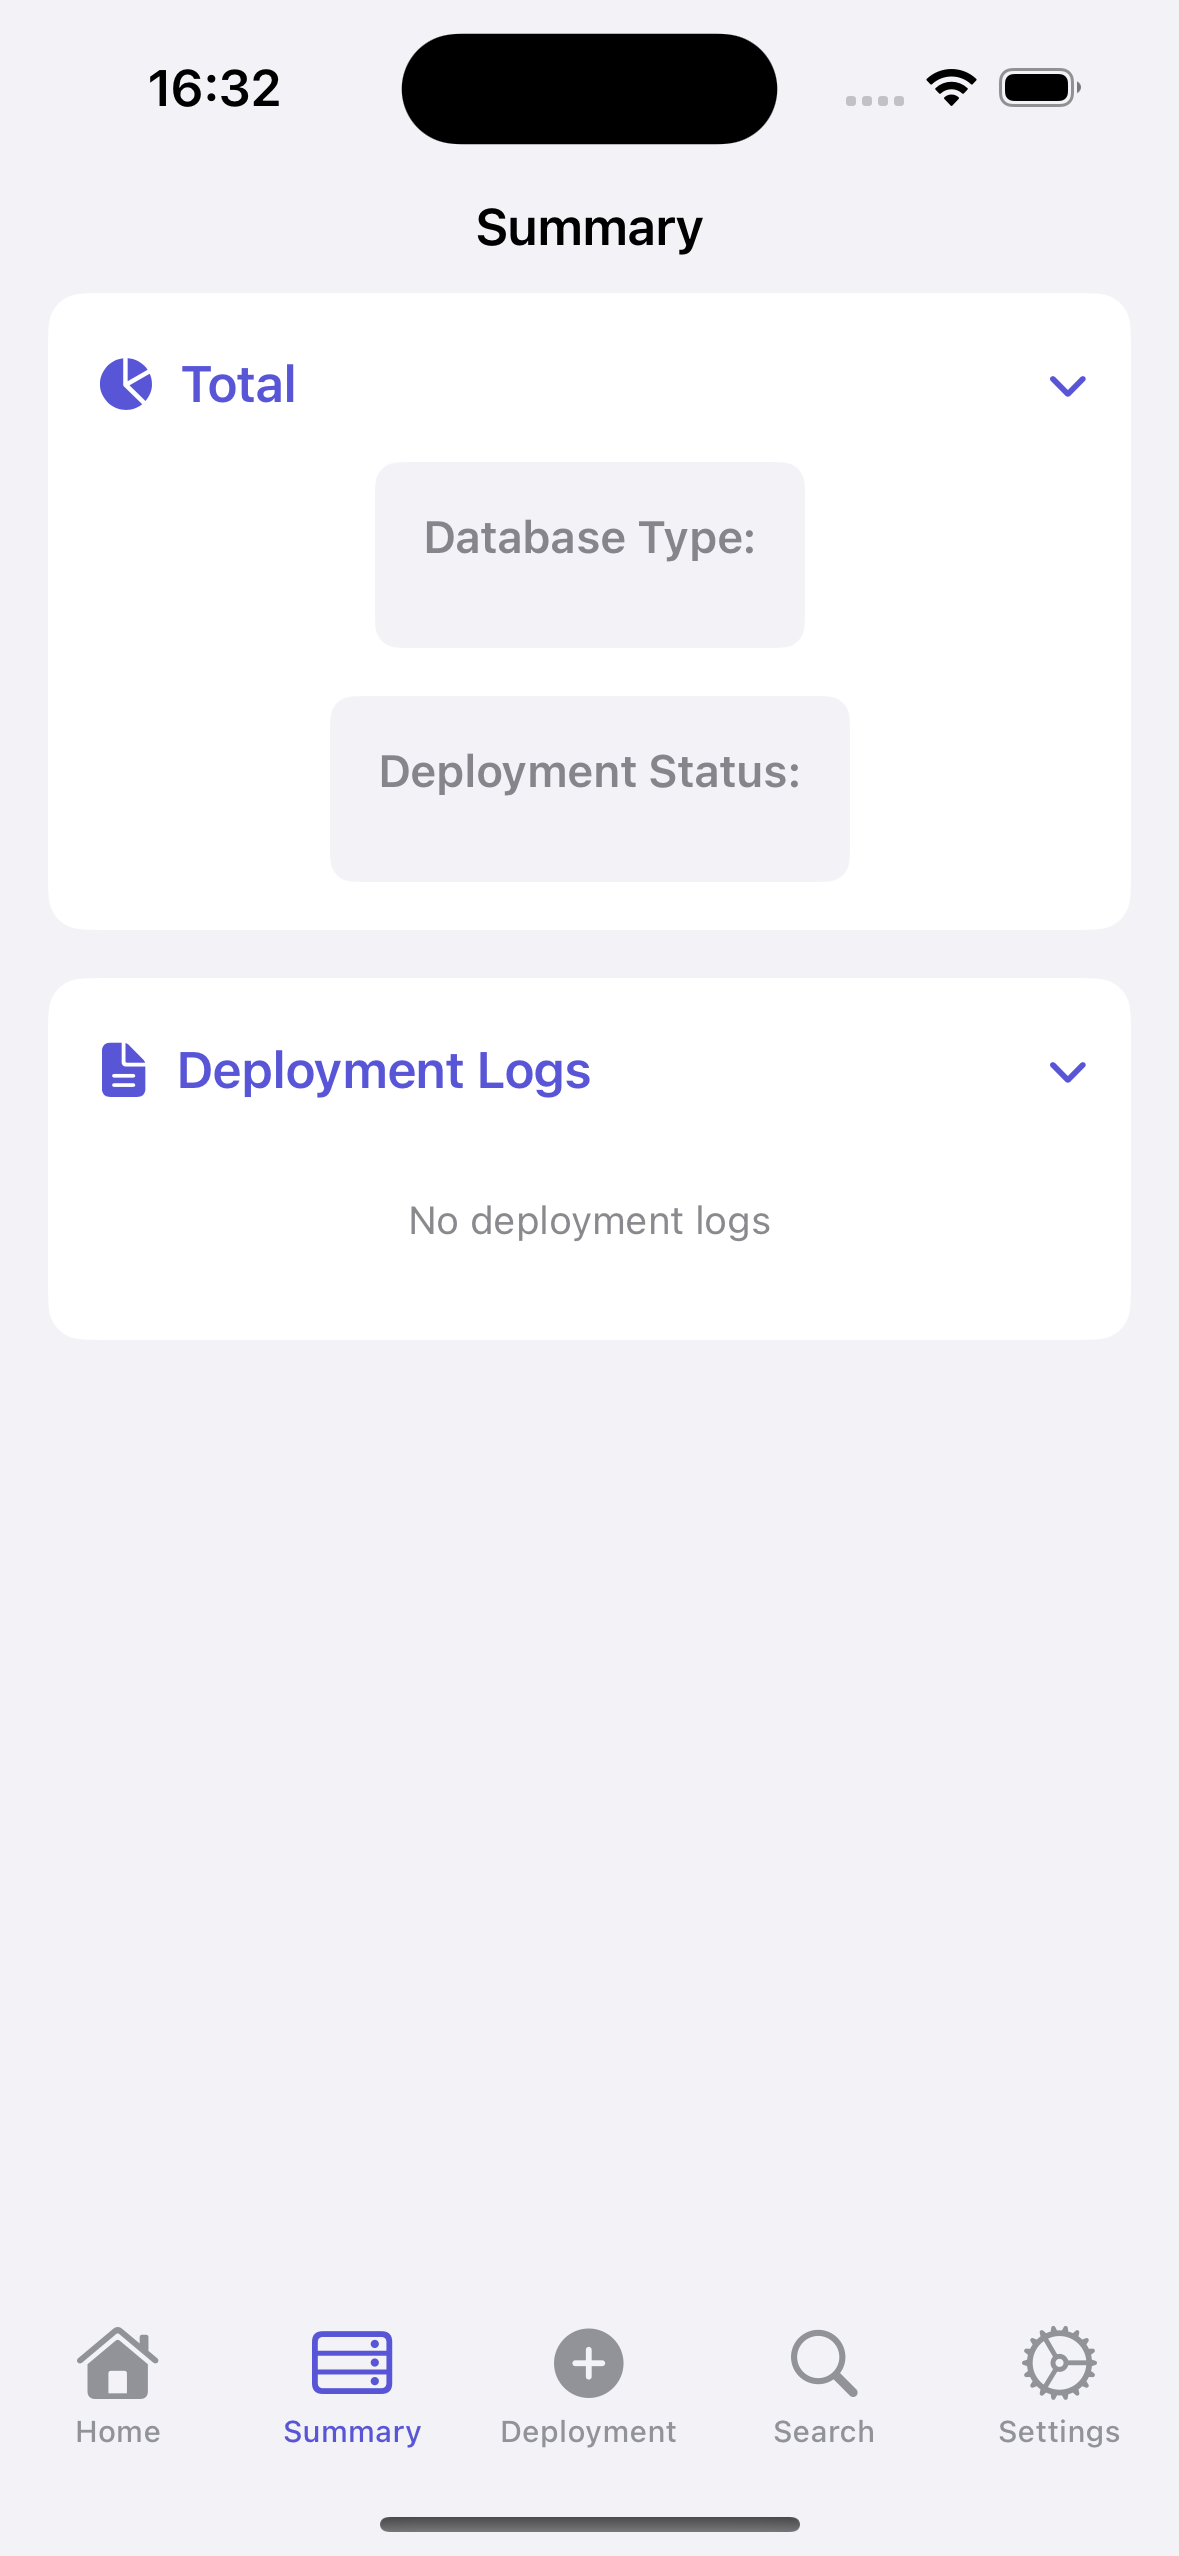
After software installation, there is no data by default. We can click the "Database Deployment" button to deploy databases.
Below are explanations of the main interface elements from top to bottom:
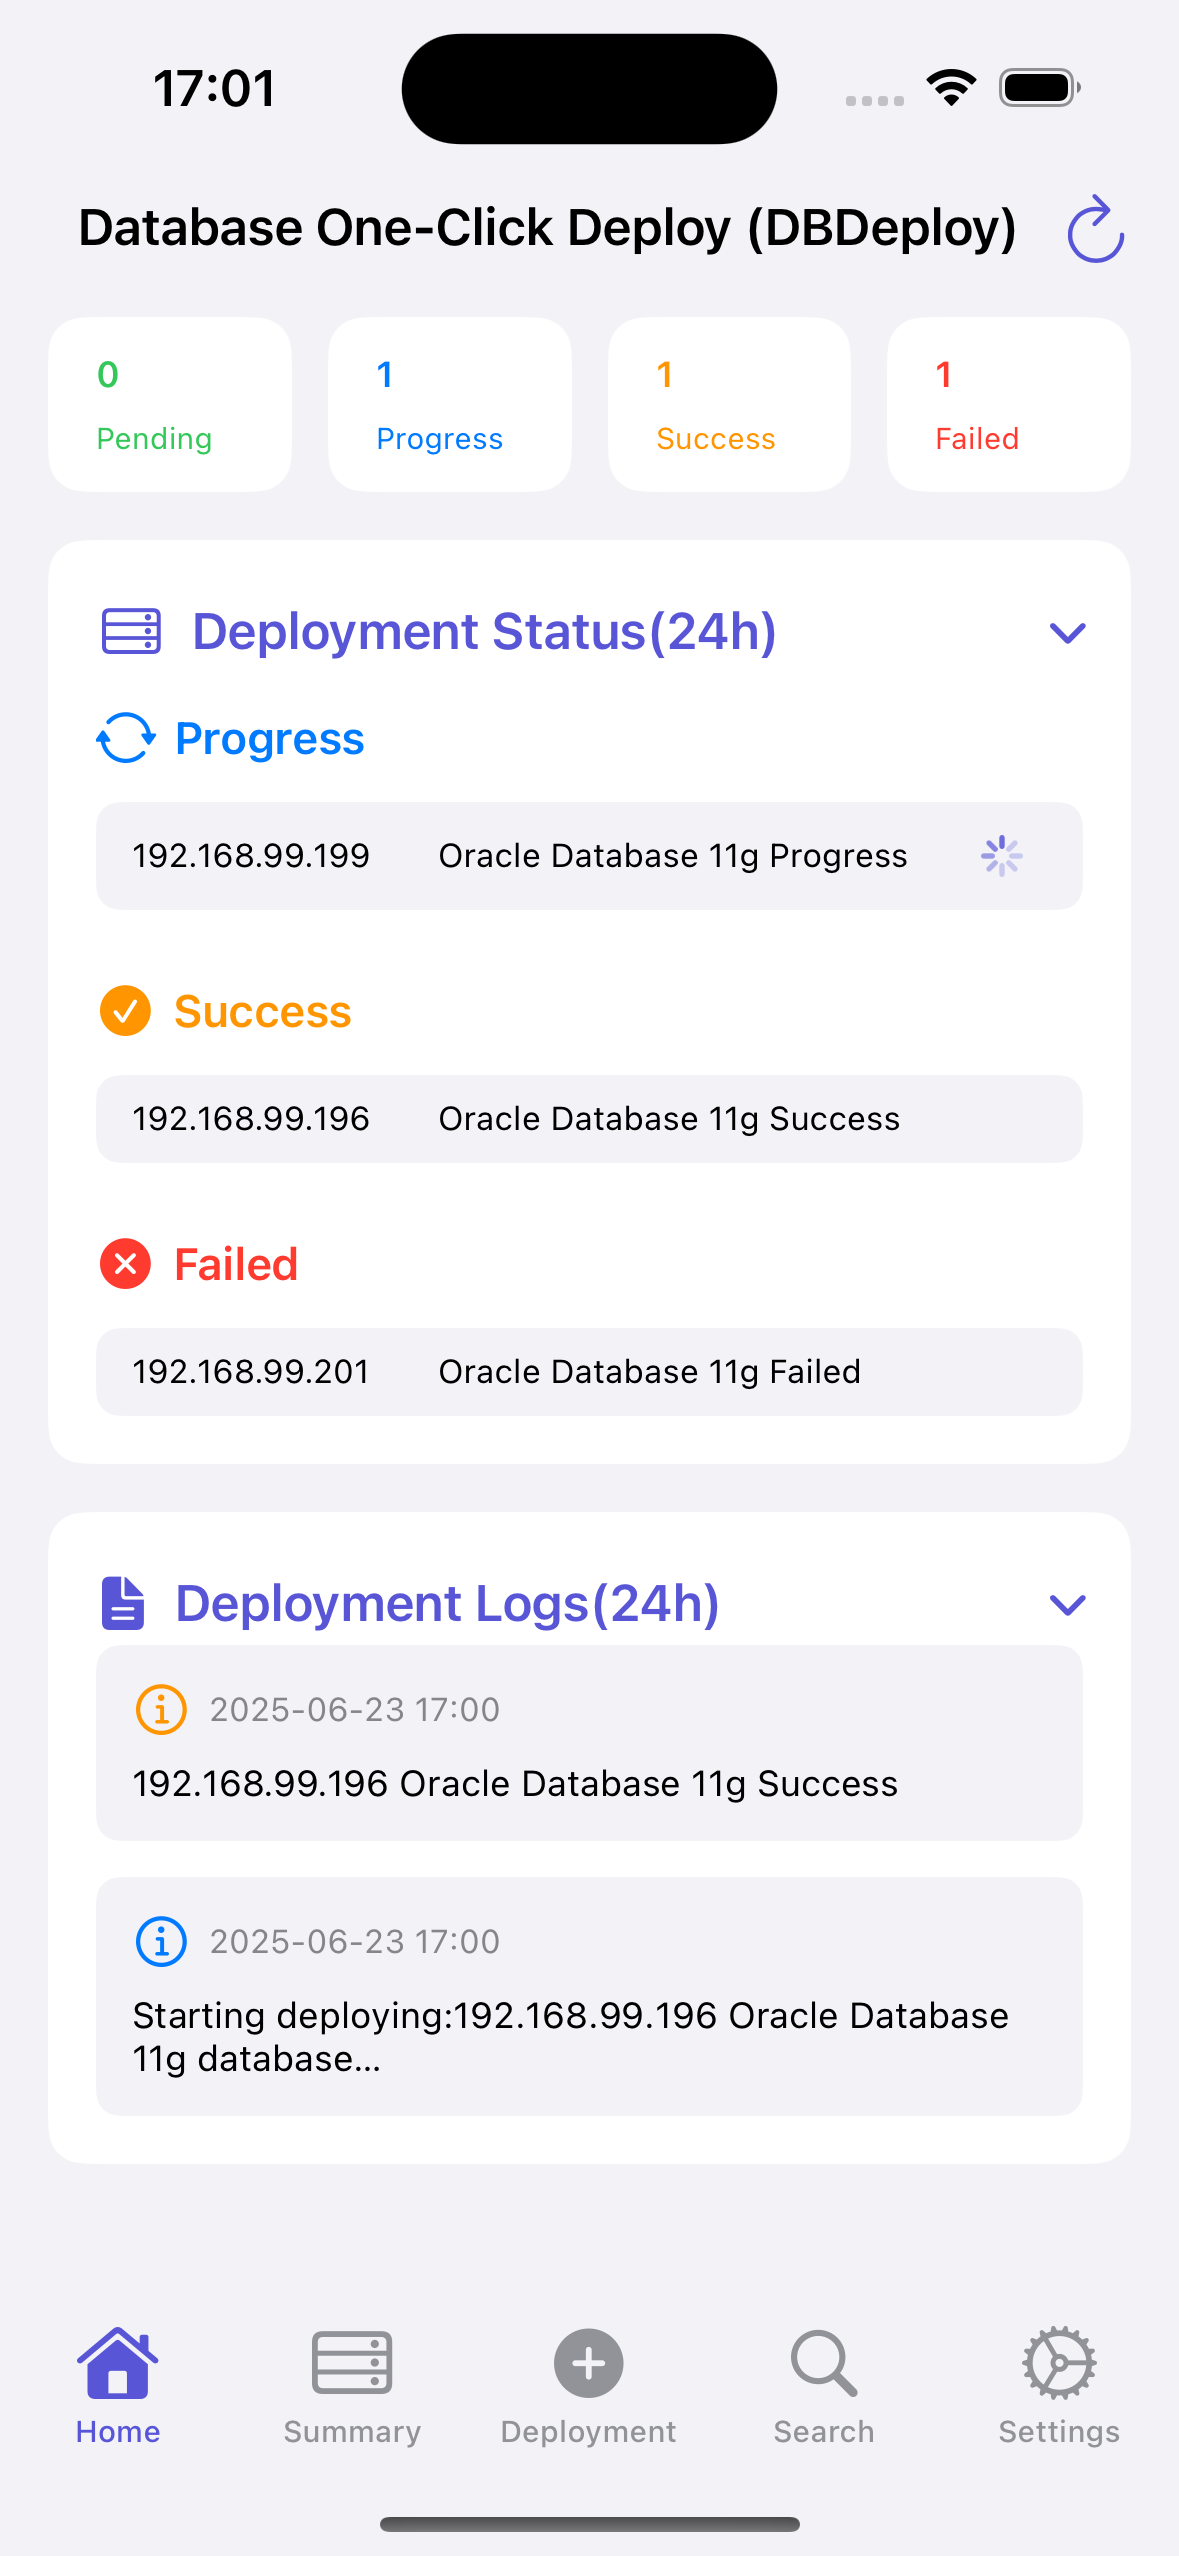
Deployment Status Bar (deployment status within 24 hours):
- Pending Deployment: Added in the database deployment page but not yet deployed
- Deploying: Currently being deployed databases
- Deployment Complete: Successfully deployed databases
- Deployment Failed: Failed database deployments
Deployment Log (within 24 hours):
- Shows database deployment records within 24 hours
Refresh Button:
- Located on the right side of the APP's title bar
- When a deployment remains in "Progress" status for a long time, you can click the refresh button to refresh the deployment status.
- Note: The refresh button is only useful when the deployment status is "Progress".
II. Deployment Summary
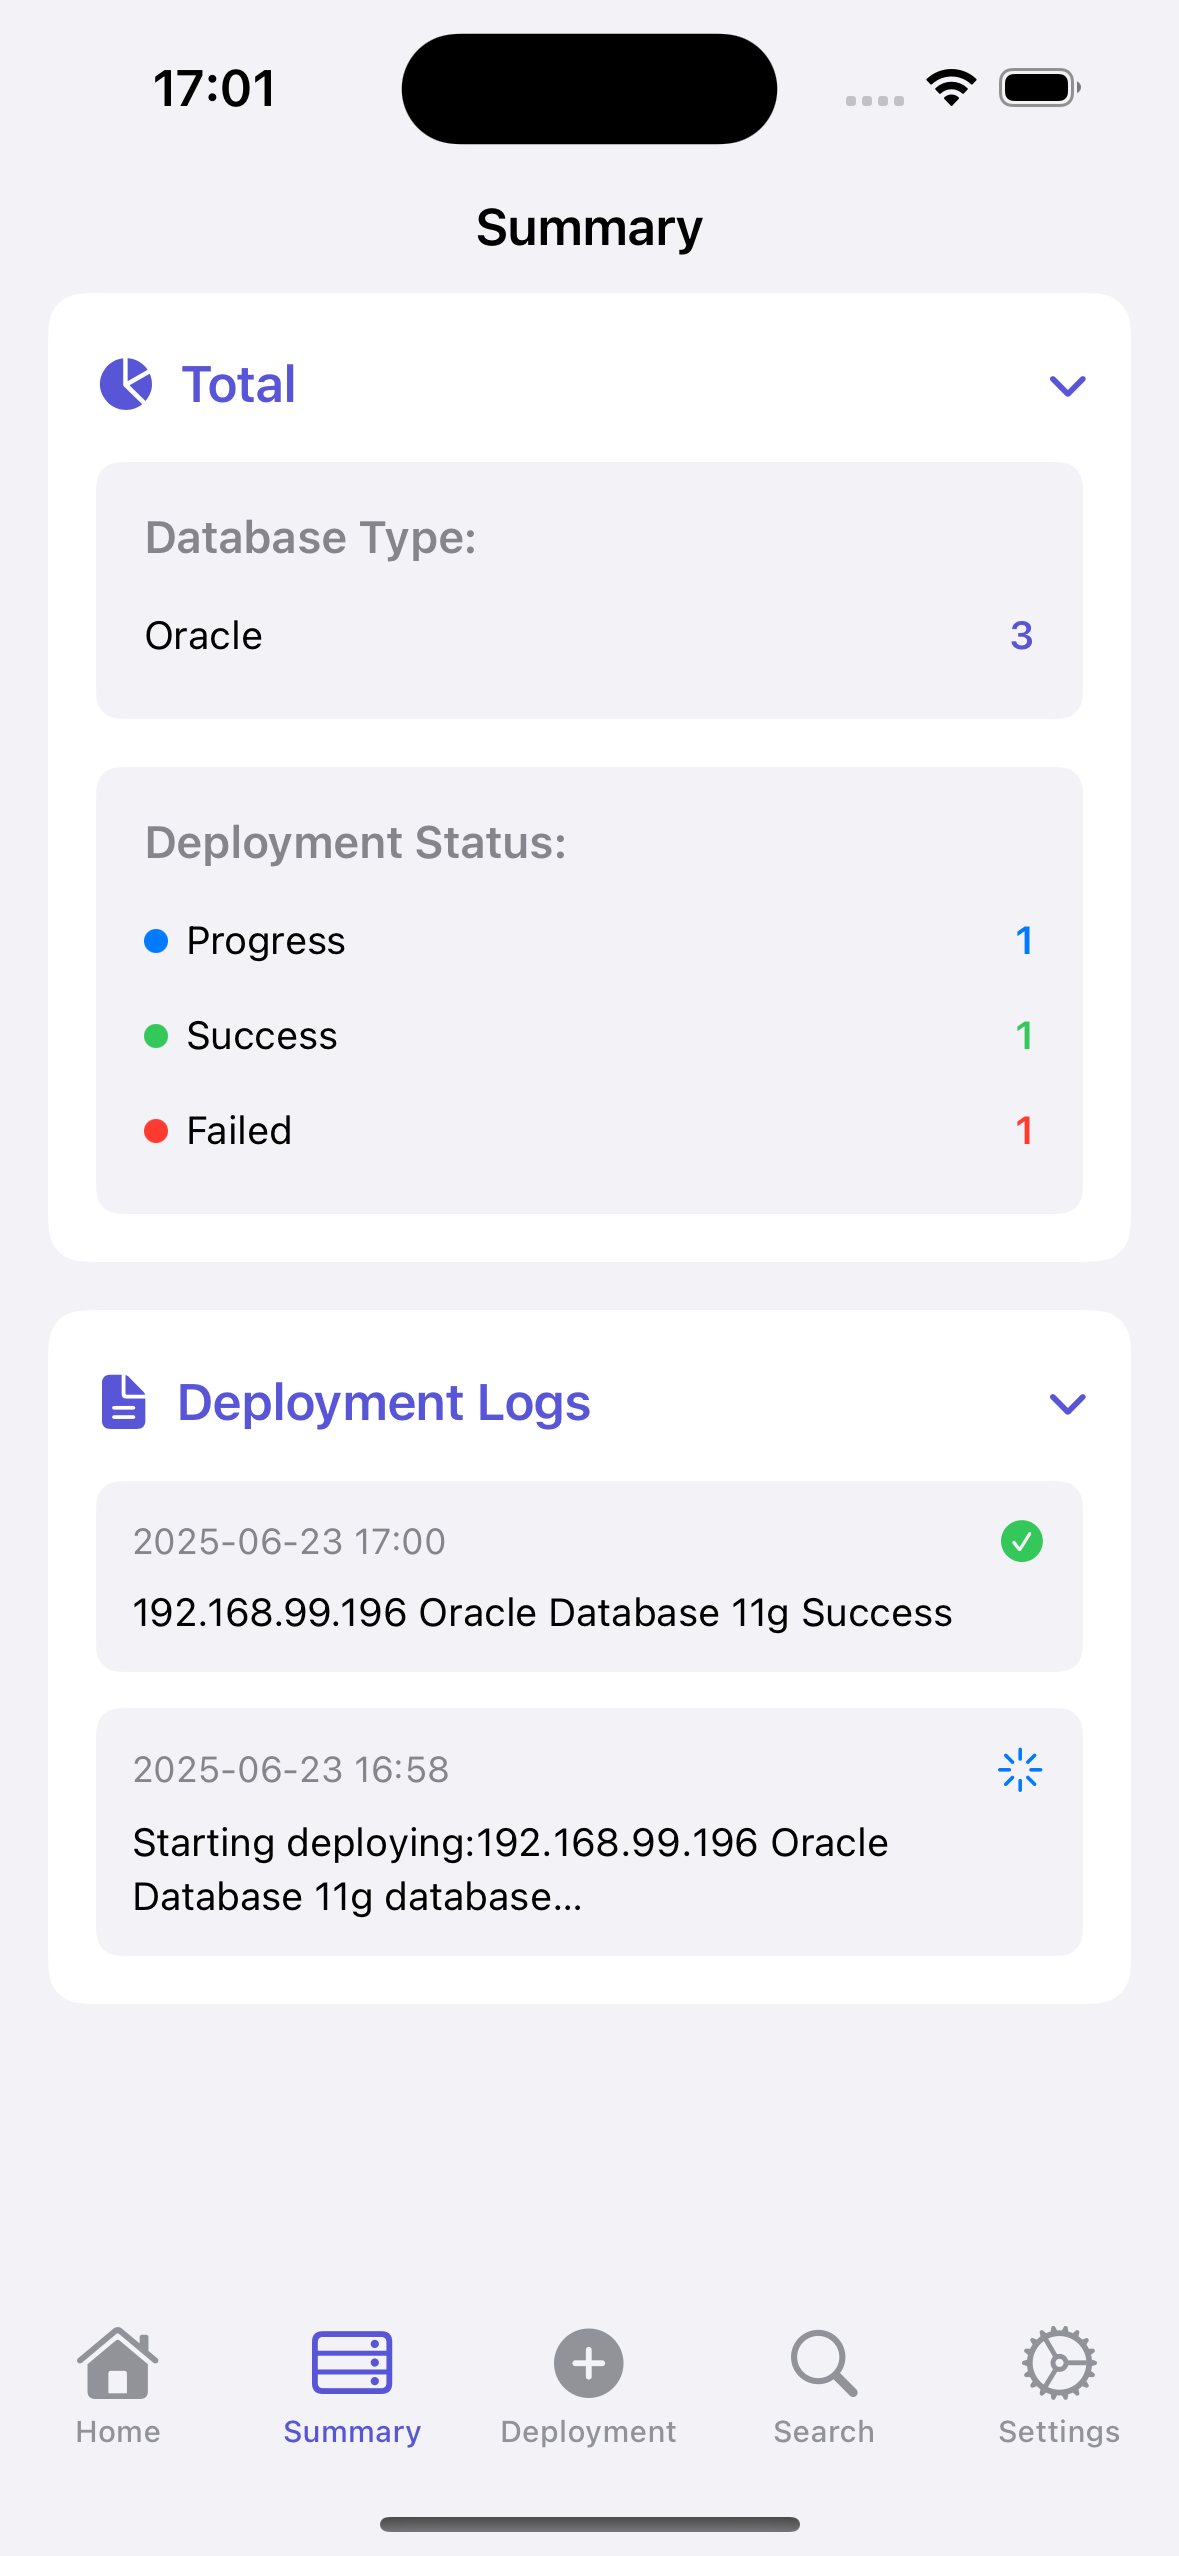
Total:
- Summarizes all deployed records
- Categorized by database type, such as: Oracle, MySQL, PostgreSQL, etc.
- Categorized by deployment status: Pending deployment, Deploying, Deployment successful, Deployment failed.
- Records with status "Pending deployment" and "Deployment failed" can be redeployed.
Deployment Log:
- Shows deployment records in chronological order from newest to oldest.
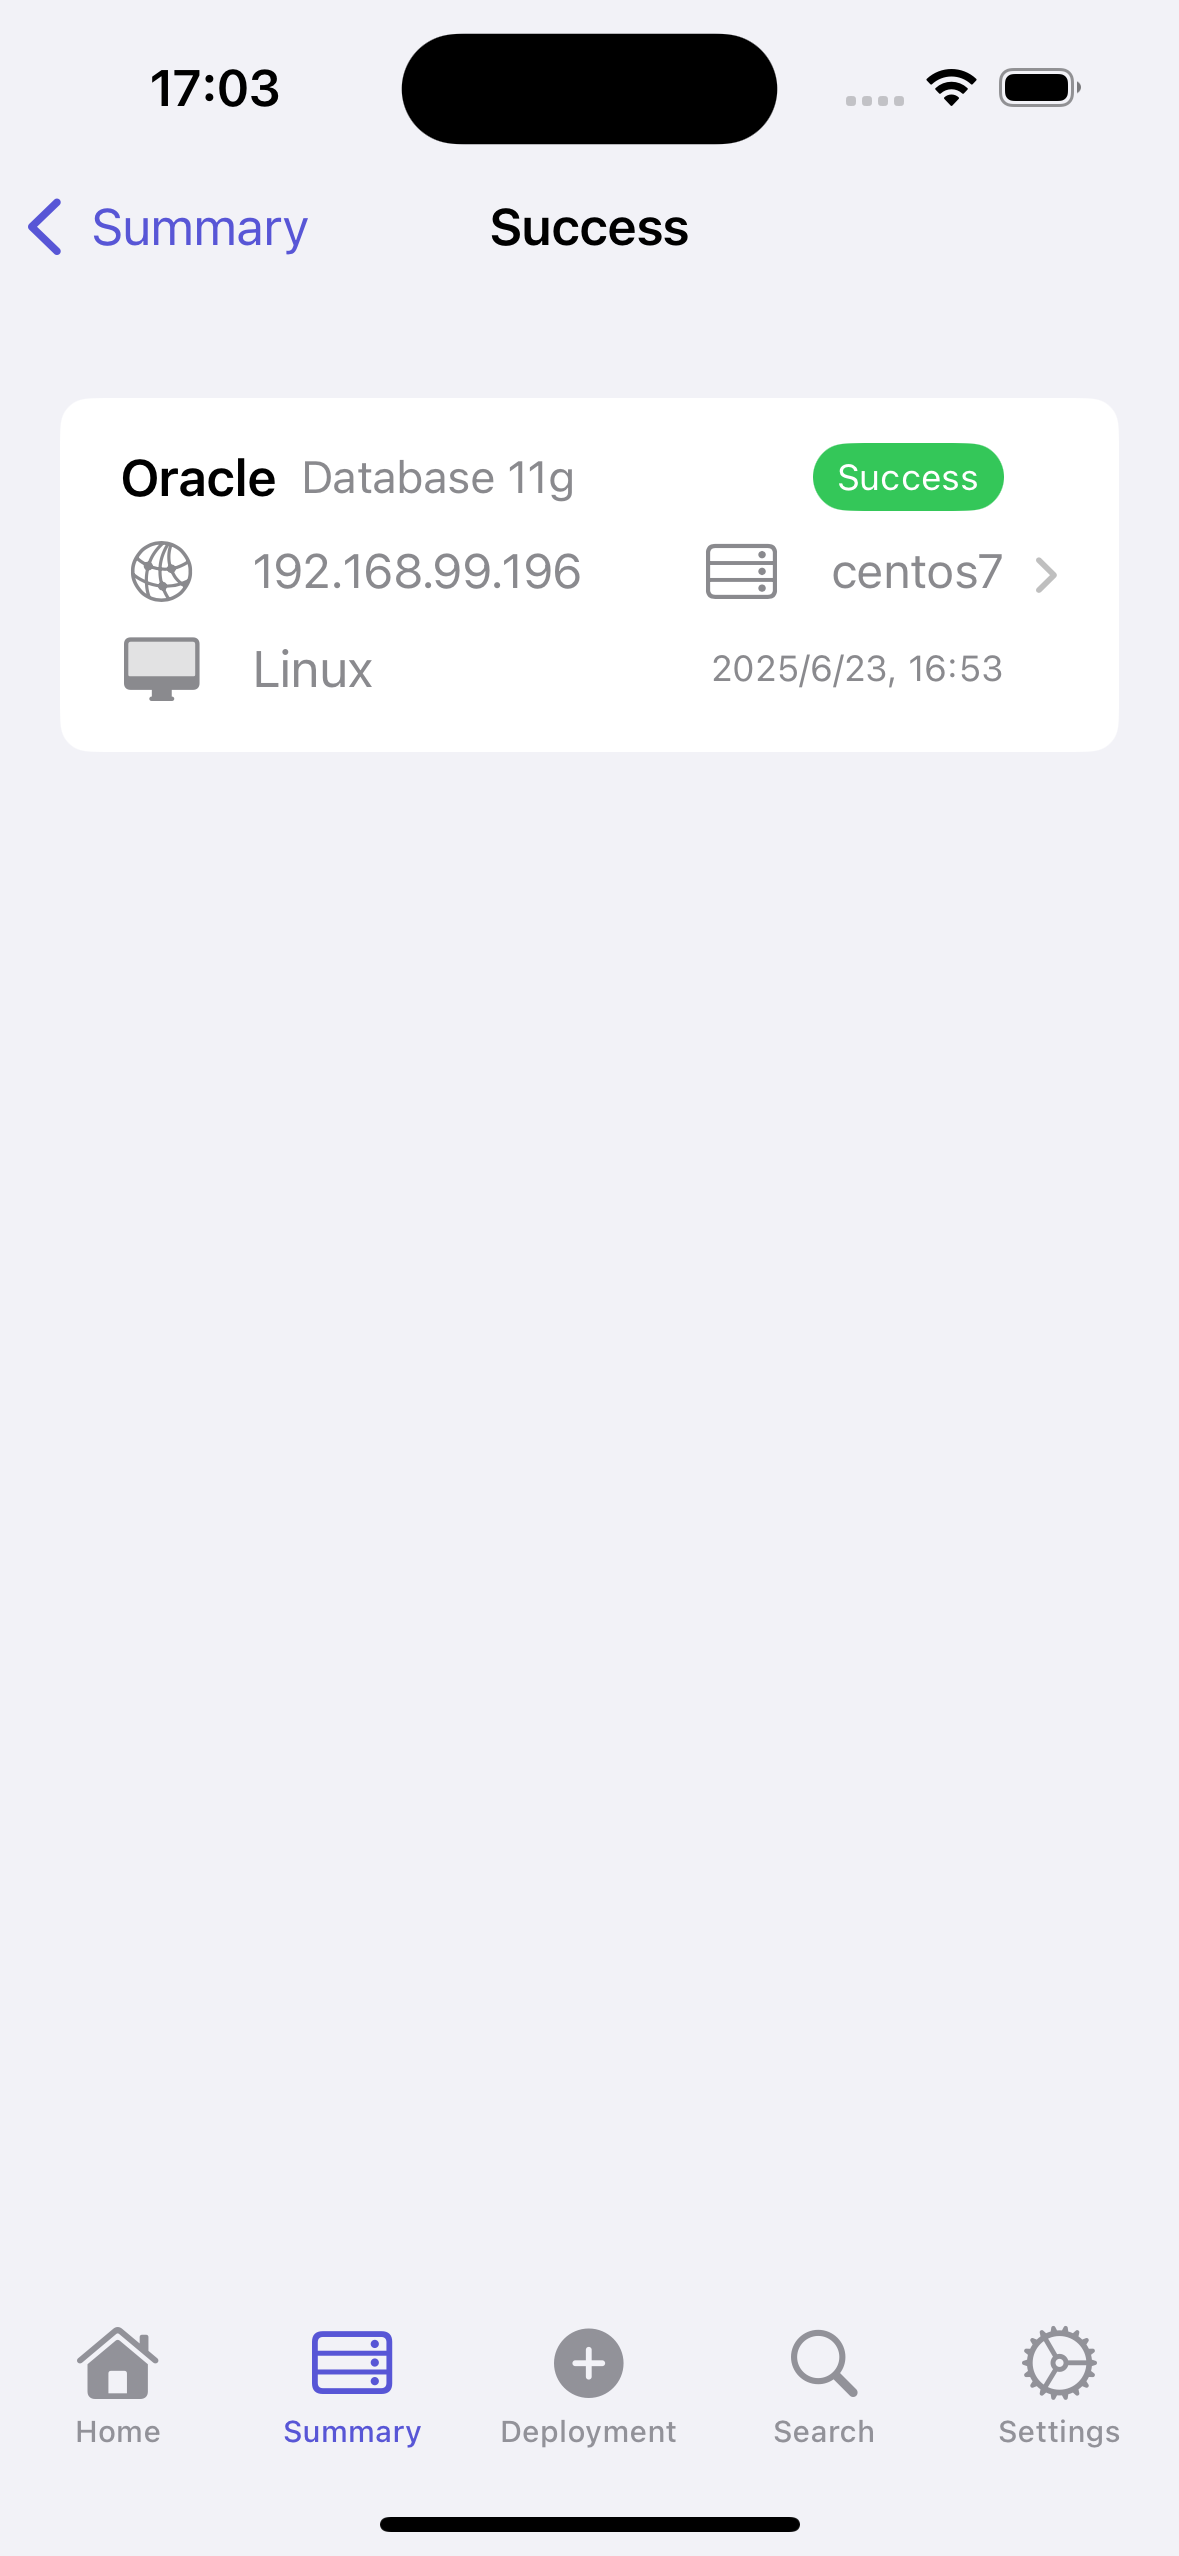
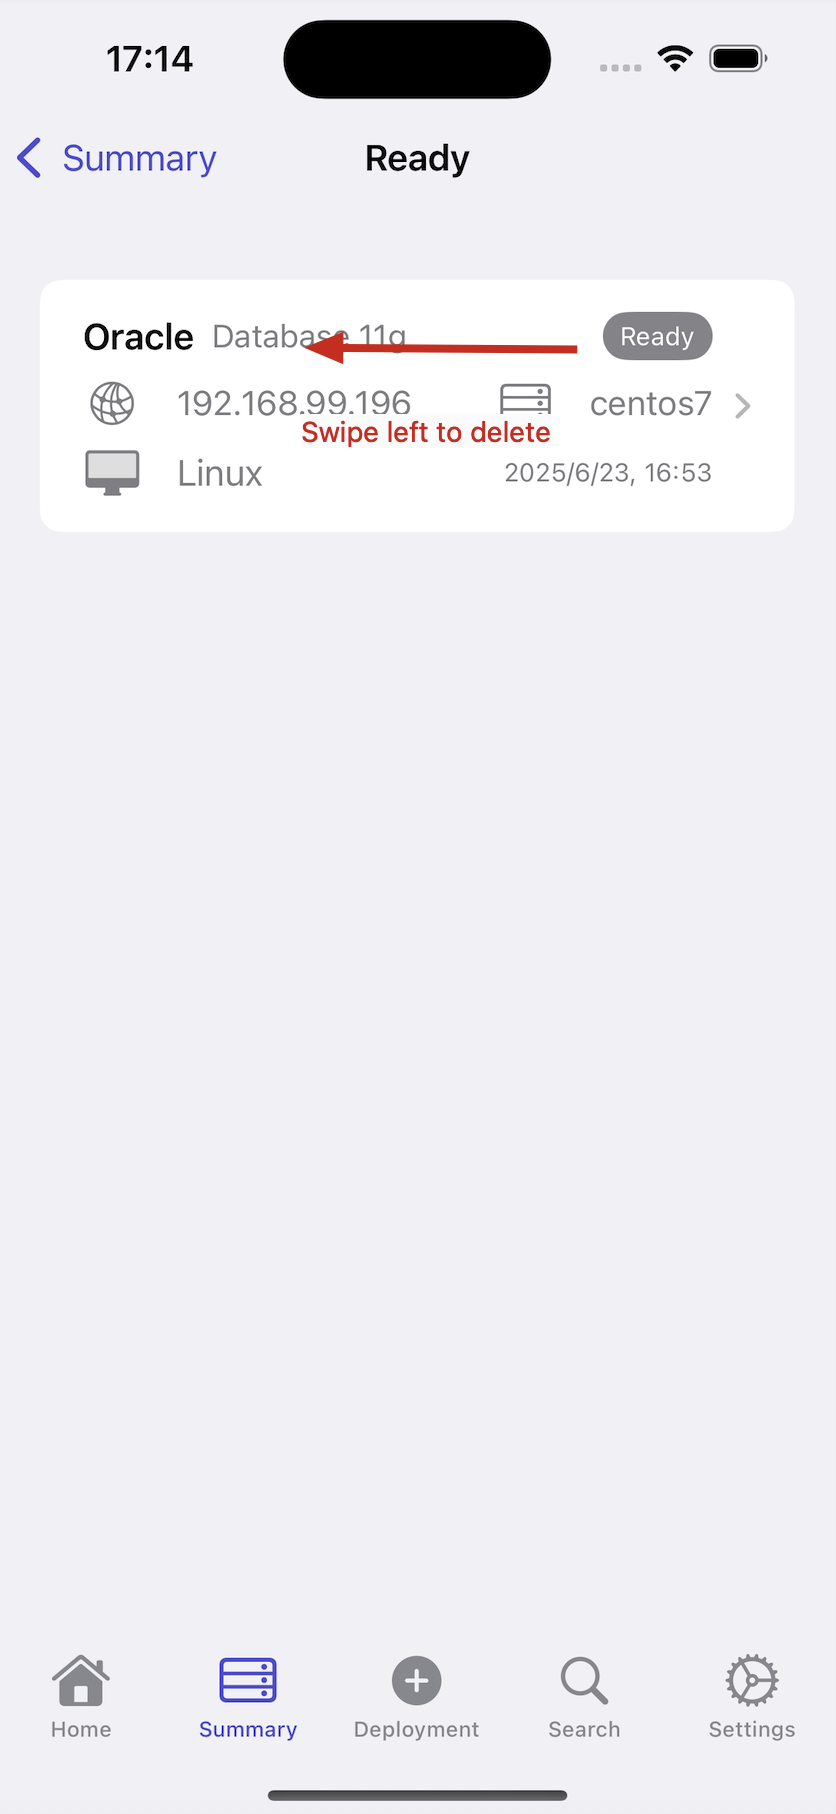
On this interface, we can click the numbers corresponding to deployment status to view detailed deployment information for records:
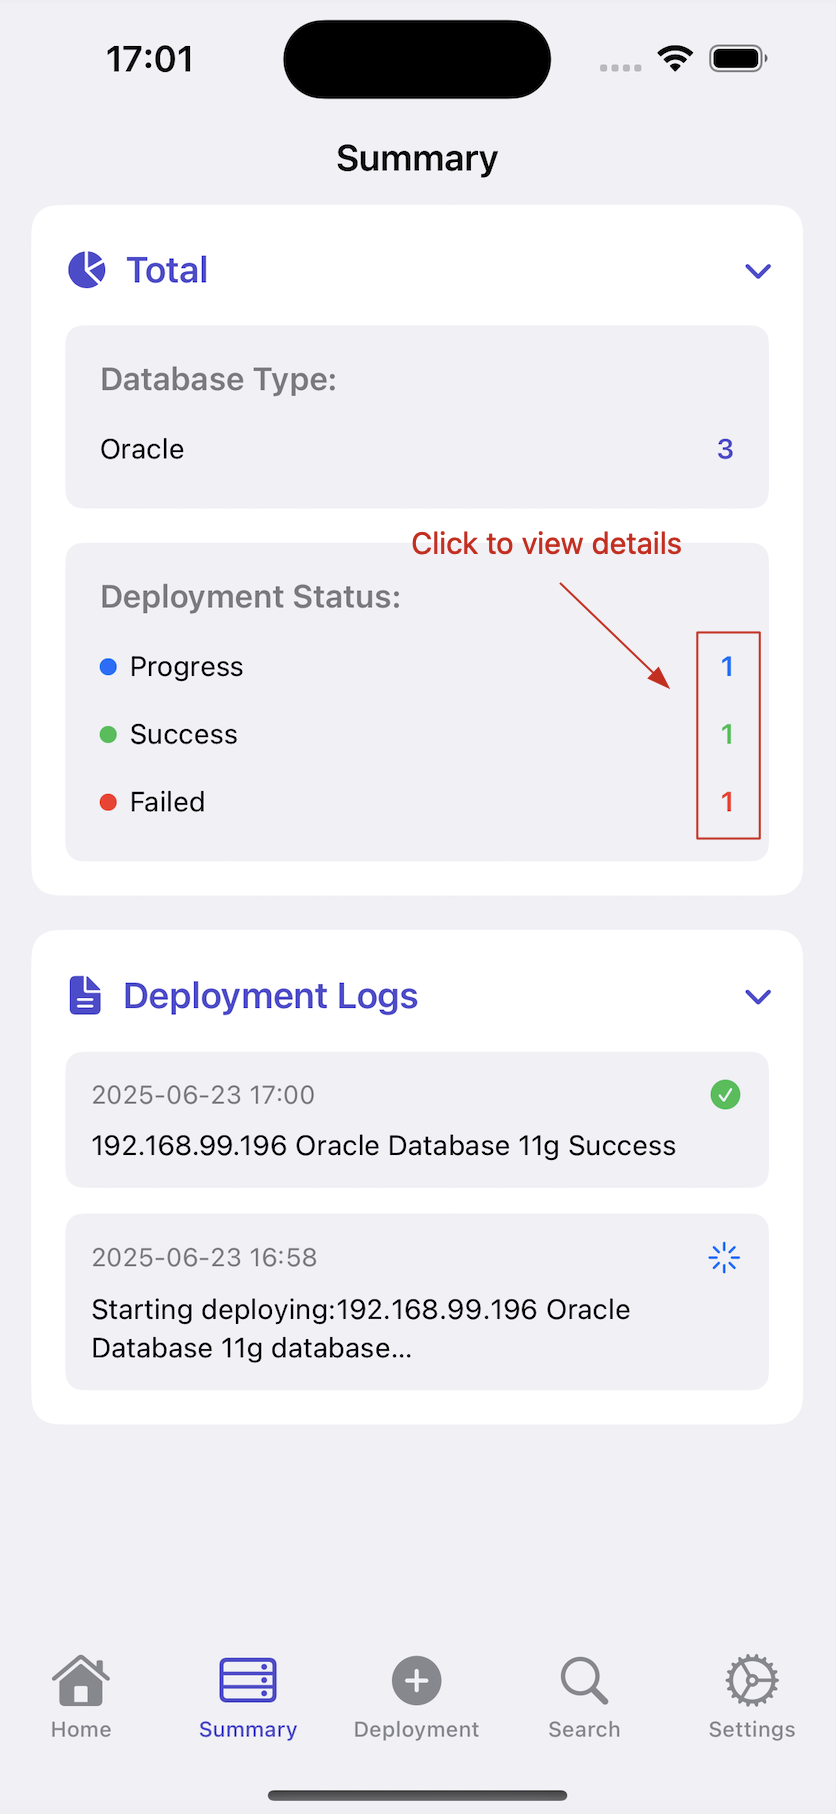
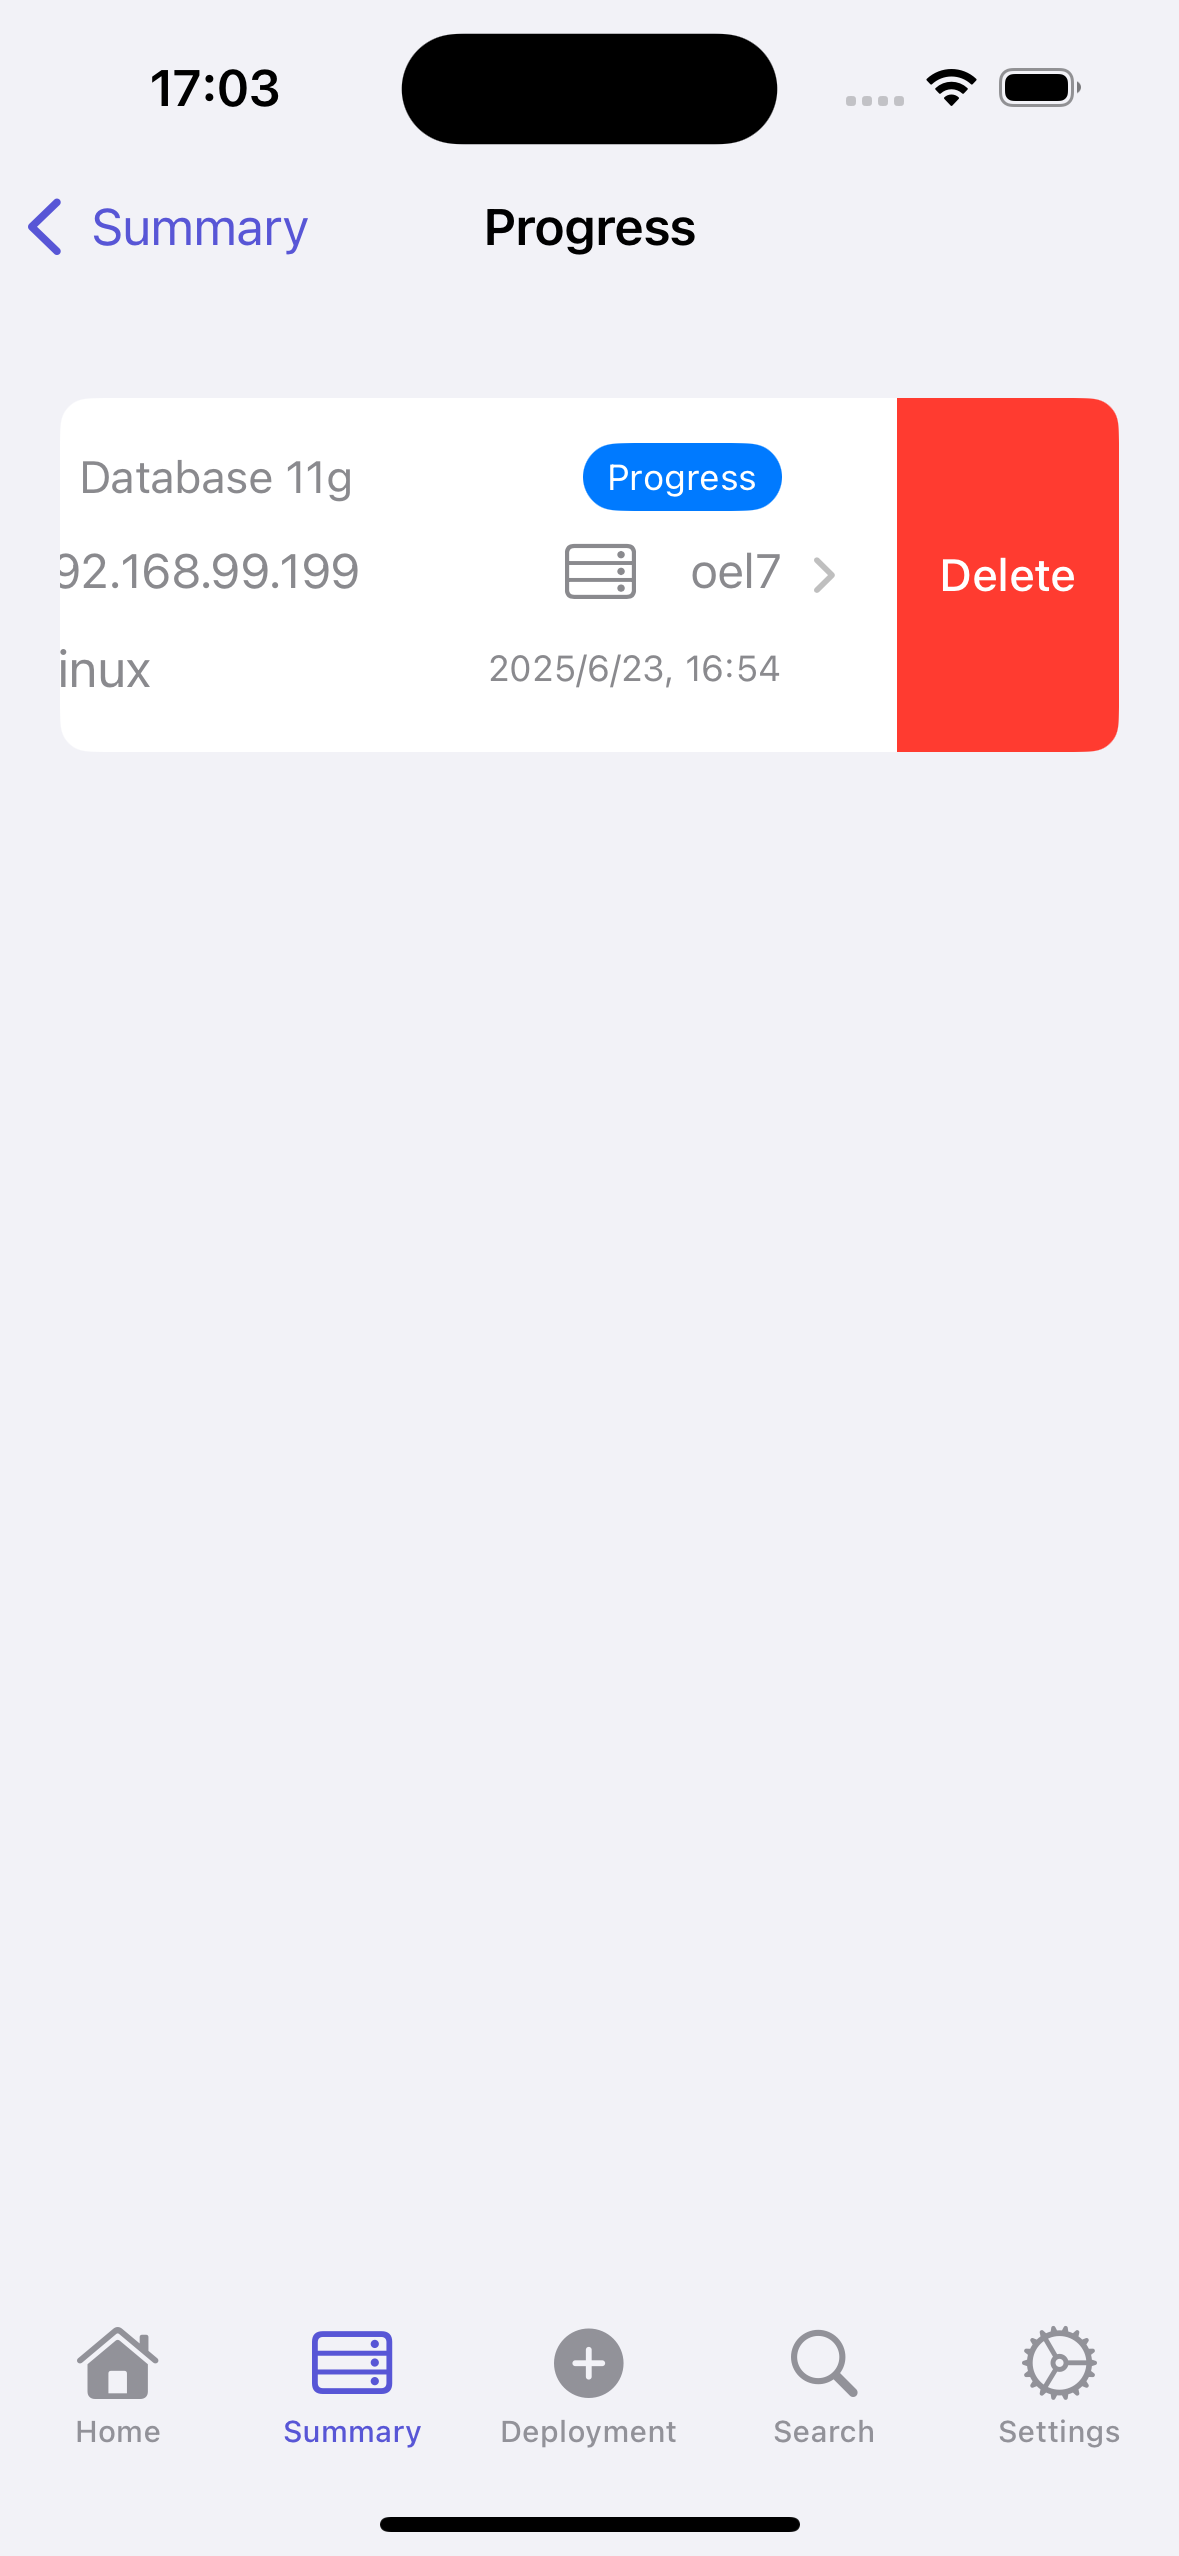
- Here you can also delete corresponding records:
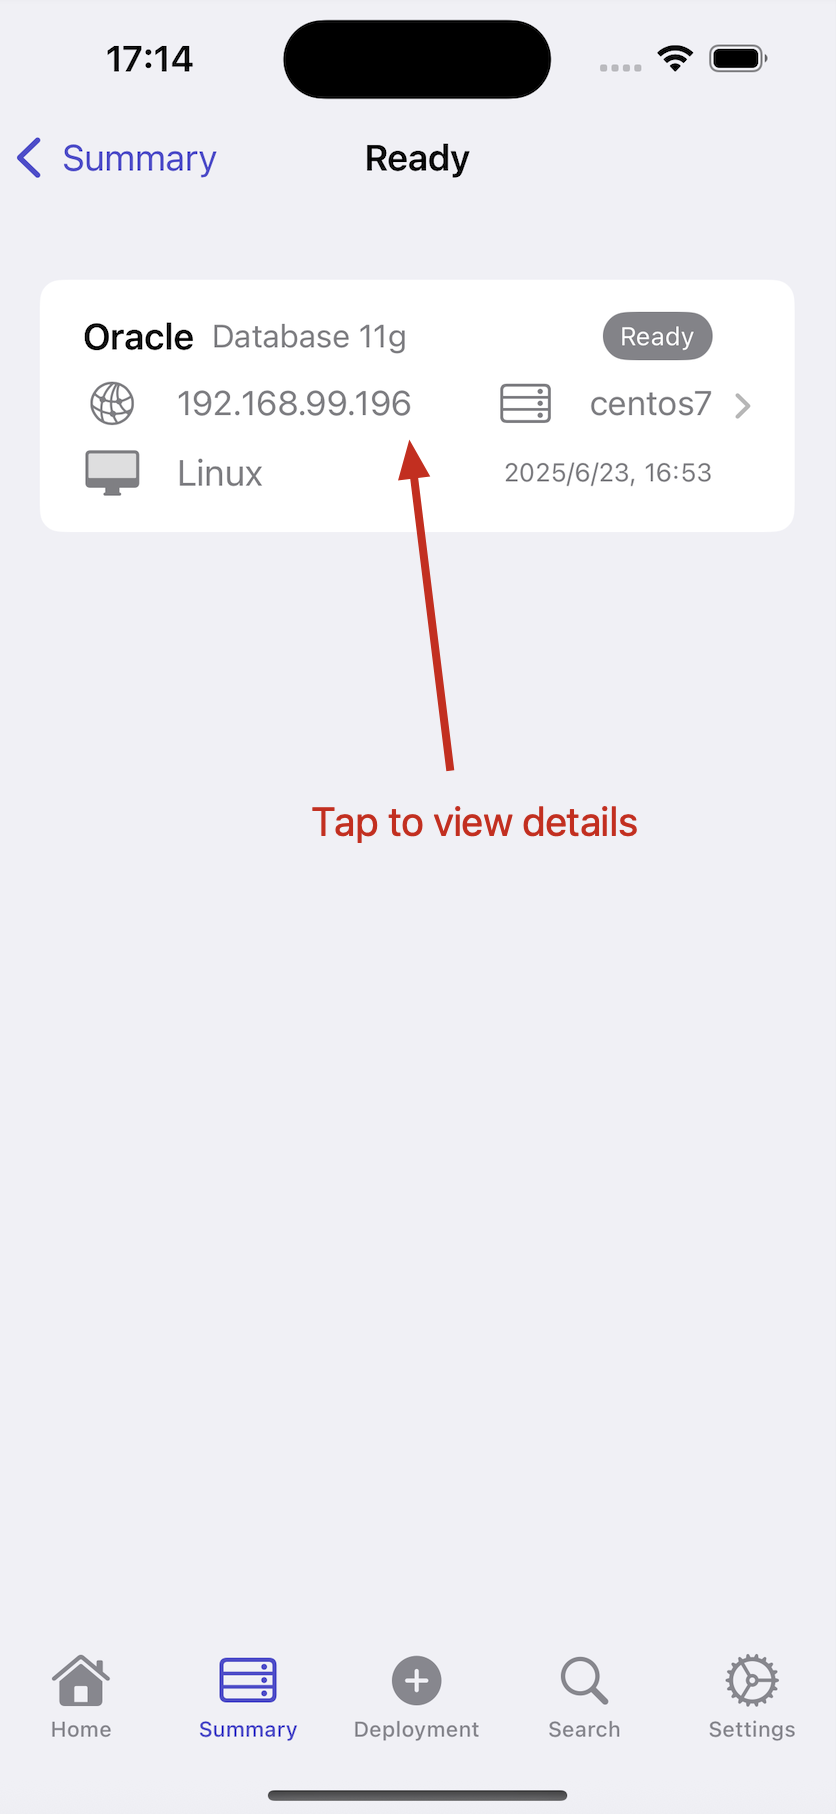
- We can also click on records to view detailed information. For records with status "Pending deployment" or "Deployment failed", we can redeploy them:
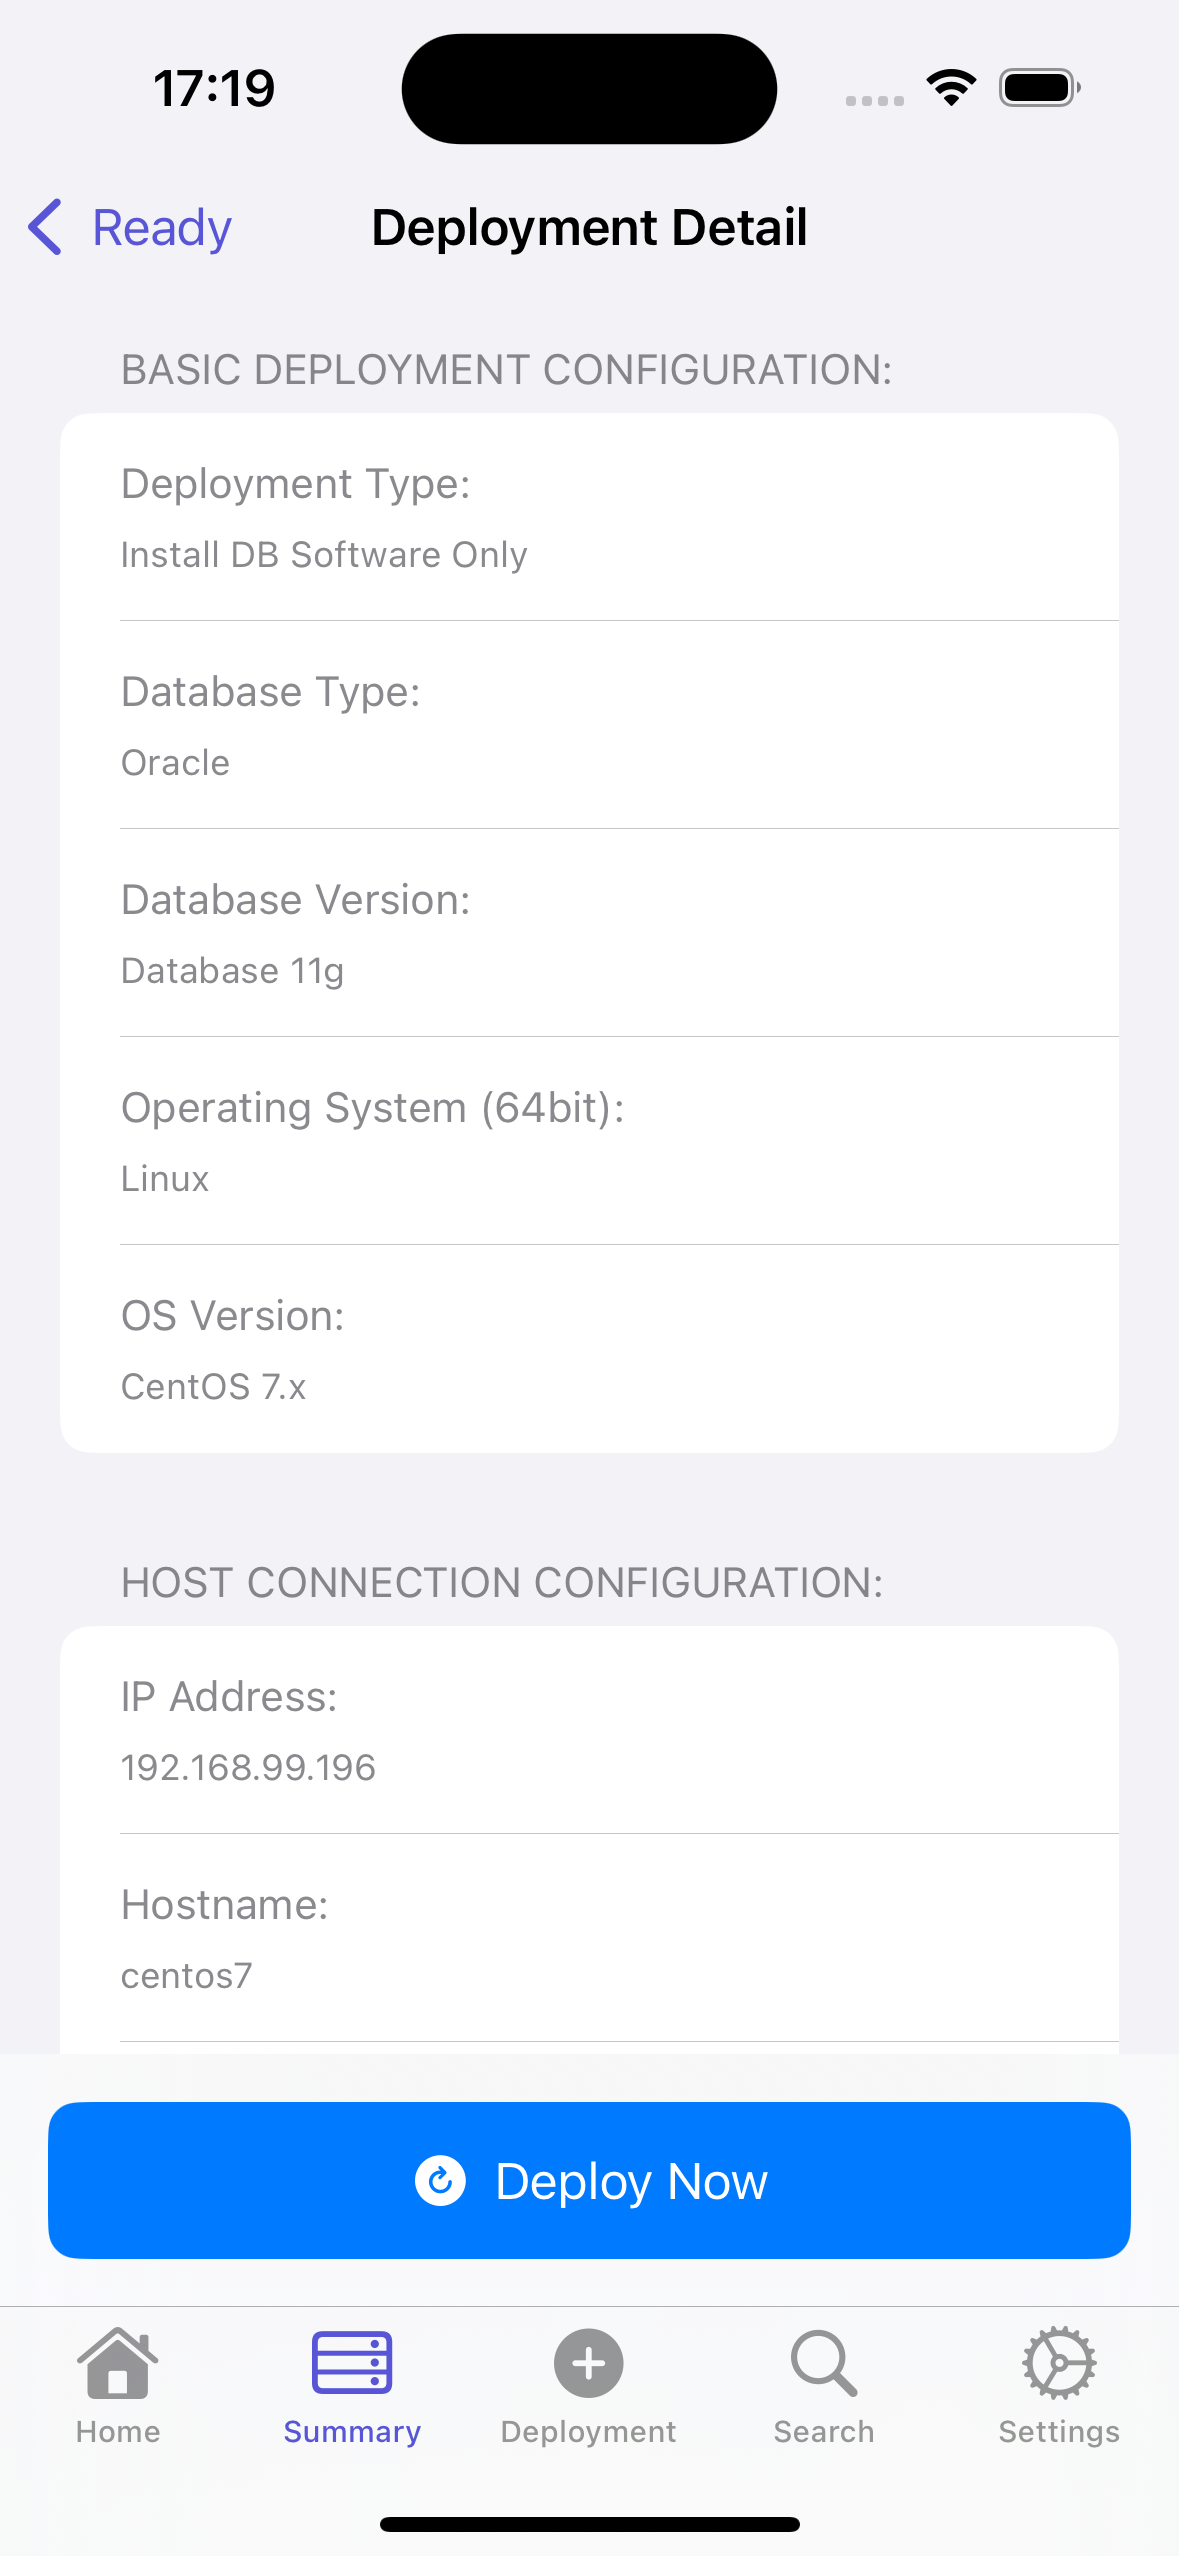
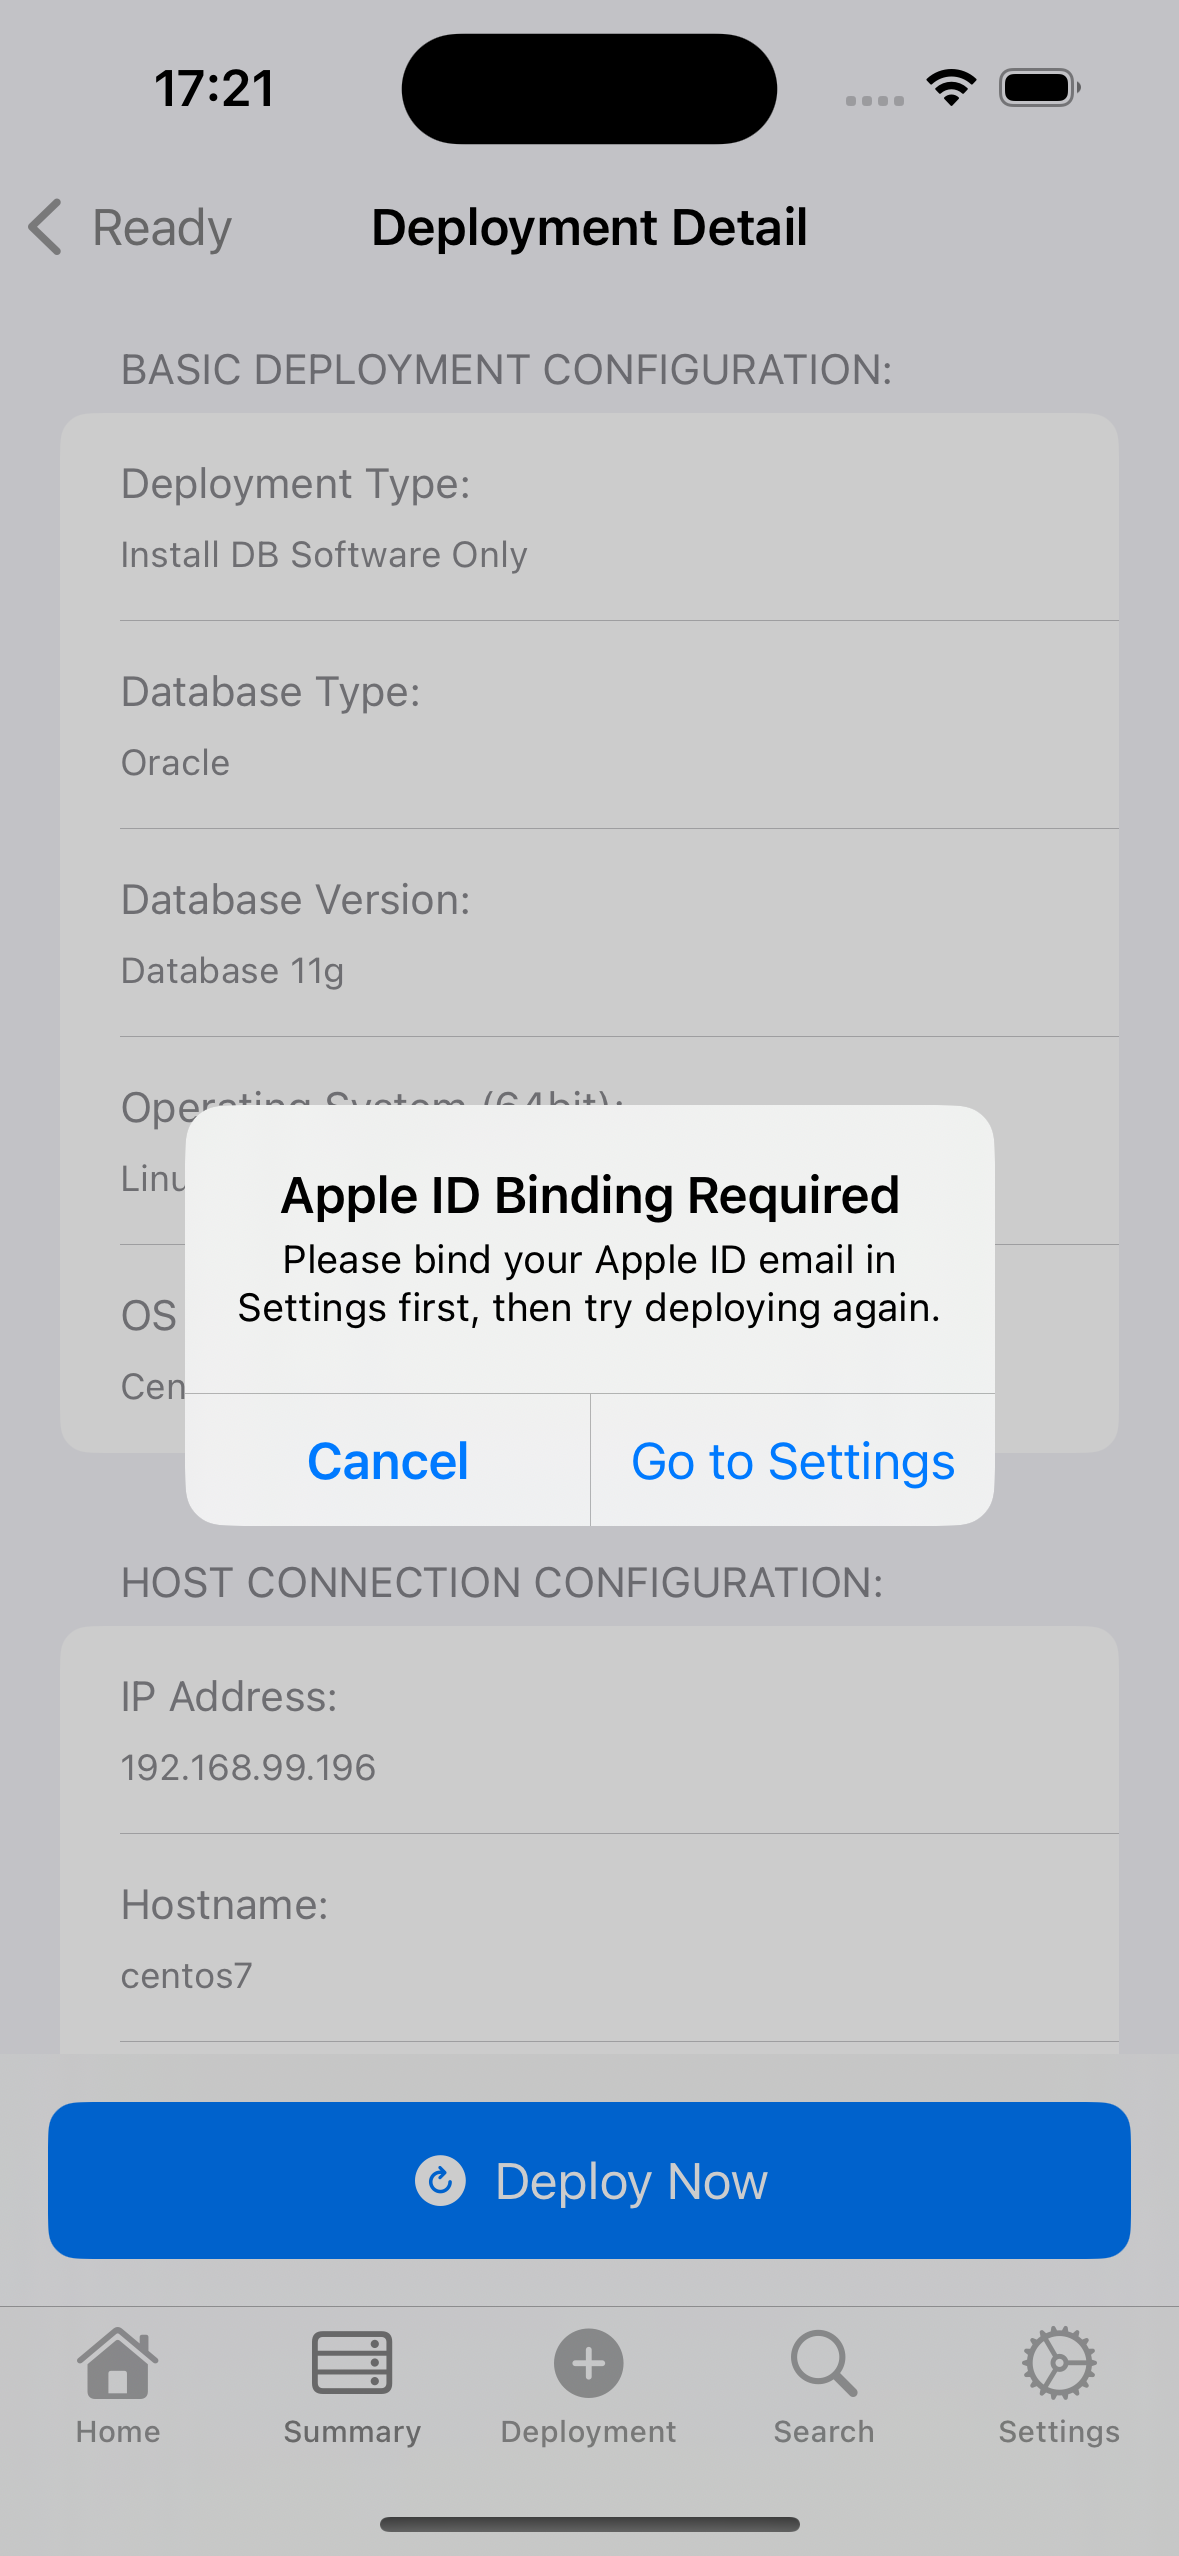
- Click deploy. If no Apple ID email login is currently available, please first log in with the subscribed Apple ID email:
III. Add New Deployment
This is the main operation interface for database deployment:
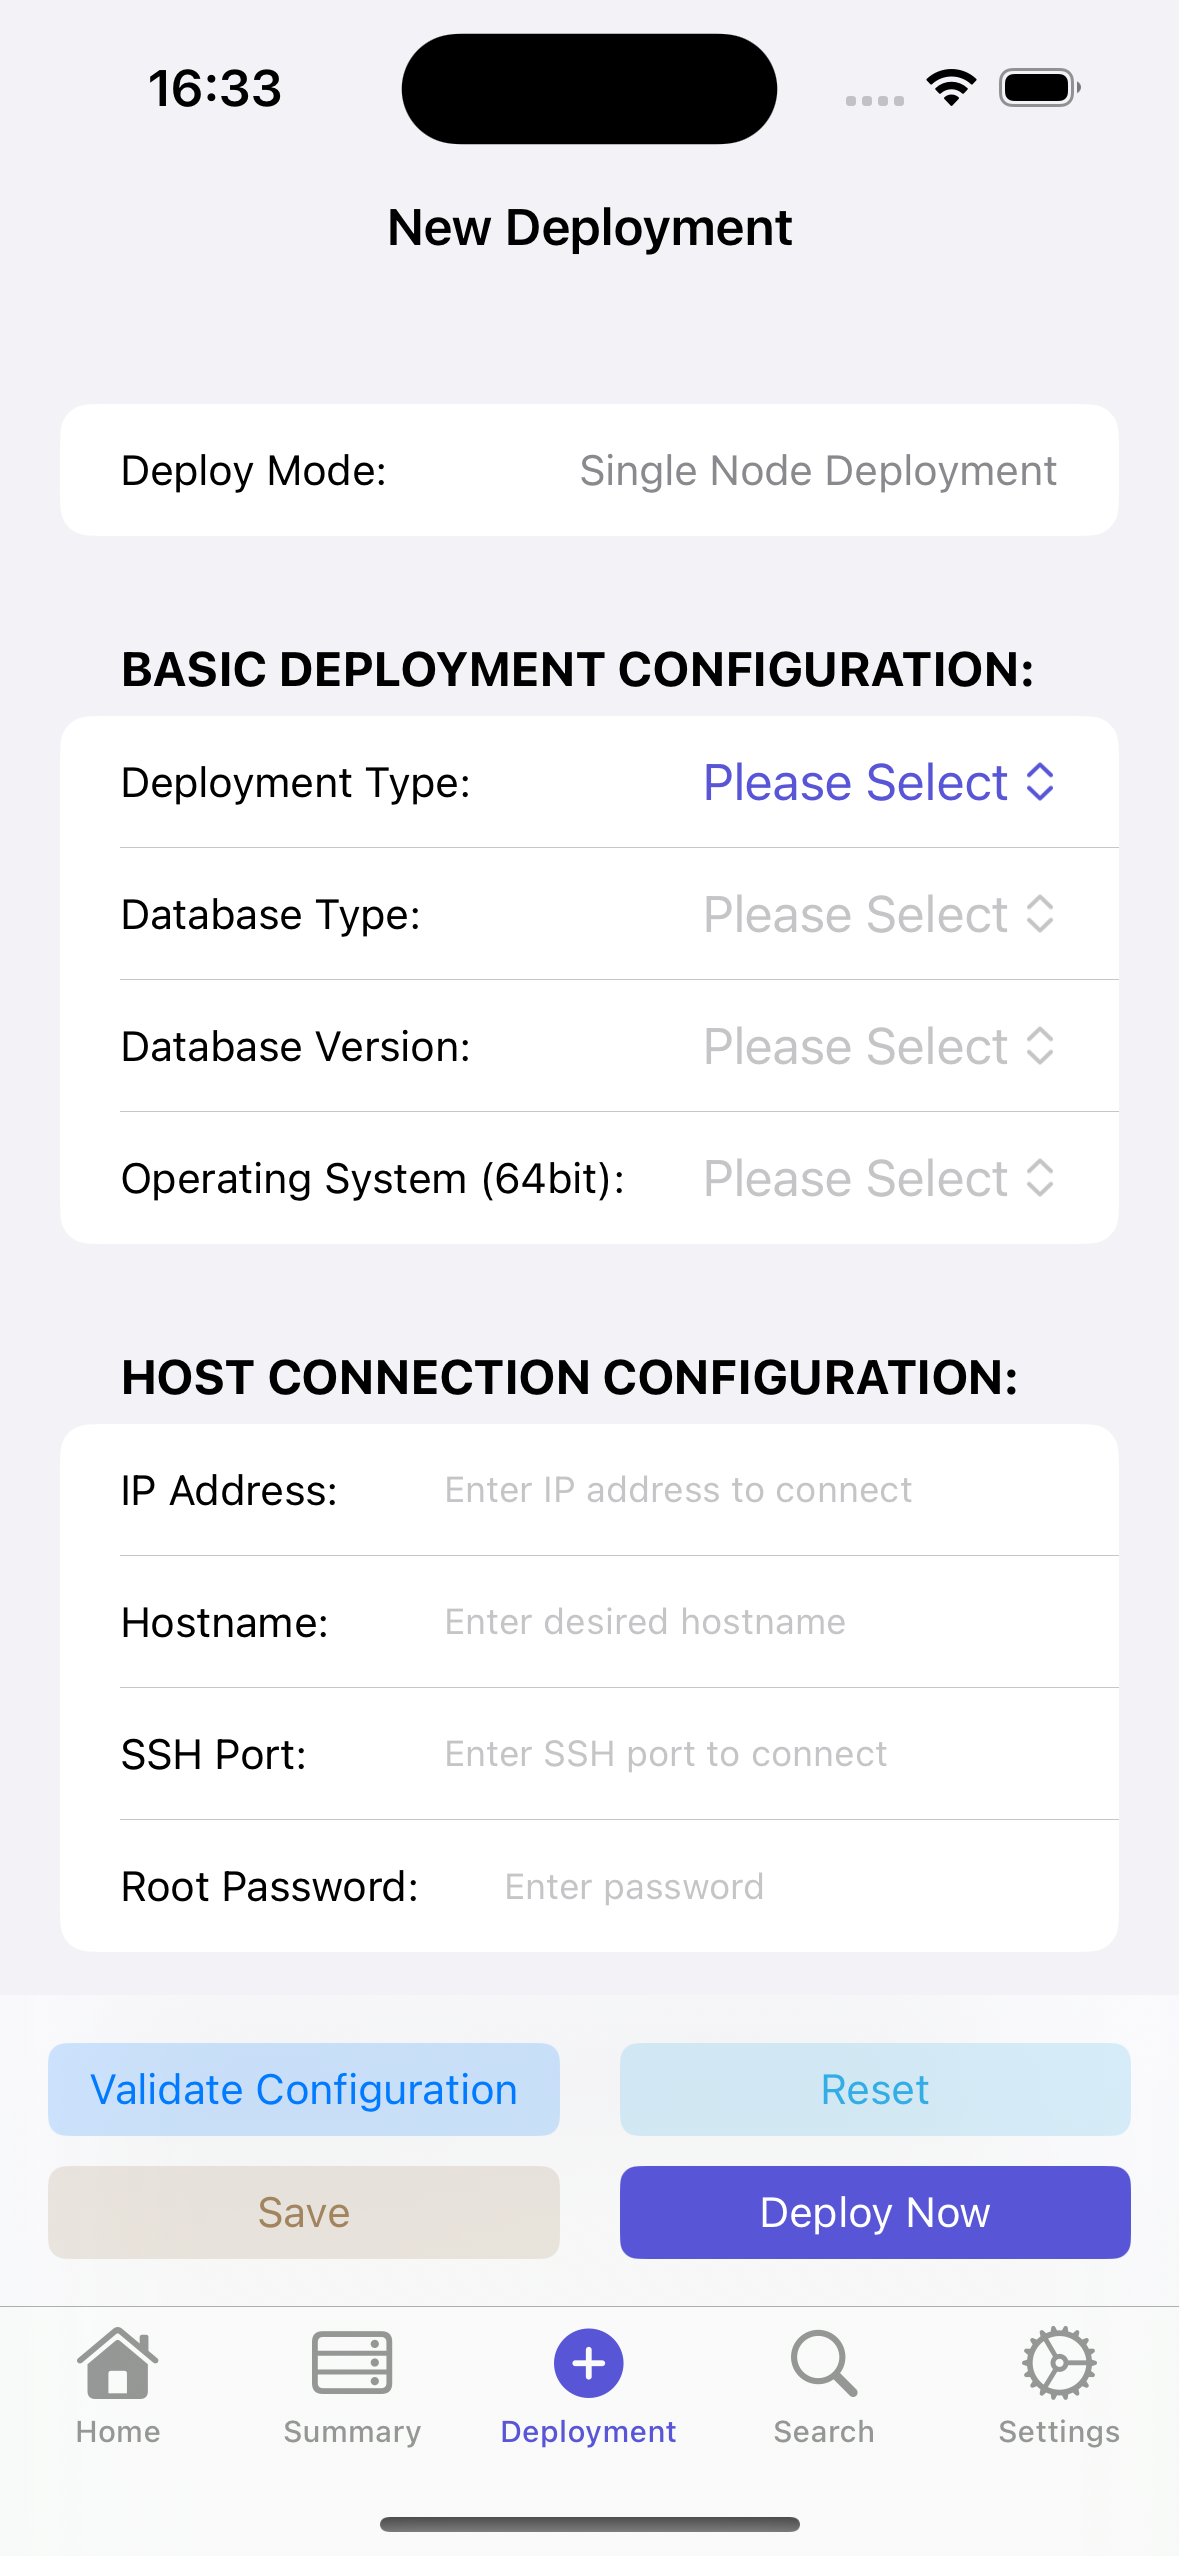
Below, we will explain this interface from top to bottom:
Deployment Mode:
- Single Machine Deployment
- Currently, since we need to adapt to a large number of database versions, the current version only supports deploying databases on a single machine.
Basic Deployment Configuration:
- Deployment Type
- Database Software Installation & Database Creation
- Deploy and install the database software, then create a default database instance.
- Default parameters are recommended parameter configurations.
- You can modify parameters according to your needs.
- Note: Incorrect parameter settings may cause database creation failure. Please ensure you have relevant database knowledge.
- Database Software Installation Only
- Only install the database software.
- Database Software Installation & Database Creation
- Database Type
- Can only be configured after completing the previous step.
- Lists databases available for deployment in the current version.
- Tip: The current version has completed adaptation testing for Oracle databases 11g - 21c.
- We will gradually adapt all mainstream databases in the future.
- Operating System
- Note: Only 64-bit operating systems are supported.
- Currently only supports mainstream Linux operating systems.
- Will adapt to more operating systems in the future, such as: Solaris, AIX, HP-UNIX, etc.
- For operating system versions like: x.x, such as: 7.x means all 7.x versions are supported.
If certain Linux operating system versions are not listed, there may be the following reasons:
- The operating system has not passed database vendor compatibility certification.
- The operating system has compatibility issues with the current database version.
- The operating system has underlying compatibility issues on iOS systems.
Host Connection Configuration:
- IP Address
- The IP where the database will be deployed.
- Hostname
- The hostname you want to set for this IP.
- SSH Port
- The SSH port to access this IP address.
- Note: Please ensure the firewall has opened this port.
- Root User Password
- Database deployment requires superuser privileges for configuration.
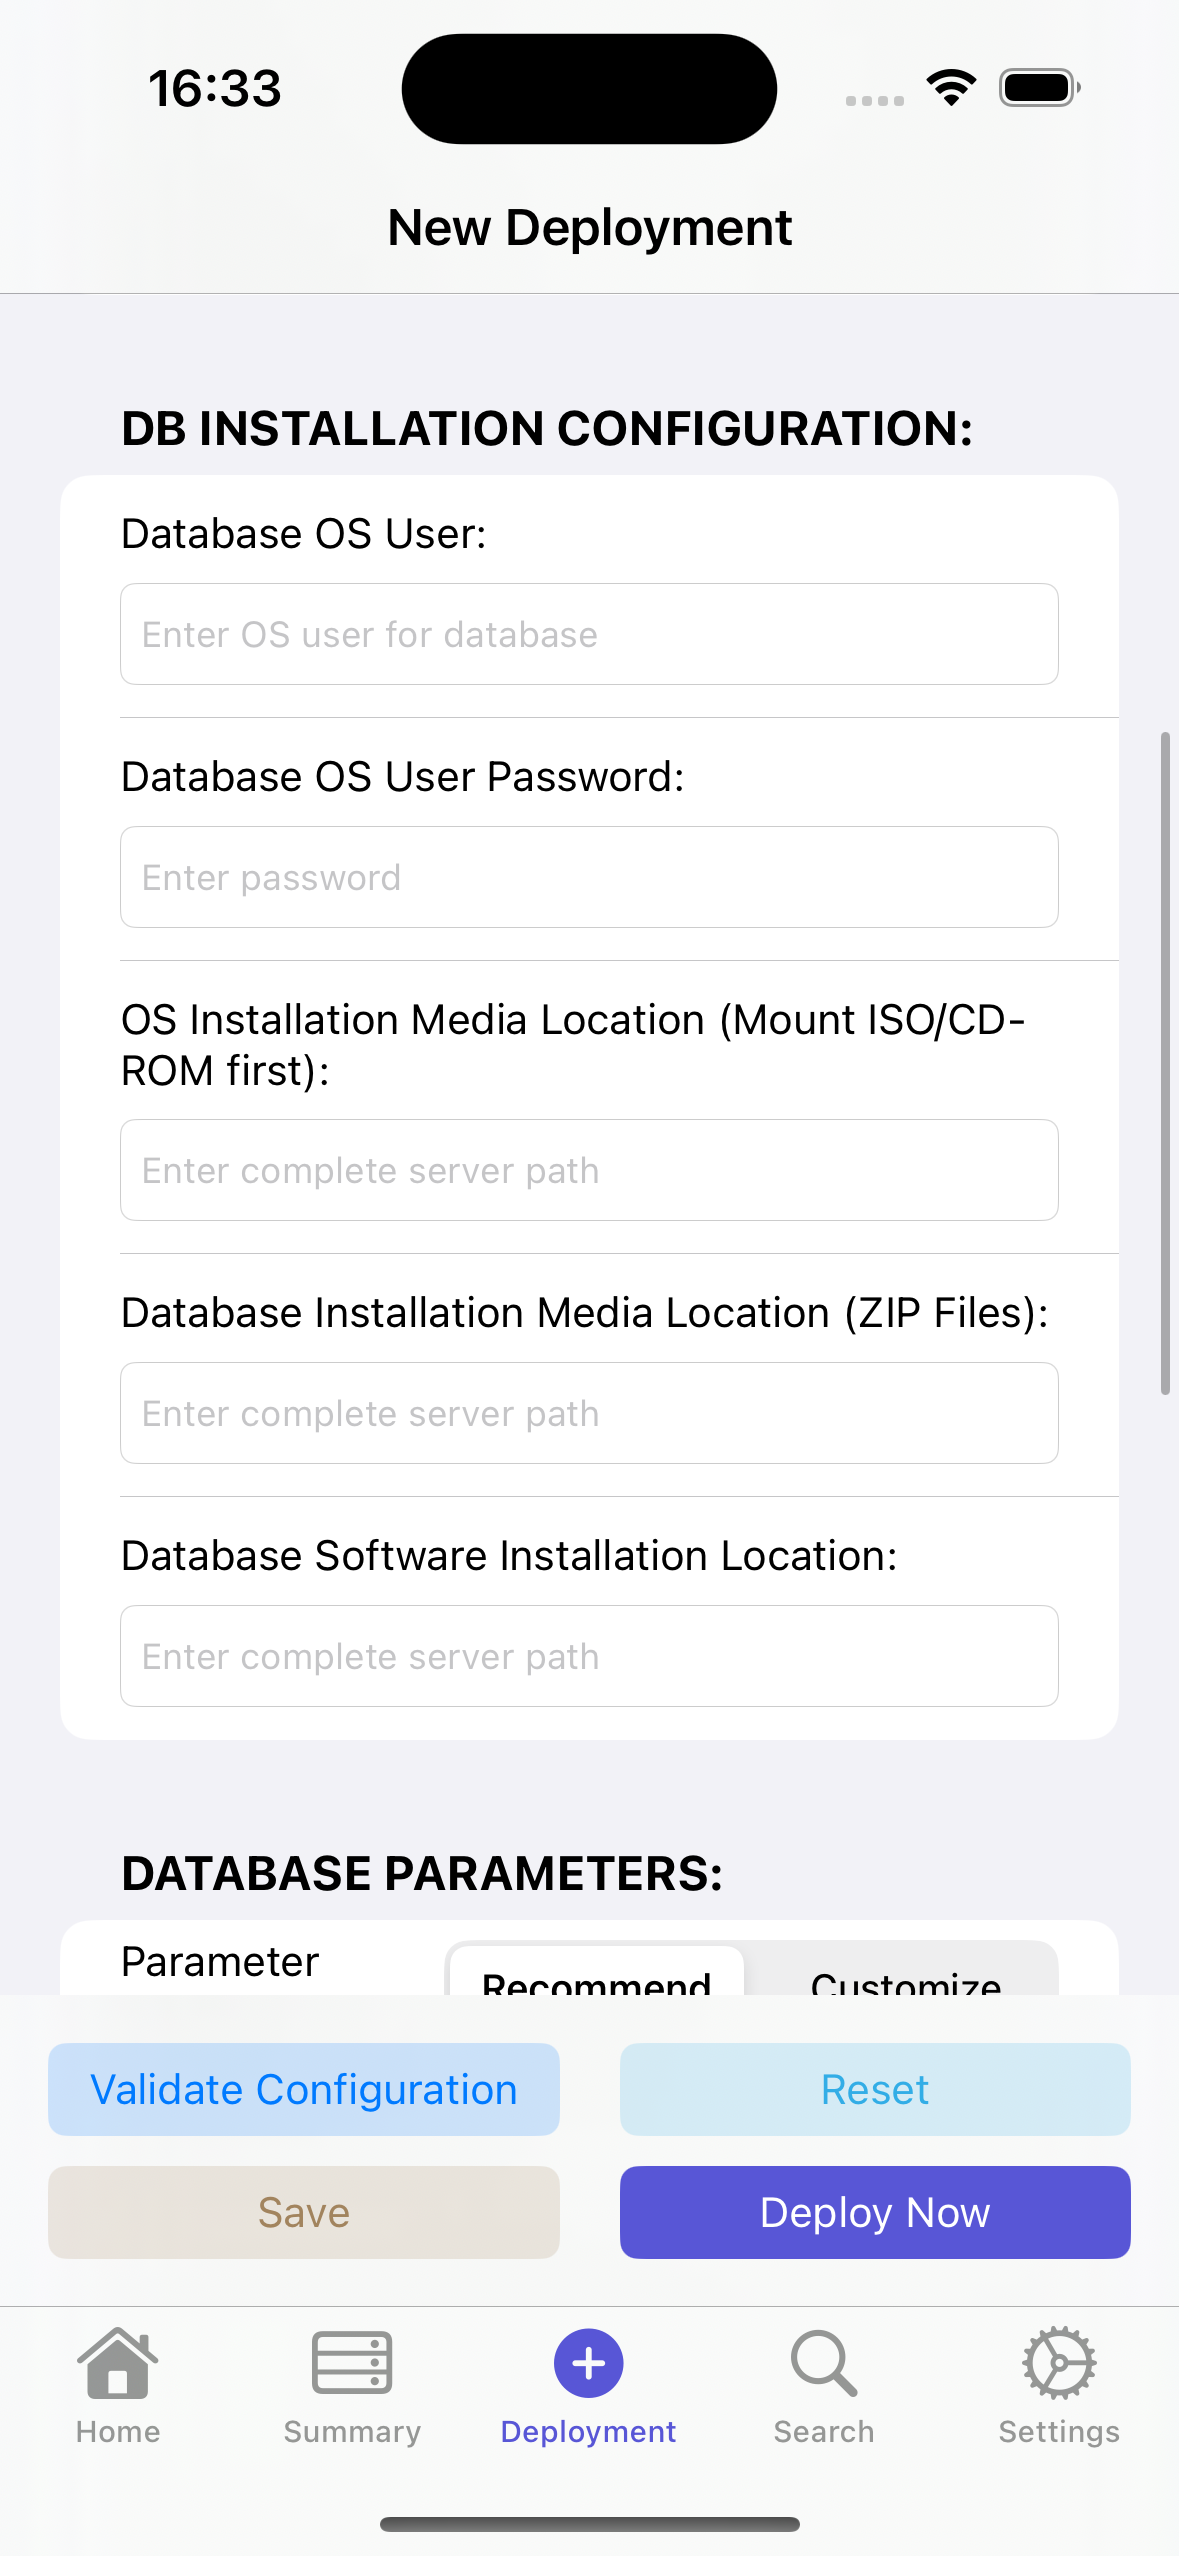
Database Installation Configuration
- Database Operating System User
- The user under which you want to install the database software.
- This user will be created during deployment. Please do not use an existing user, as it may contain related information that could cause deployment failure.
- Database Operating System User Password
- The password you want to set for the new user (corresponding to the above "Database Operating System User").
- Operating System Installation Media Location
- Please first mount the operating system installation media to a system path, such as: /media
- Reference commands (run as root user):
- Mount from CD-ROM:
- mount /dev/cdrom /media
- Mount from ISO image:
- mount -o loop /path/to/your.iso /media
- Mount from CD-ROM:
- Tip: When clicking "Validate Configuration", it will check if the media exists.
- Reference commands (run as root user):
- Please first mount the operating system installation media to a system path, such as: /media
- Database Installation Media Location
- The path where the database installation media is located.
- Must be in zip format. Please do not place unrelated zip files in this directory.
Example: Below are installation media situations for Oracle 11g, 12c, 18c, 19c, 21c respectively:
# oracle 11g
/db_media/ora11g
[root@centos7 ora11g]# ls -ltrh
total 2.4G
-rw-r--r-- 1 root root 1.1G Apr  9 21:18 p13390677_112040_Linux-x86-64_2of7.zip
-rw-r--r-- 1 root root 1.3G Apr  9 21:18 p13390677_112040_Linux-x86-64_1of7.zip

# oracle 12c
/db_media/ora12c
[root@centos7 ora12c]# ls -ltrh
total 3.3G
-rwx------ 1 root root 3.3G Apr 24 09:52 12.2_V839960-01-db.zip
drwxr-xr-x 3 root root   22 May 20 14:20 database

# oracle 18c
/db_media/ora18c
[root@centos7 ora18c]# ls -ltrh
total 4.3G
-rwx------ 1 root root 4.3G Apr 28 13:46 V978967-01_db.zip

# oracle 19c
/db_media/ora19c
[root@centos7 ora19c]# ls -ltrh
total 2.9G
-rwx------  1 root root 2.9G Apr 24 14:43 19c_V982063-01-db.zip

# oracle 21c
/db_media/ora21c
[root@centos7 ora21c]# ls -ltrh
total 2.9G
-rwx------  1 root root 2.9G Apr 24 14:44 V1011496-01_linux_x64_db.zip
- Database Software Installation Location
- The path where the database software will be installed.
- Please create the directory in advance.
- Tip: When clicking "Verify Configuration", it will check if the directory exists.
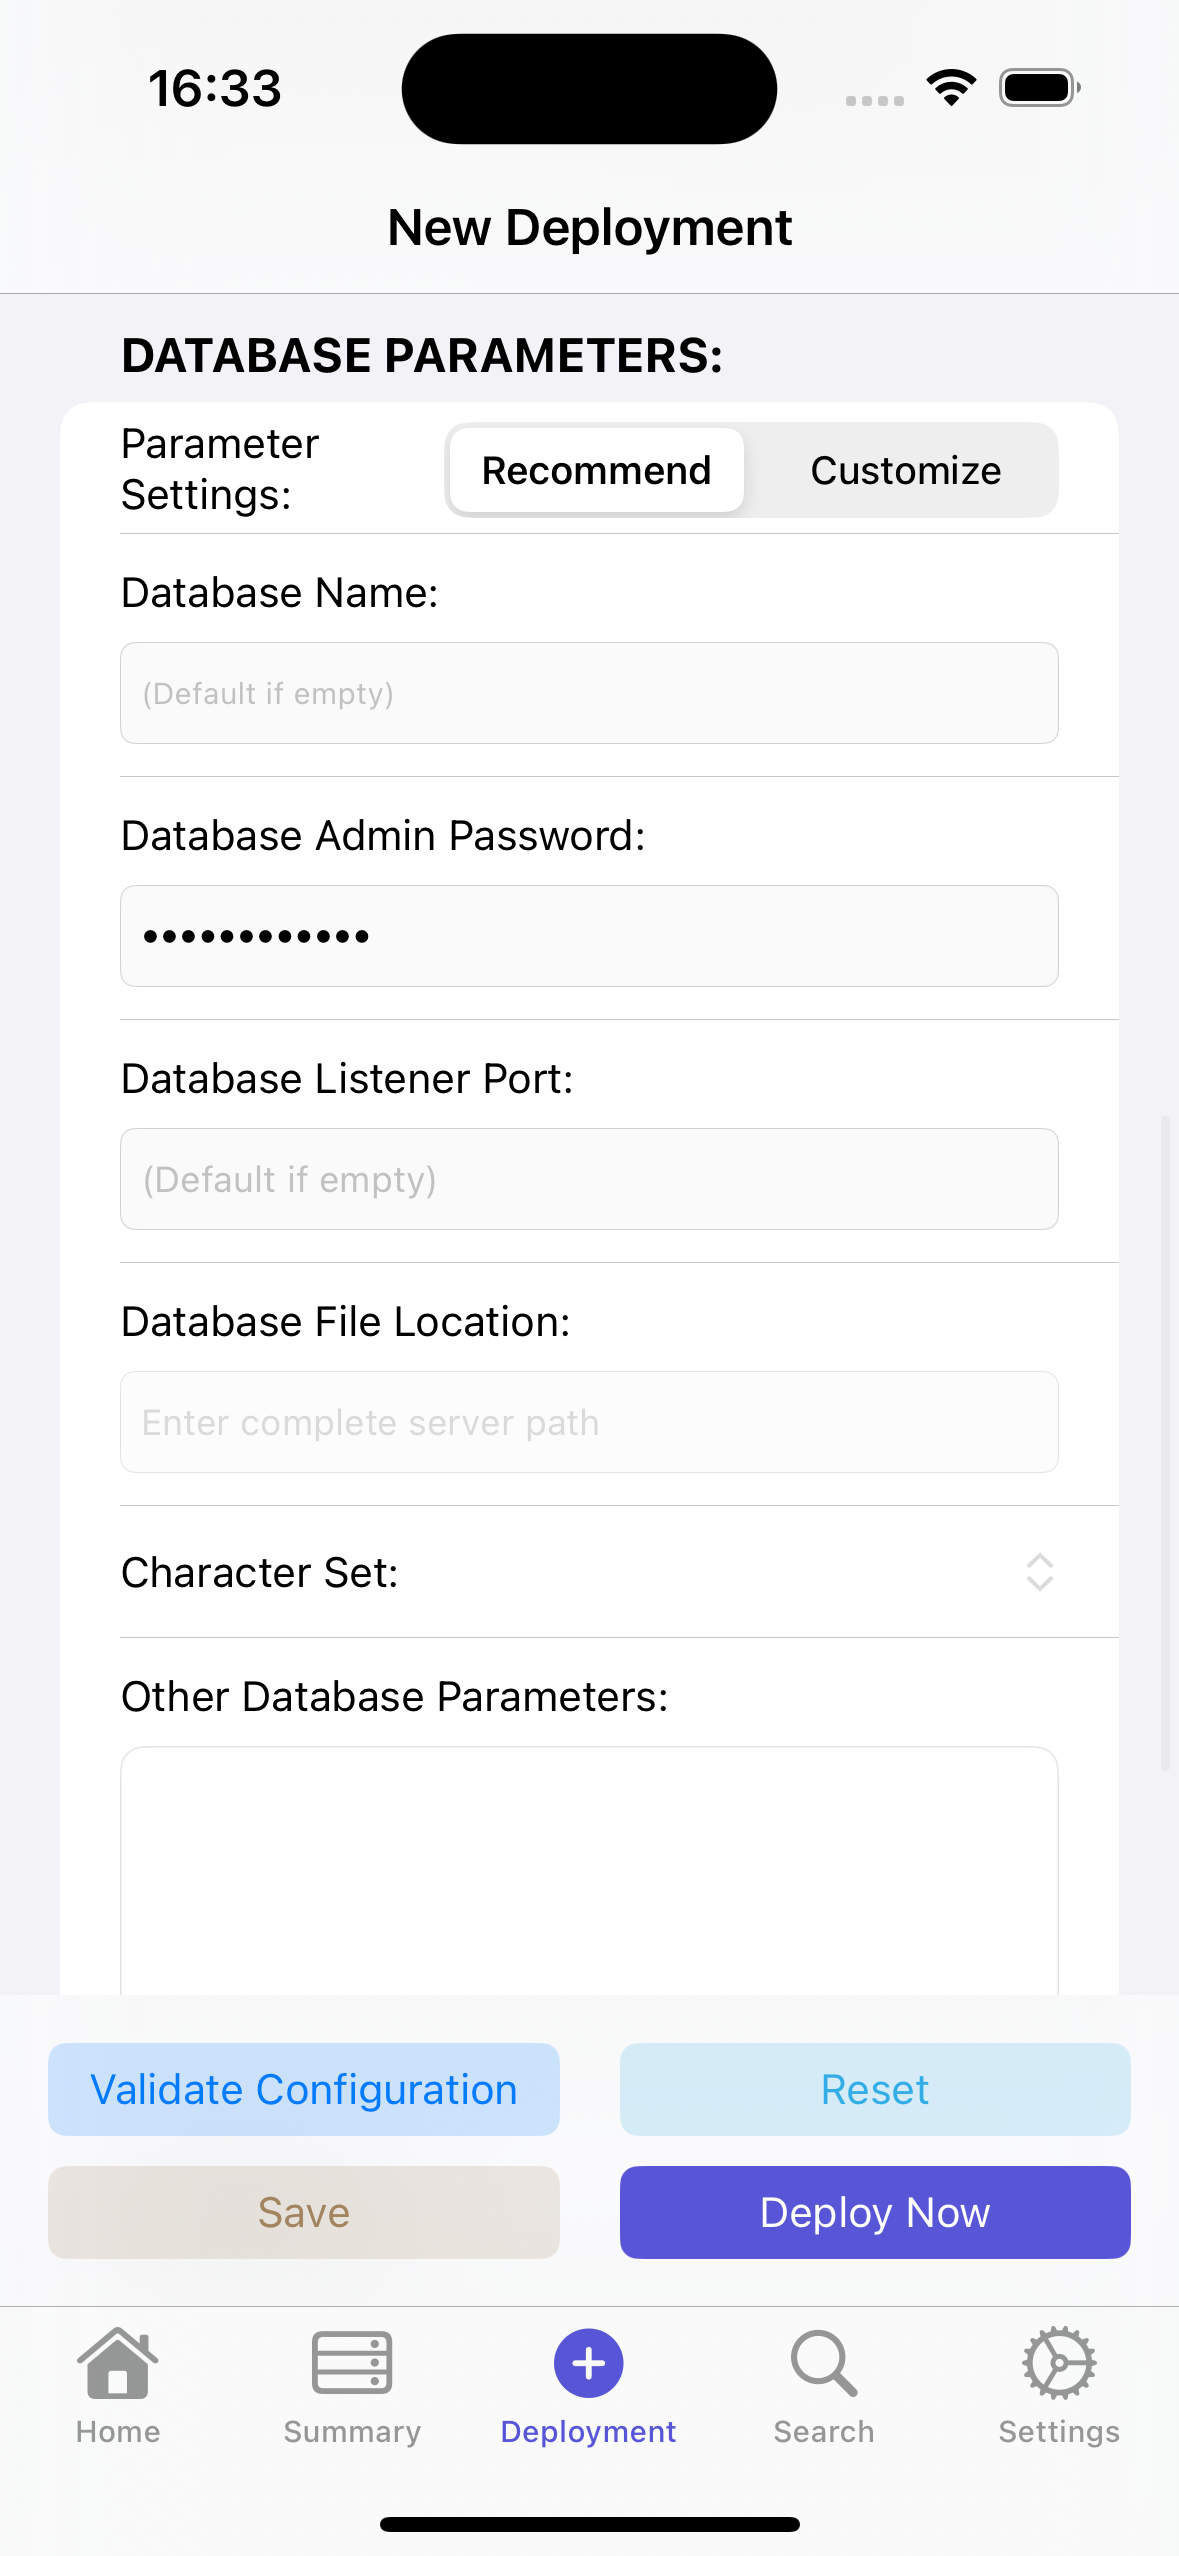
Database Parameter Settings
- Parameter Settings
- Recommended Settings
- Recommended for beginners to choose this option.
- Custom Settings
- For professionals.
- Database Name
- Available only when Custom Settings is selected.
- The database name when creating the database.
- Oracle database is limited to 8 characters.
- Database Administrator Password
- Available only when Custom Settings is selected.
- Sets the password for the database user with the highest privileges.
- Oracle database: sys
- MySQL database: root
- Database Listener Port
- Available only when Custom Settings is selected.
- The port where the database provides TCP/IP services.
- Character Set Settings
- Available only when Custom Settings is selected.
- Global character set settings for the database.
- Note: This setting cannot be changed after database creation.
- Please set carefully.
- Other Database Parameters
- Available only when Custom Settings is selected.
- Format as follows (set one parameter per line):
- parameter1=value1
- parameter2=value2
- Note: Incorrect parameter settings will cause database creation failure.
- Recommended Settings
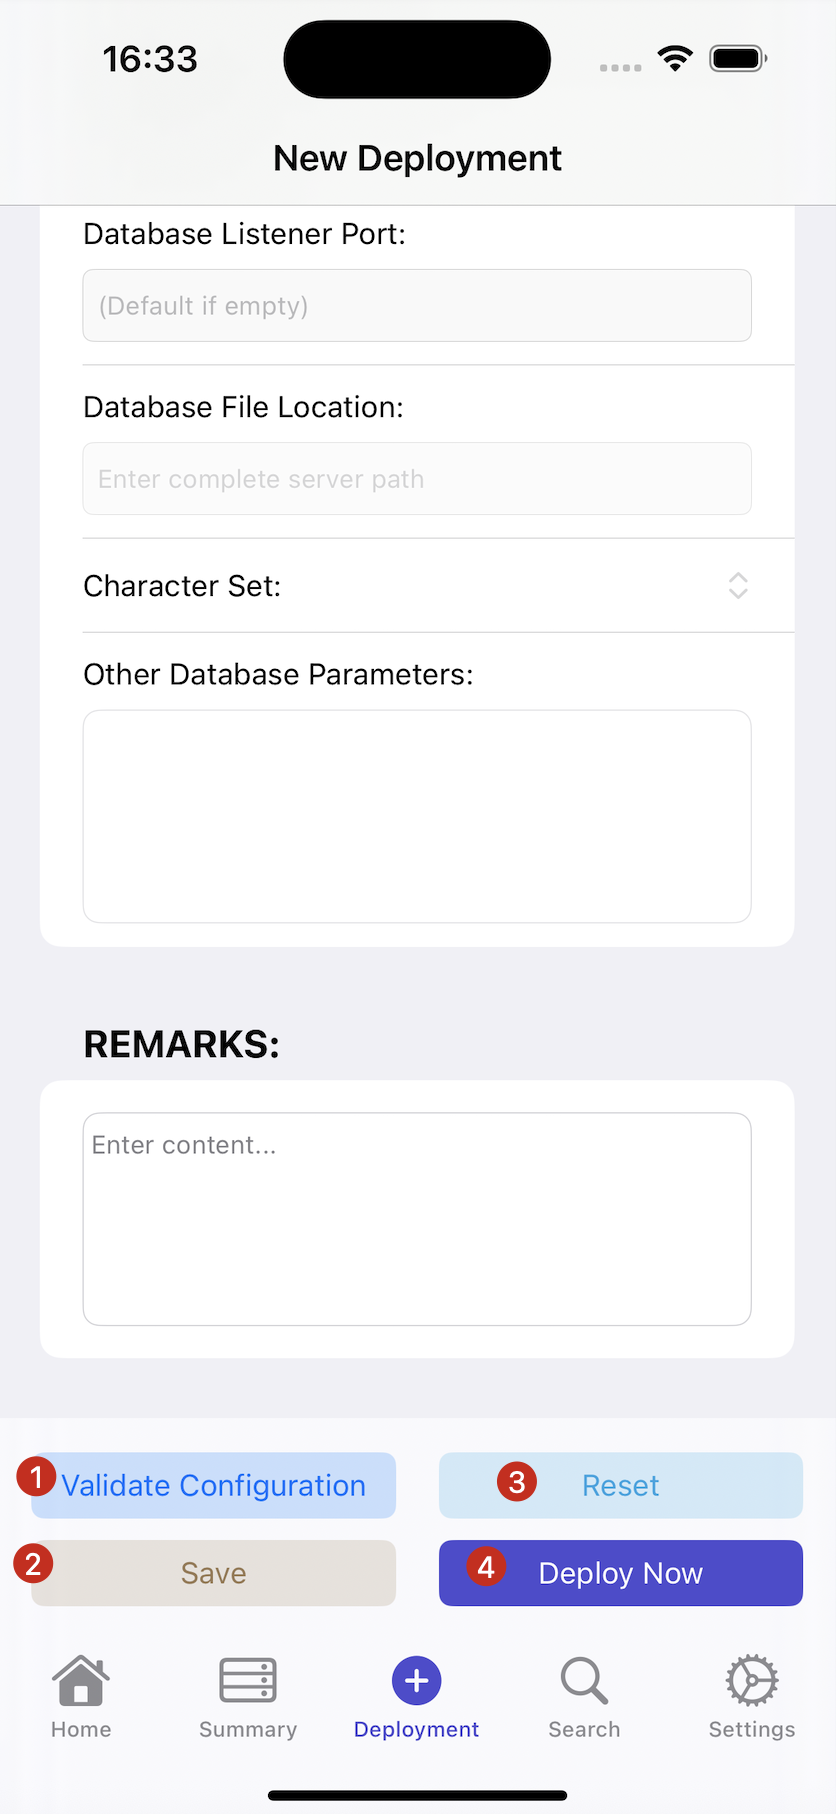
Validate Configuration
- After filling in all items, we first need to verify the current deployment information. Click "Verify Configuration" and the verification page will pop up as shown below:
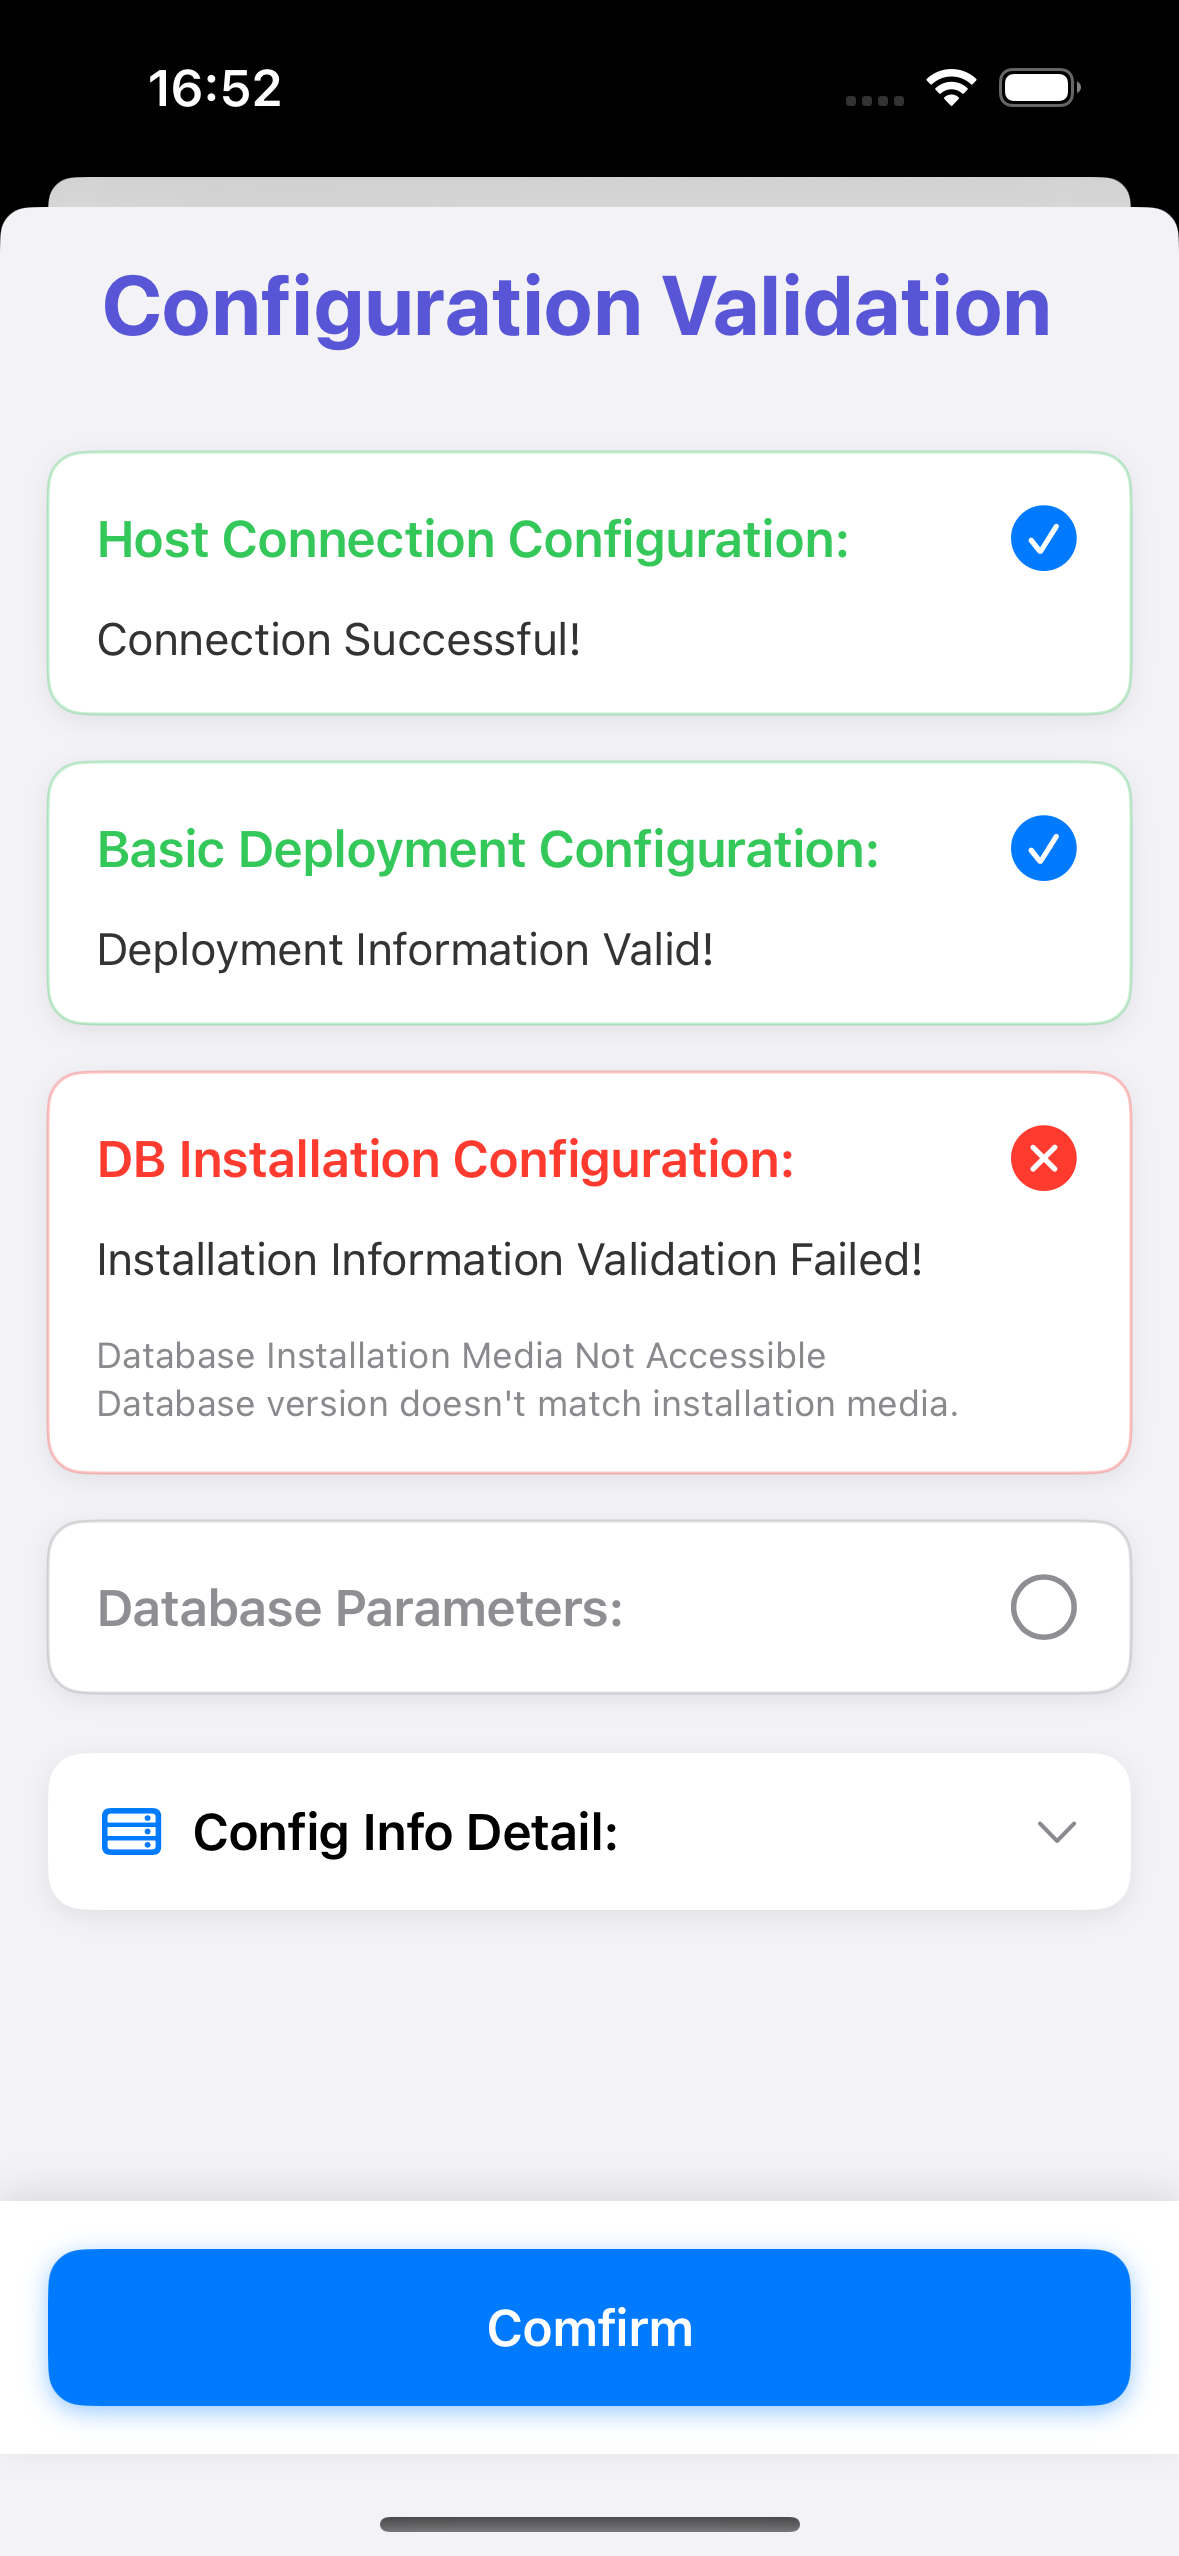
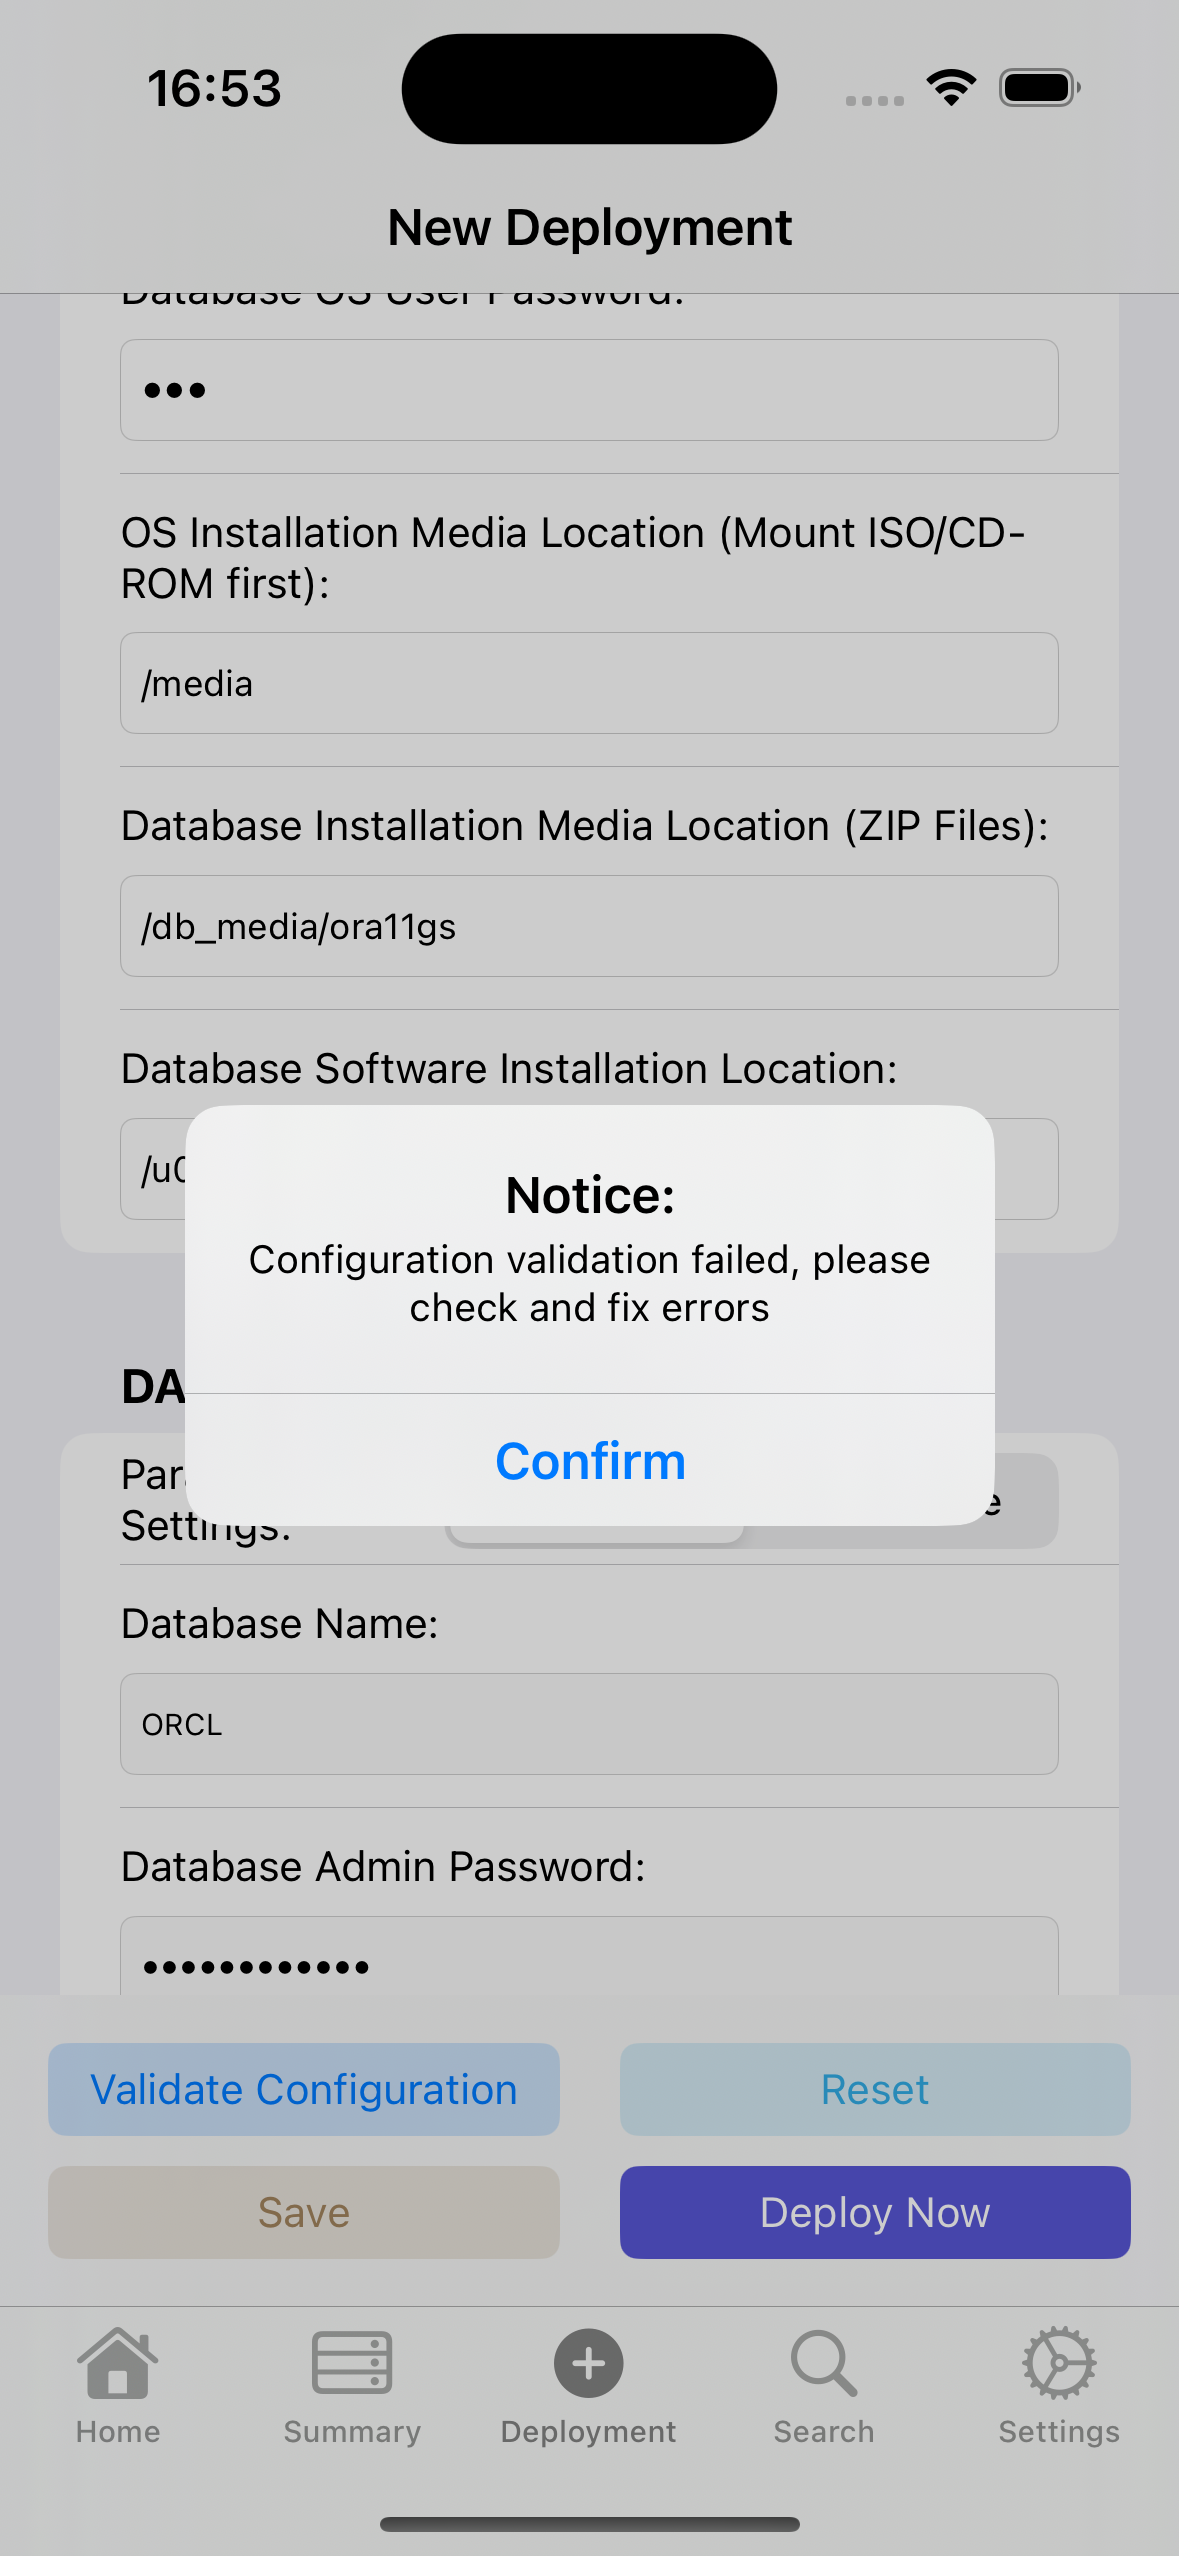
As shown above: If there are red warnings, correct the input items according to the error information.
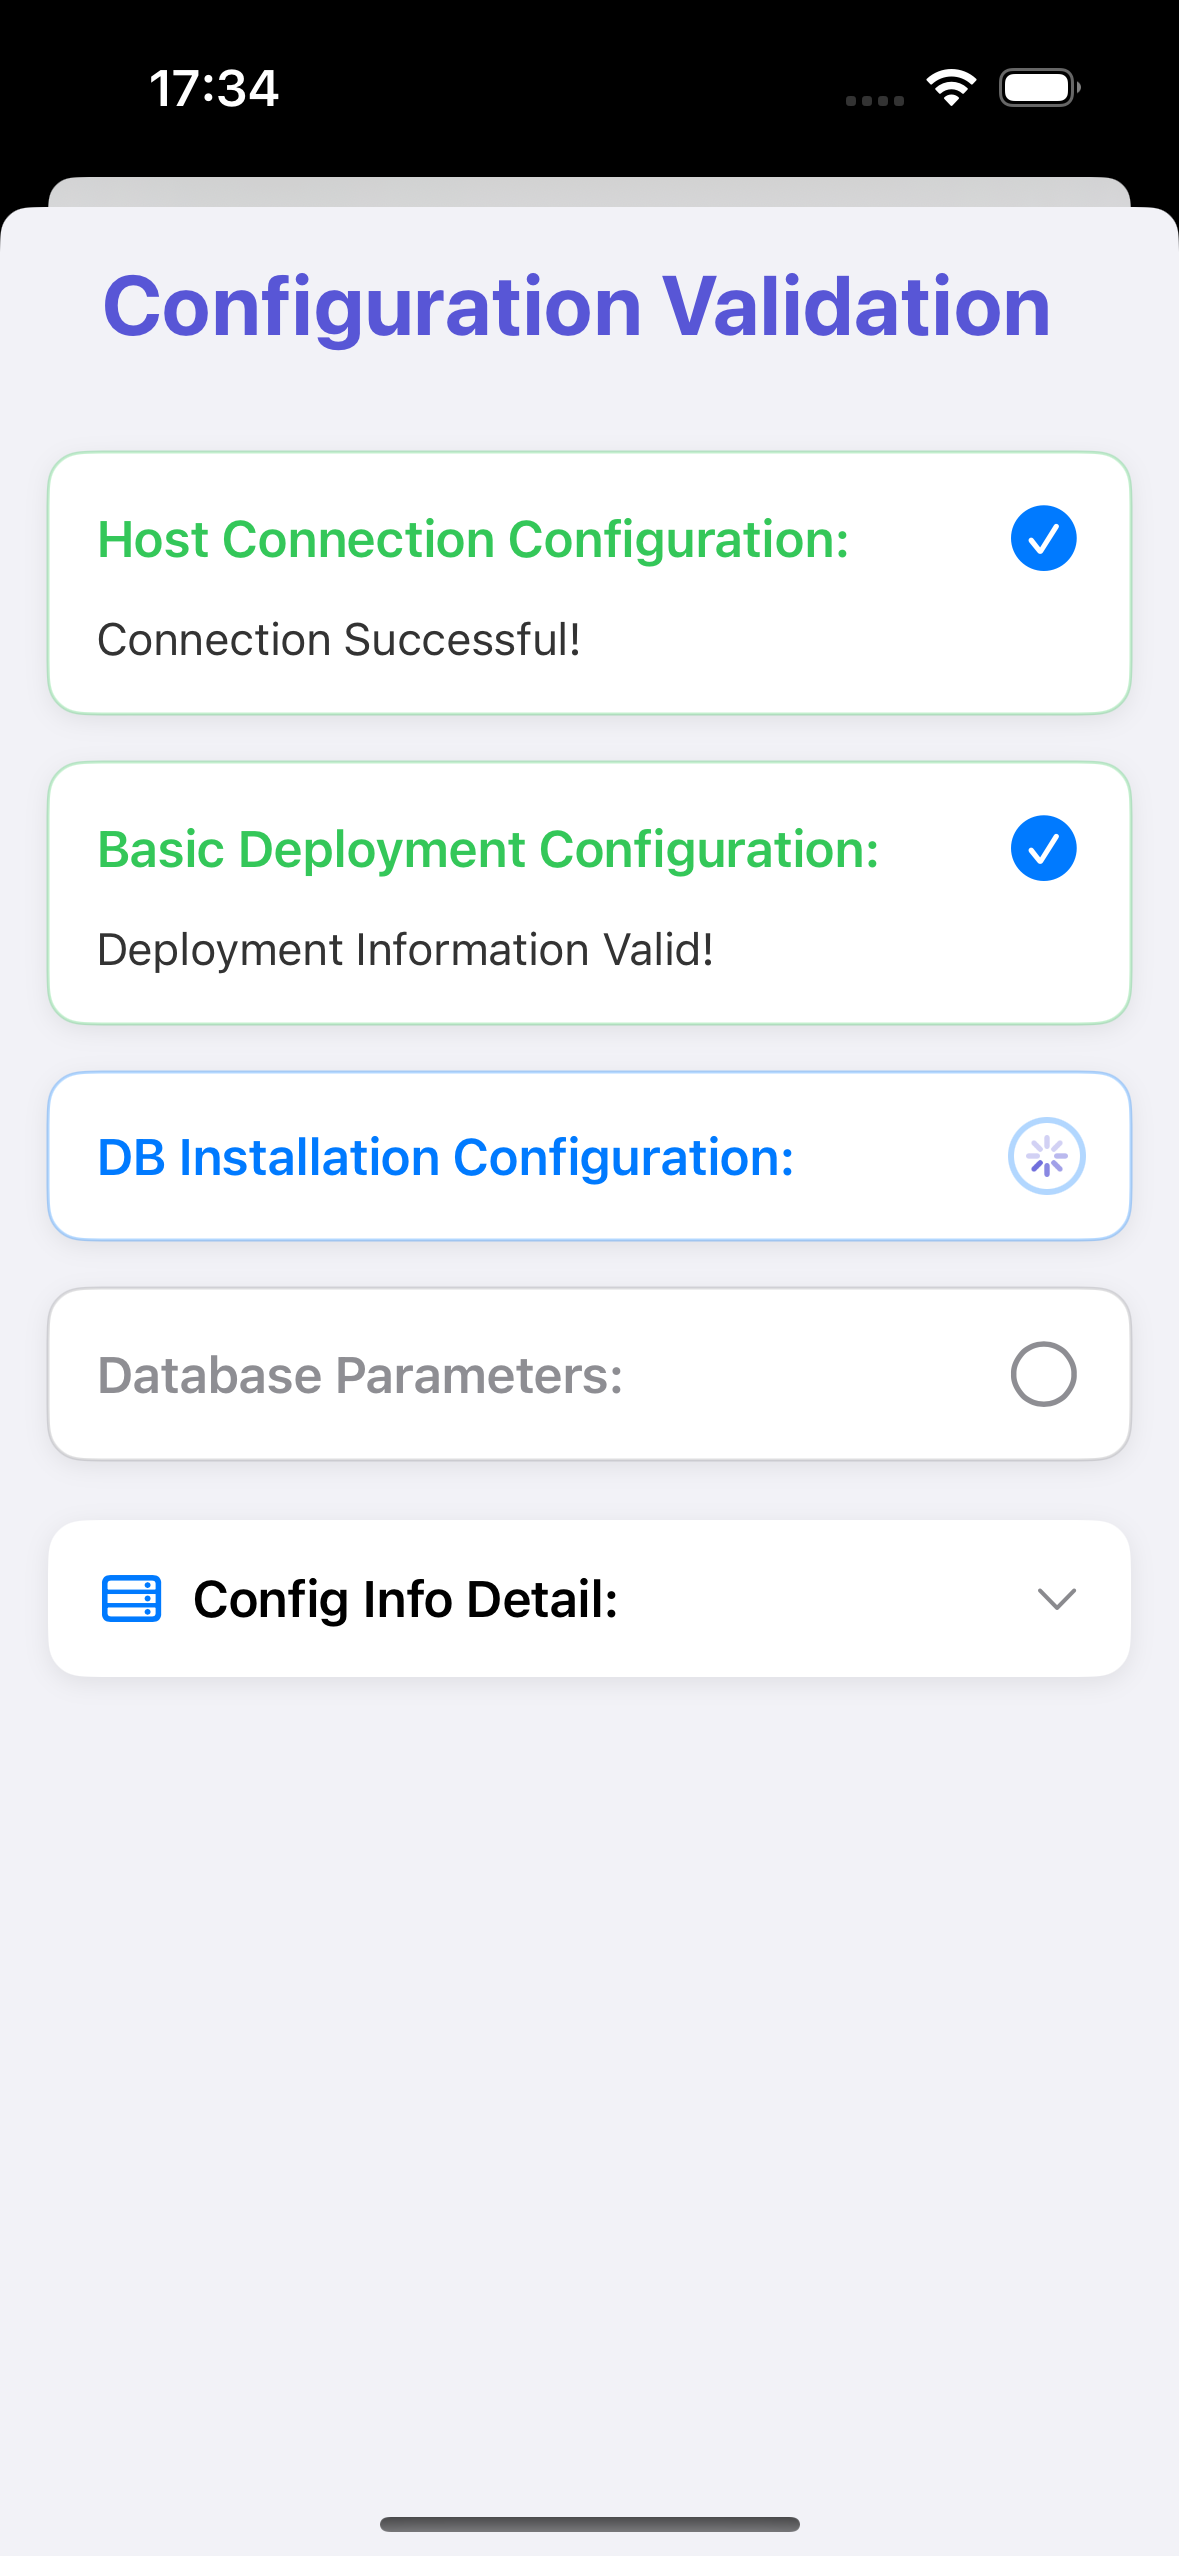
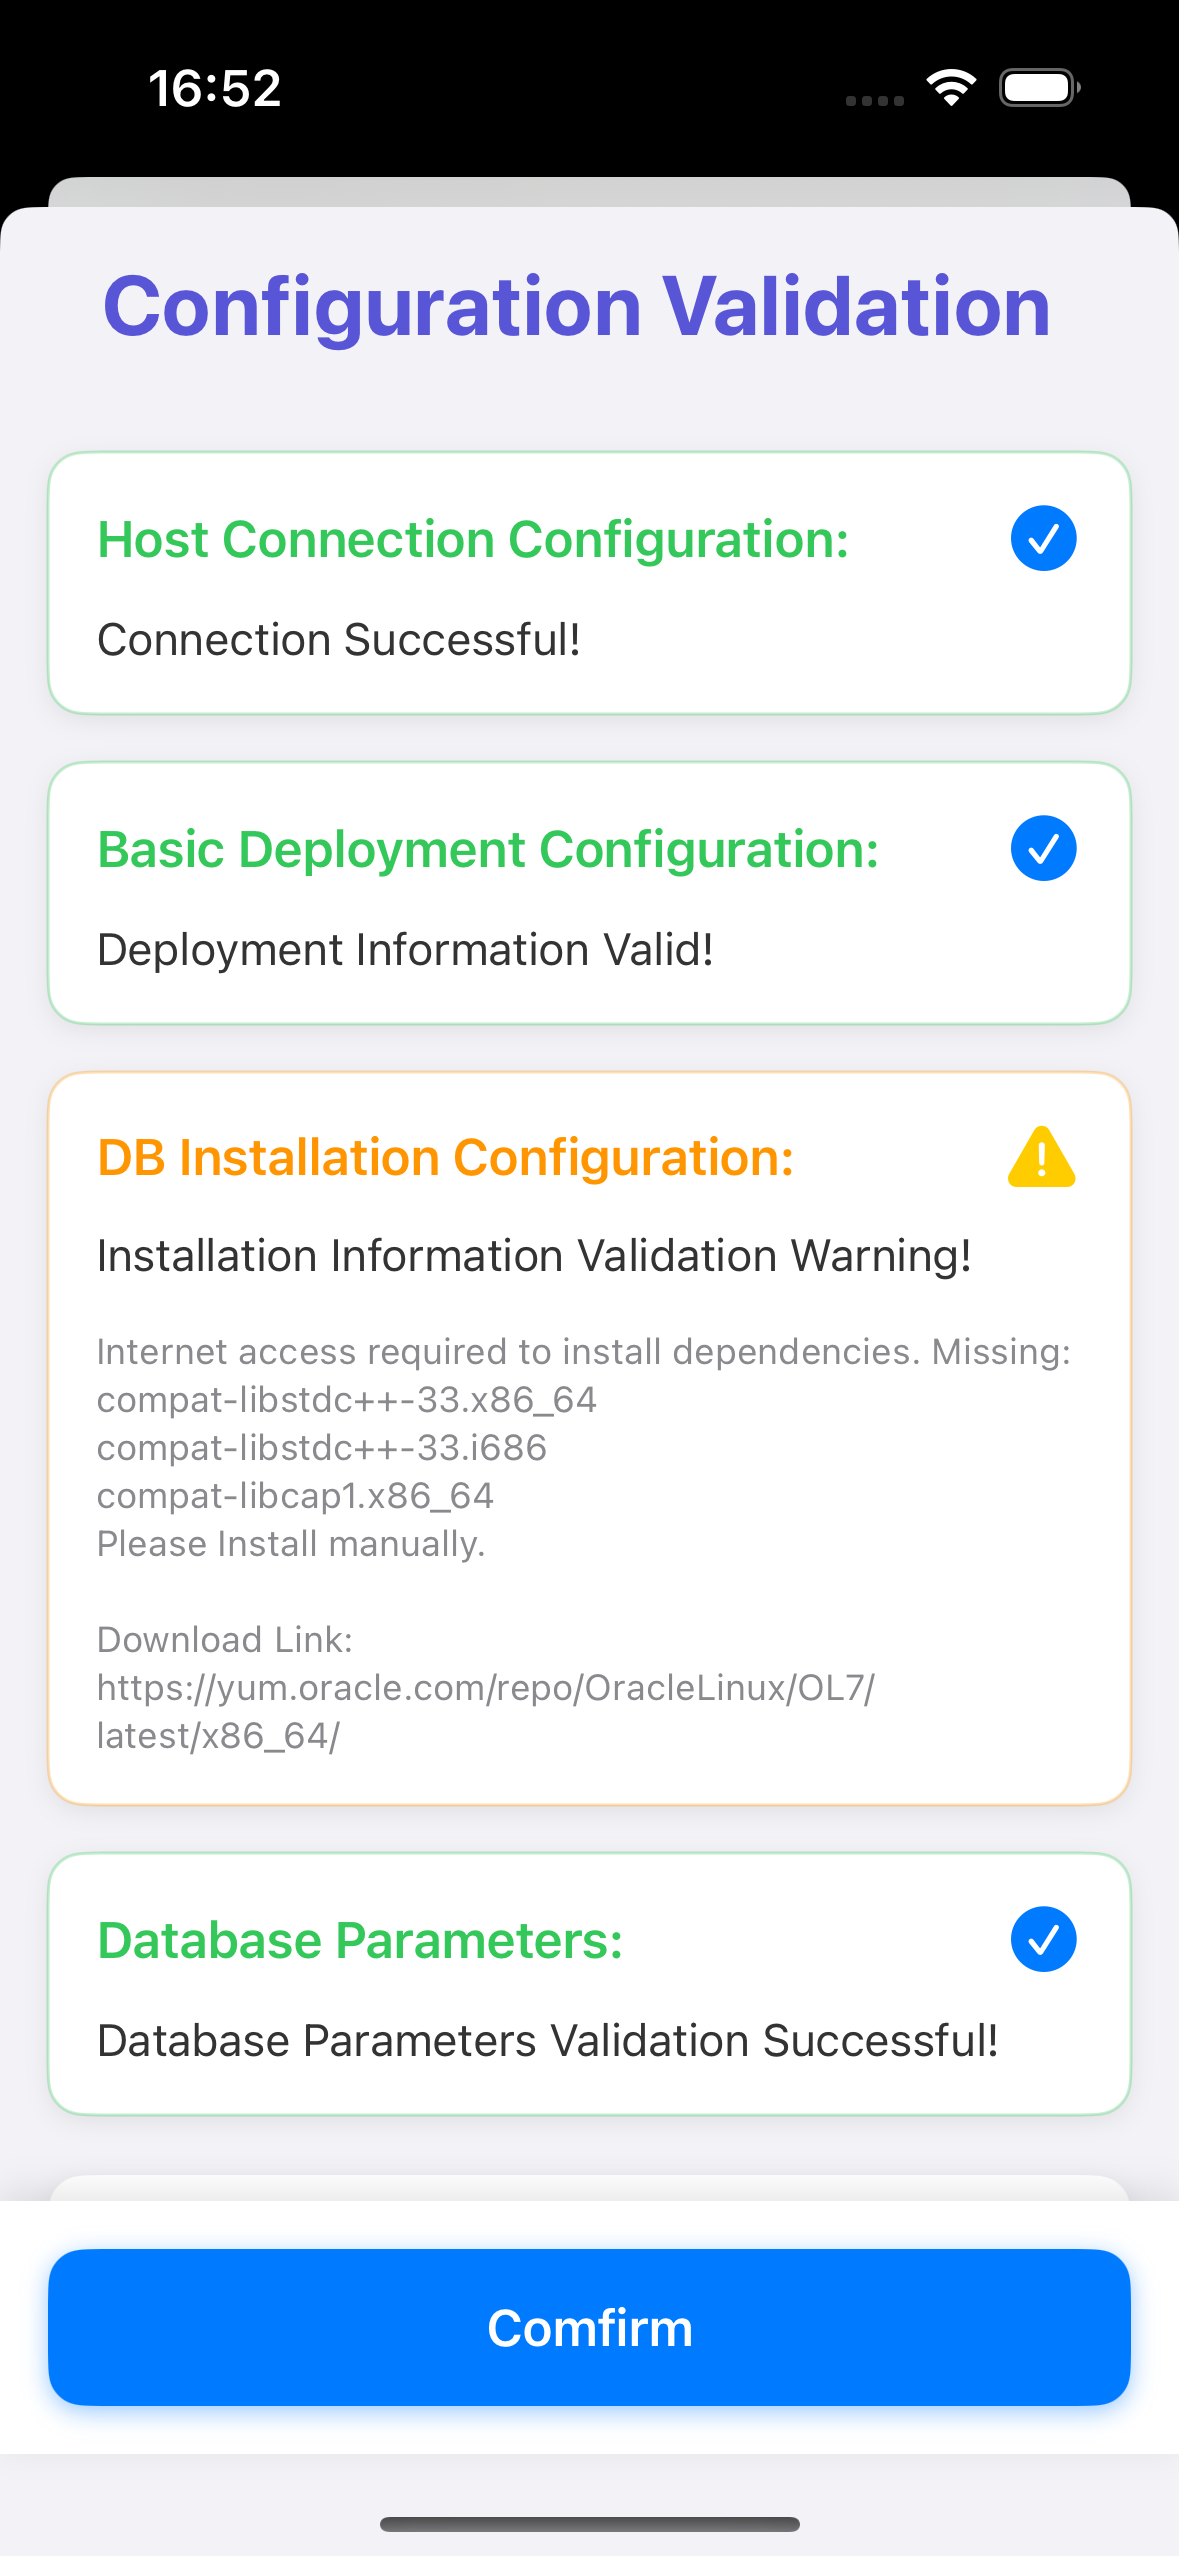
As shown above: If yellow exclamation marks appear, they can be ignored, but you need to handle them according to the warning information after deployment completion.
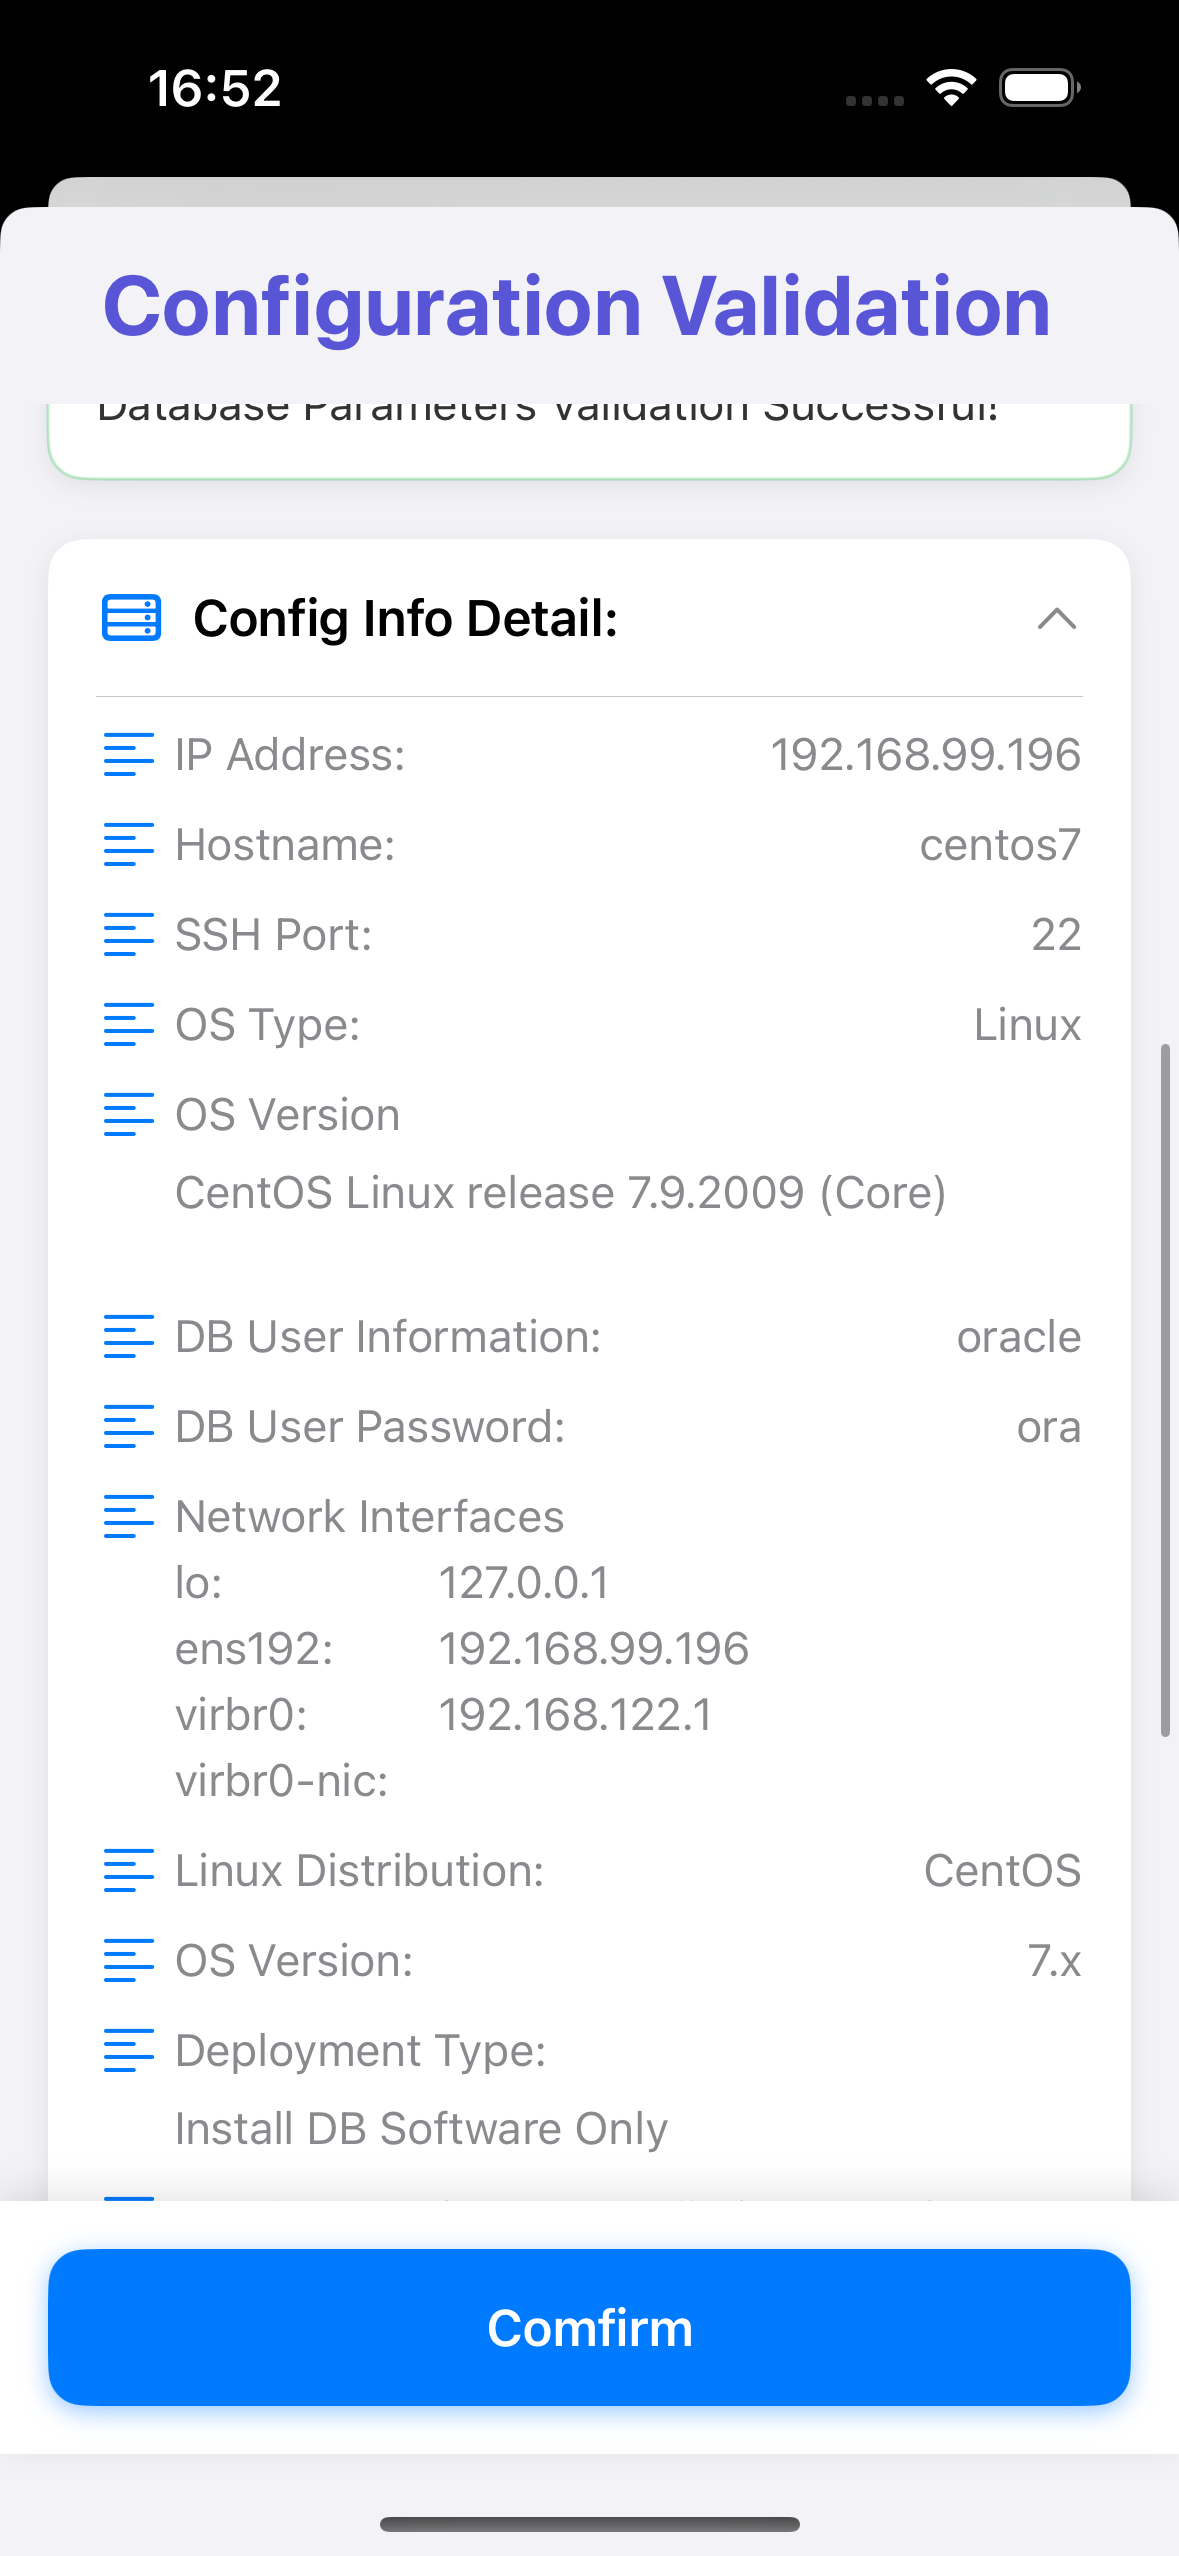

As shown above: After successful verification, we can click Config Info Detail to view system-related information of the IP to be deployed. When configuration verification is successful, we can proceed to the next step.
At this point, we can perform operations 2, 3, 4 according to the situation, as shown in the figure below:
Save
- If you don't want to deploy at this time, we can save this deployment information and perform database deployment later in the Pending Deployment section of the Deployment Summary interface.
Reset
- If you want to clear the current interface configuration information, select reset.
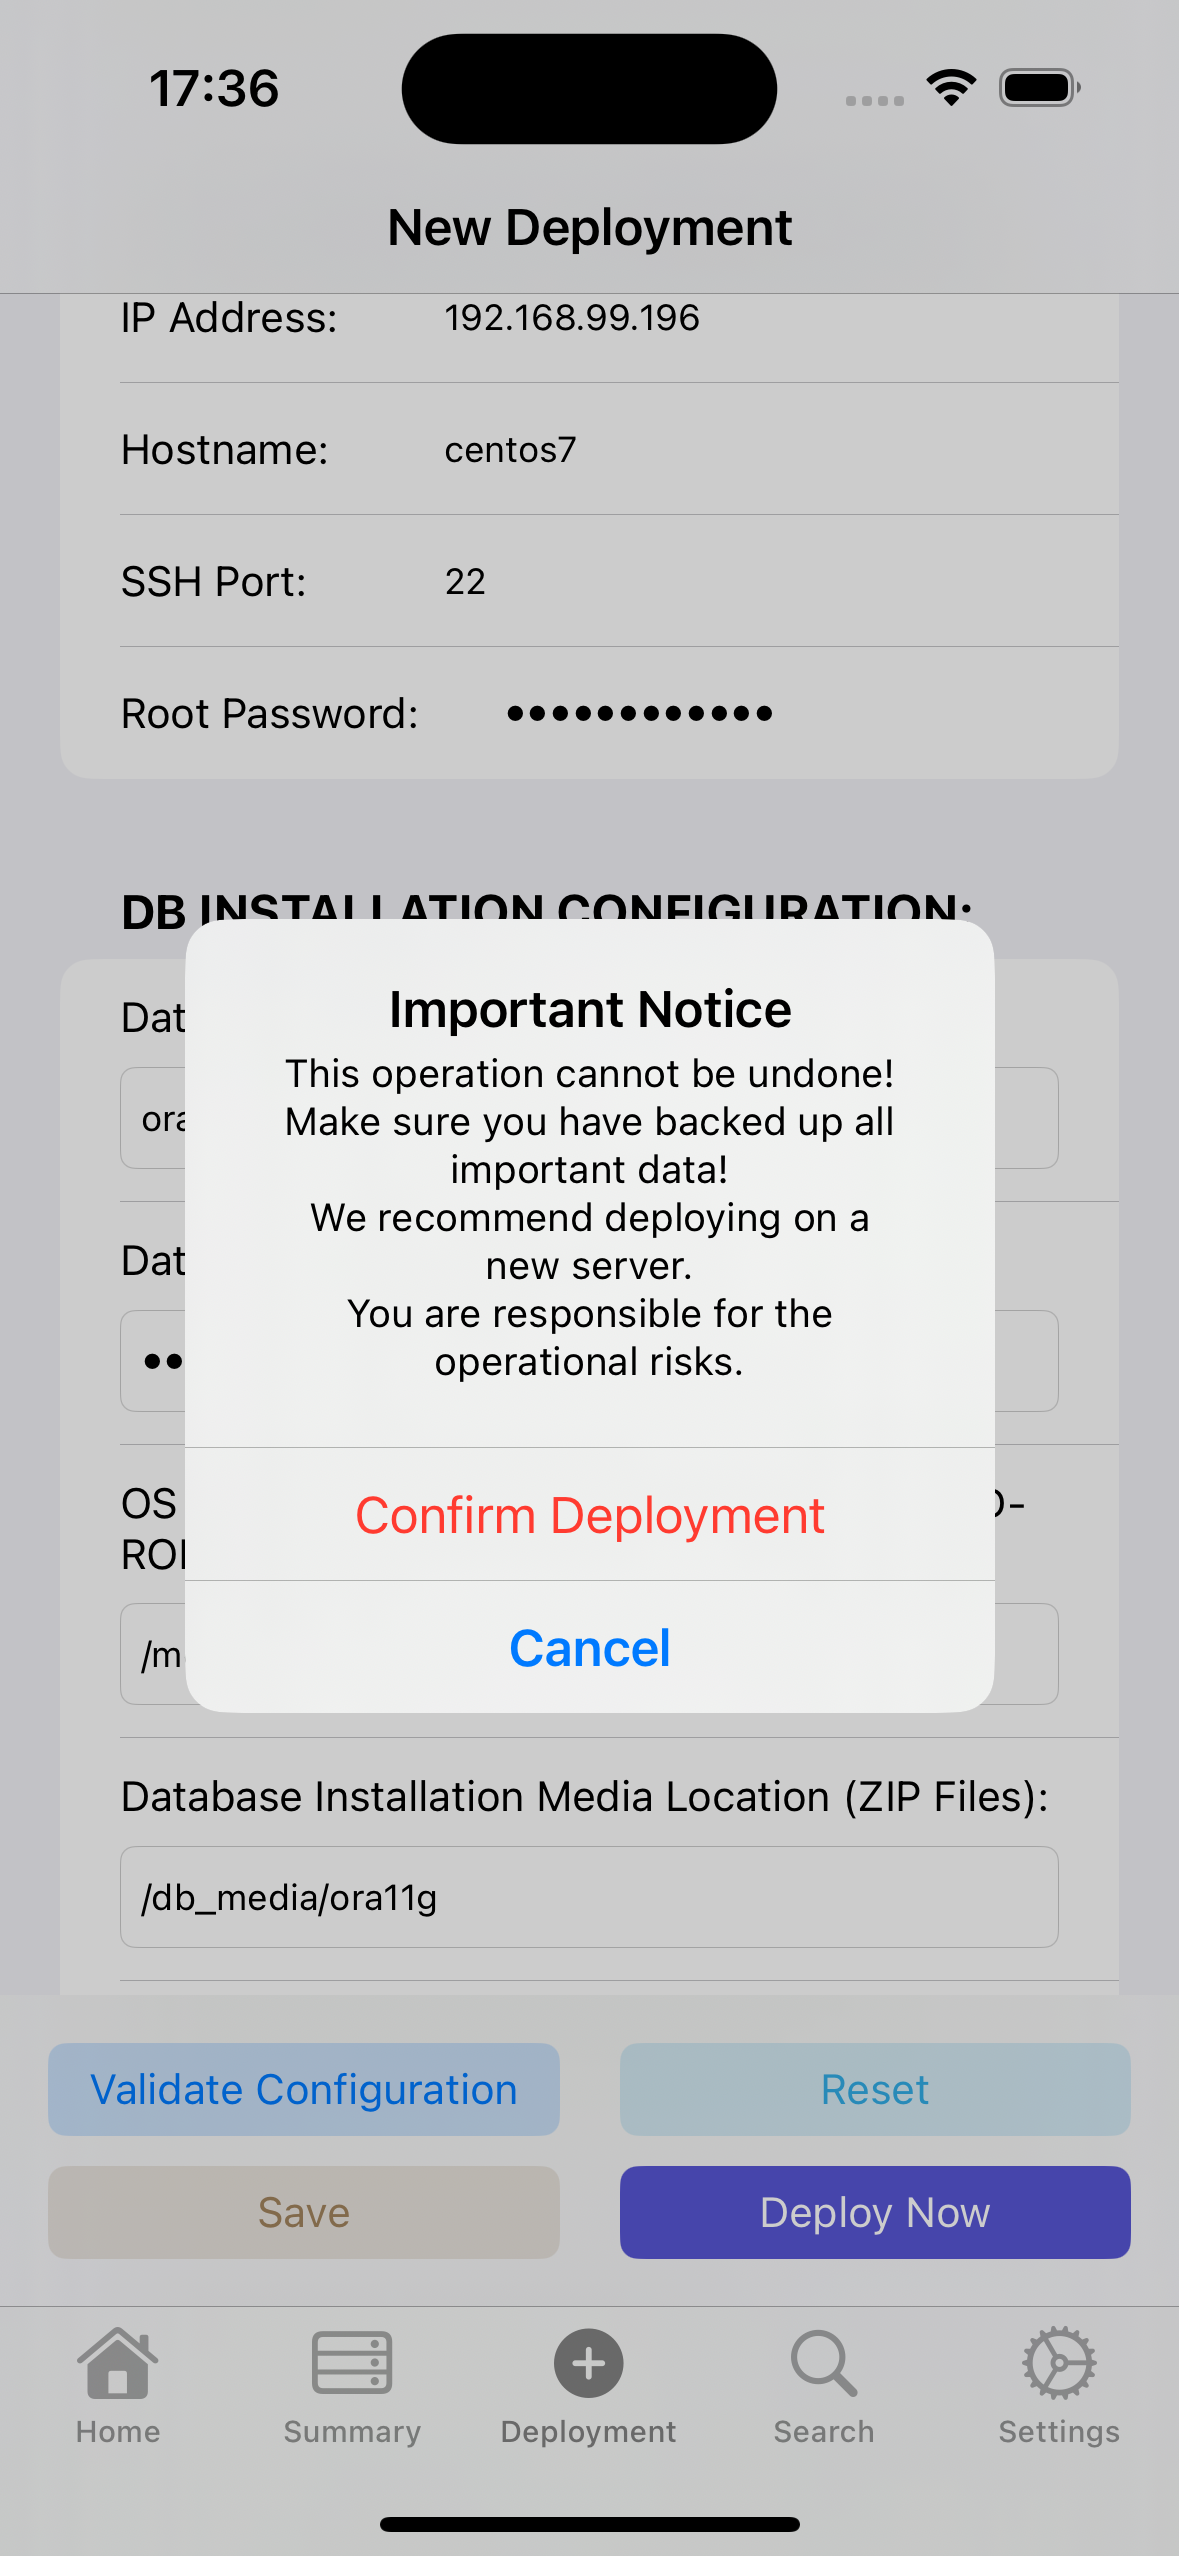
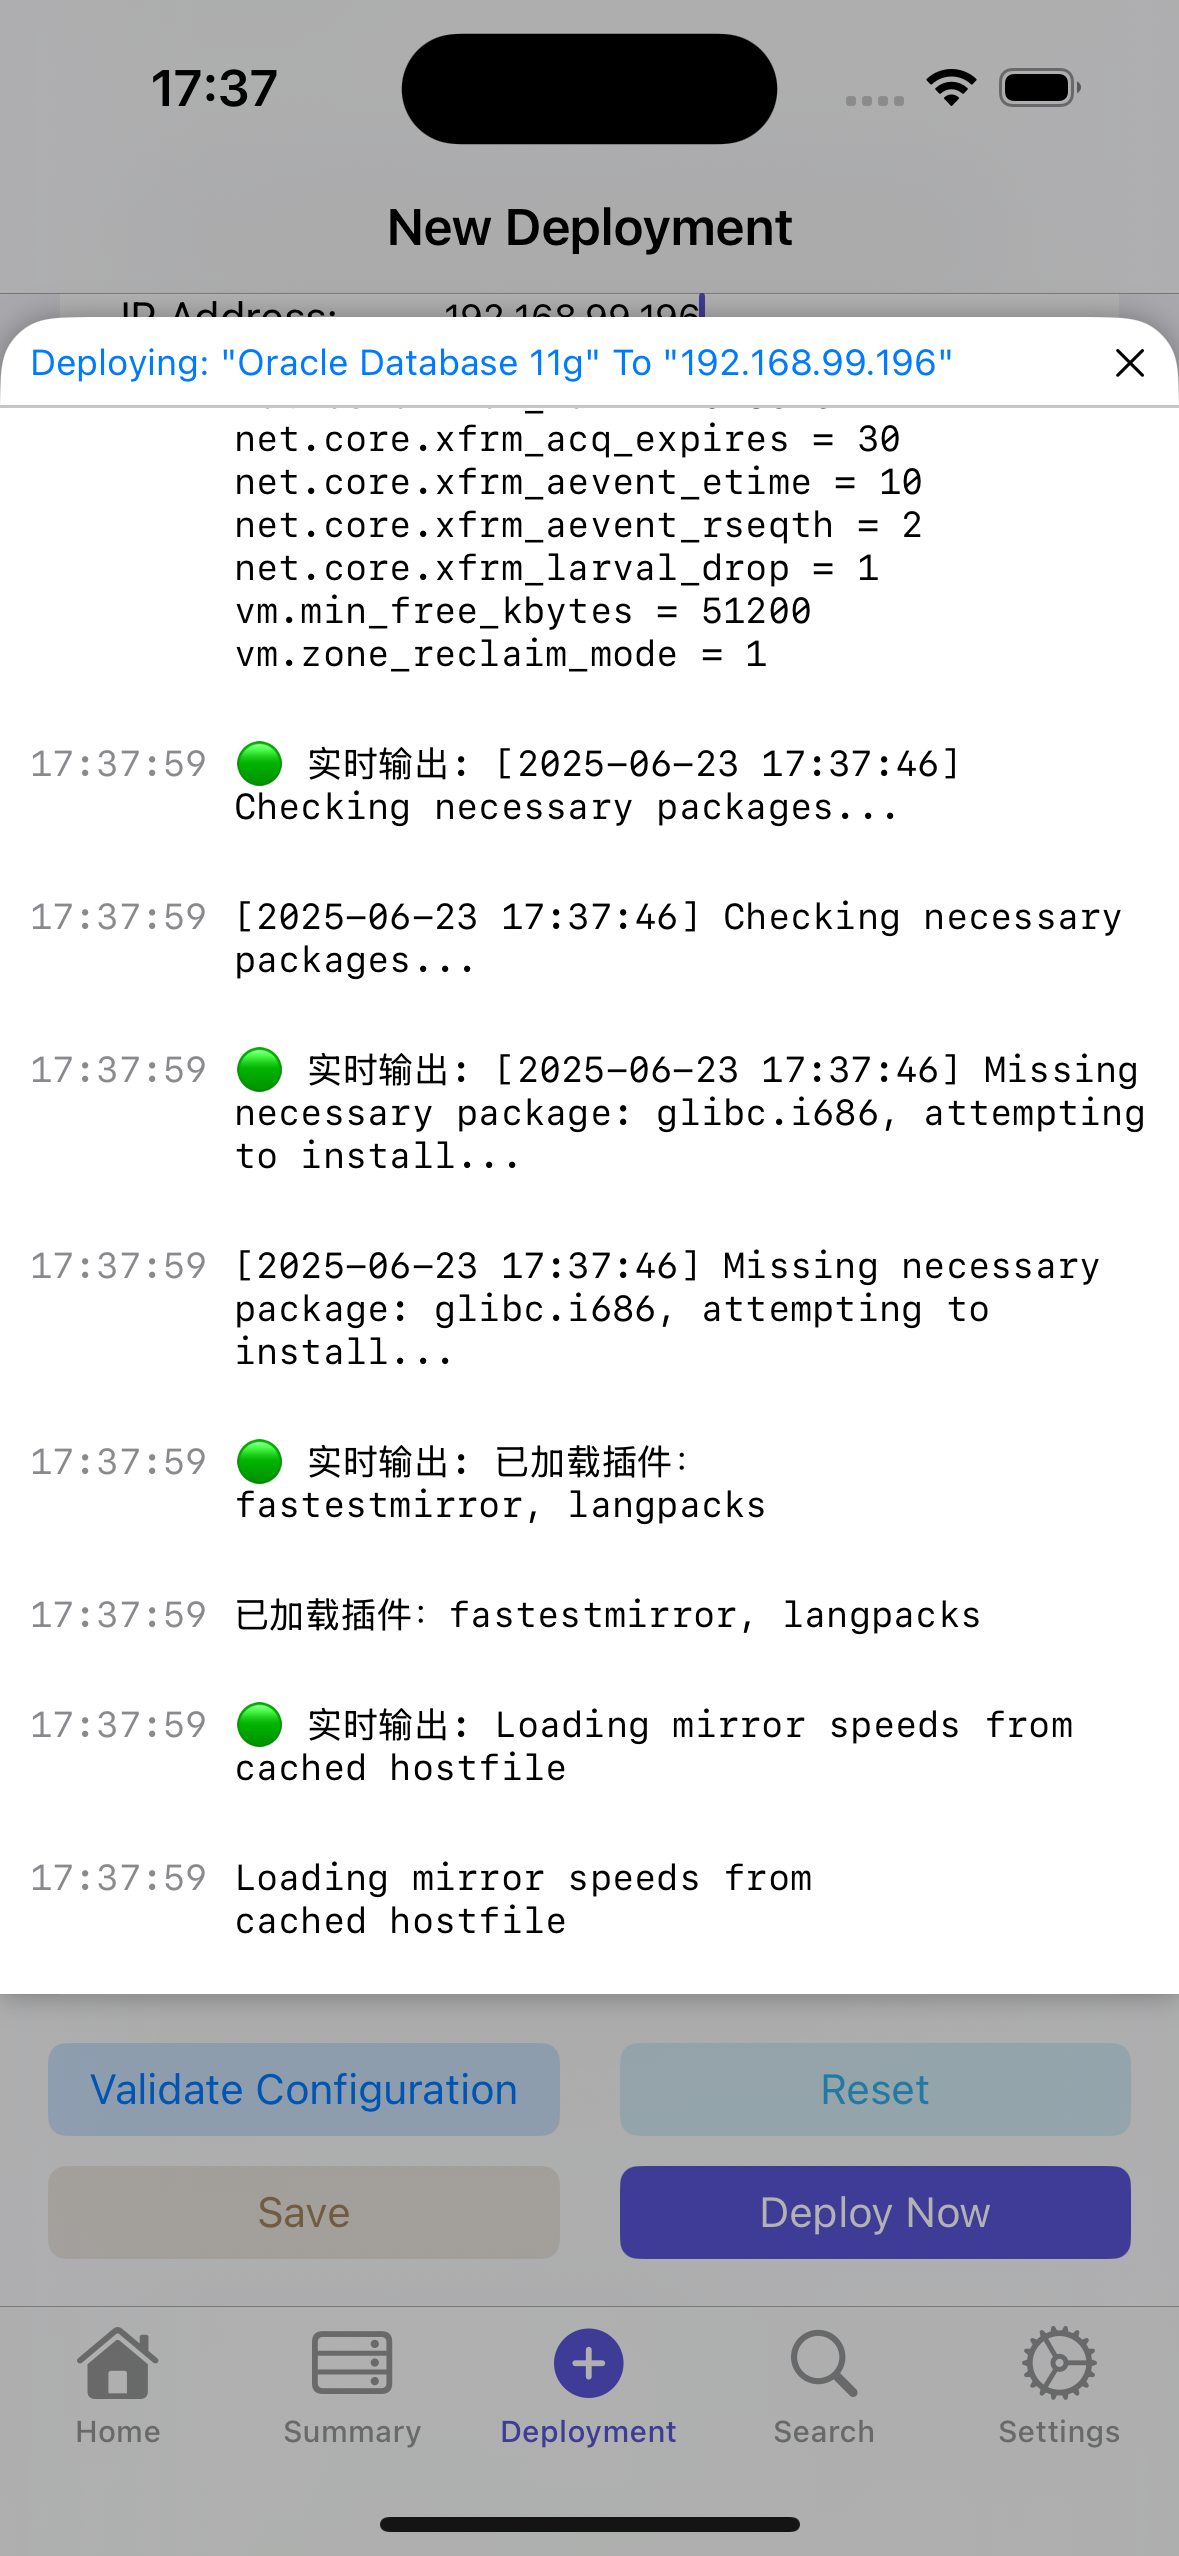
Deploy Now
- When we click "Deploy Now", it will check the current Apple ID email login and subscription status. If you have the appropriate permissions, a deployment prompt will pop up. Please read the prompt information carefully.
After deployment completion, the following prompt will pop up. Choose either option; generally, both will be prompted simultaneously:
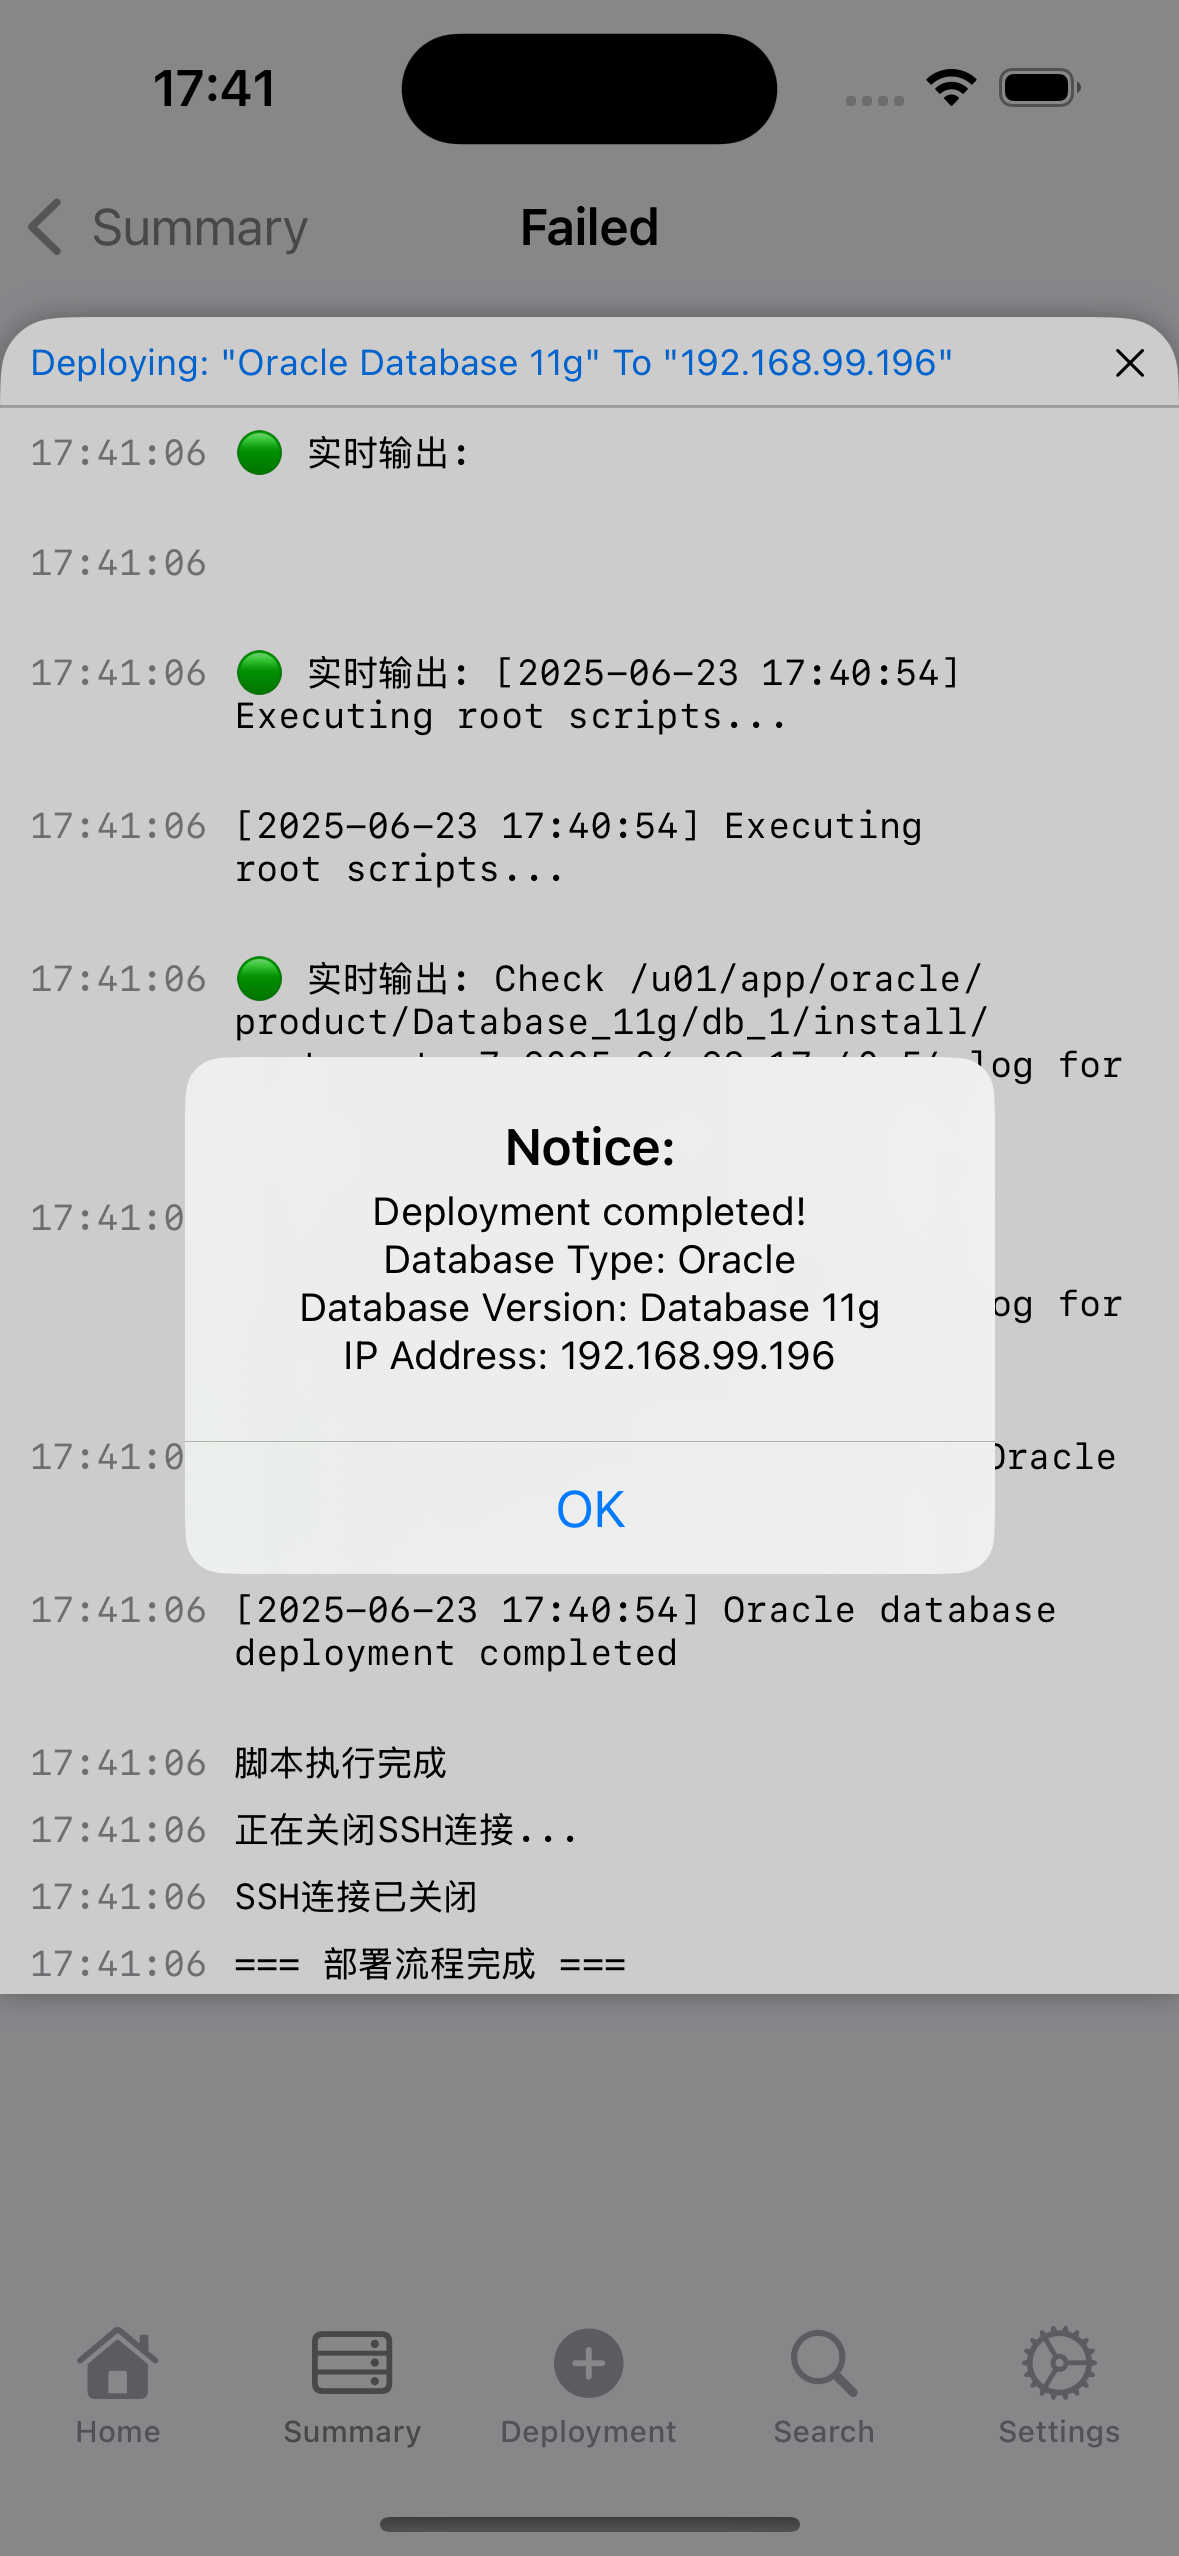
Then close the 2 dialog boxes and return to the main page.
IV. Search
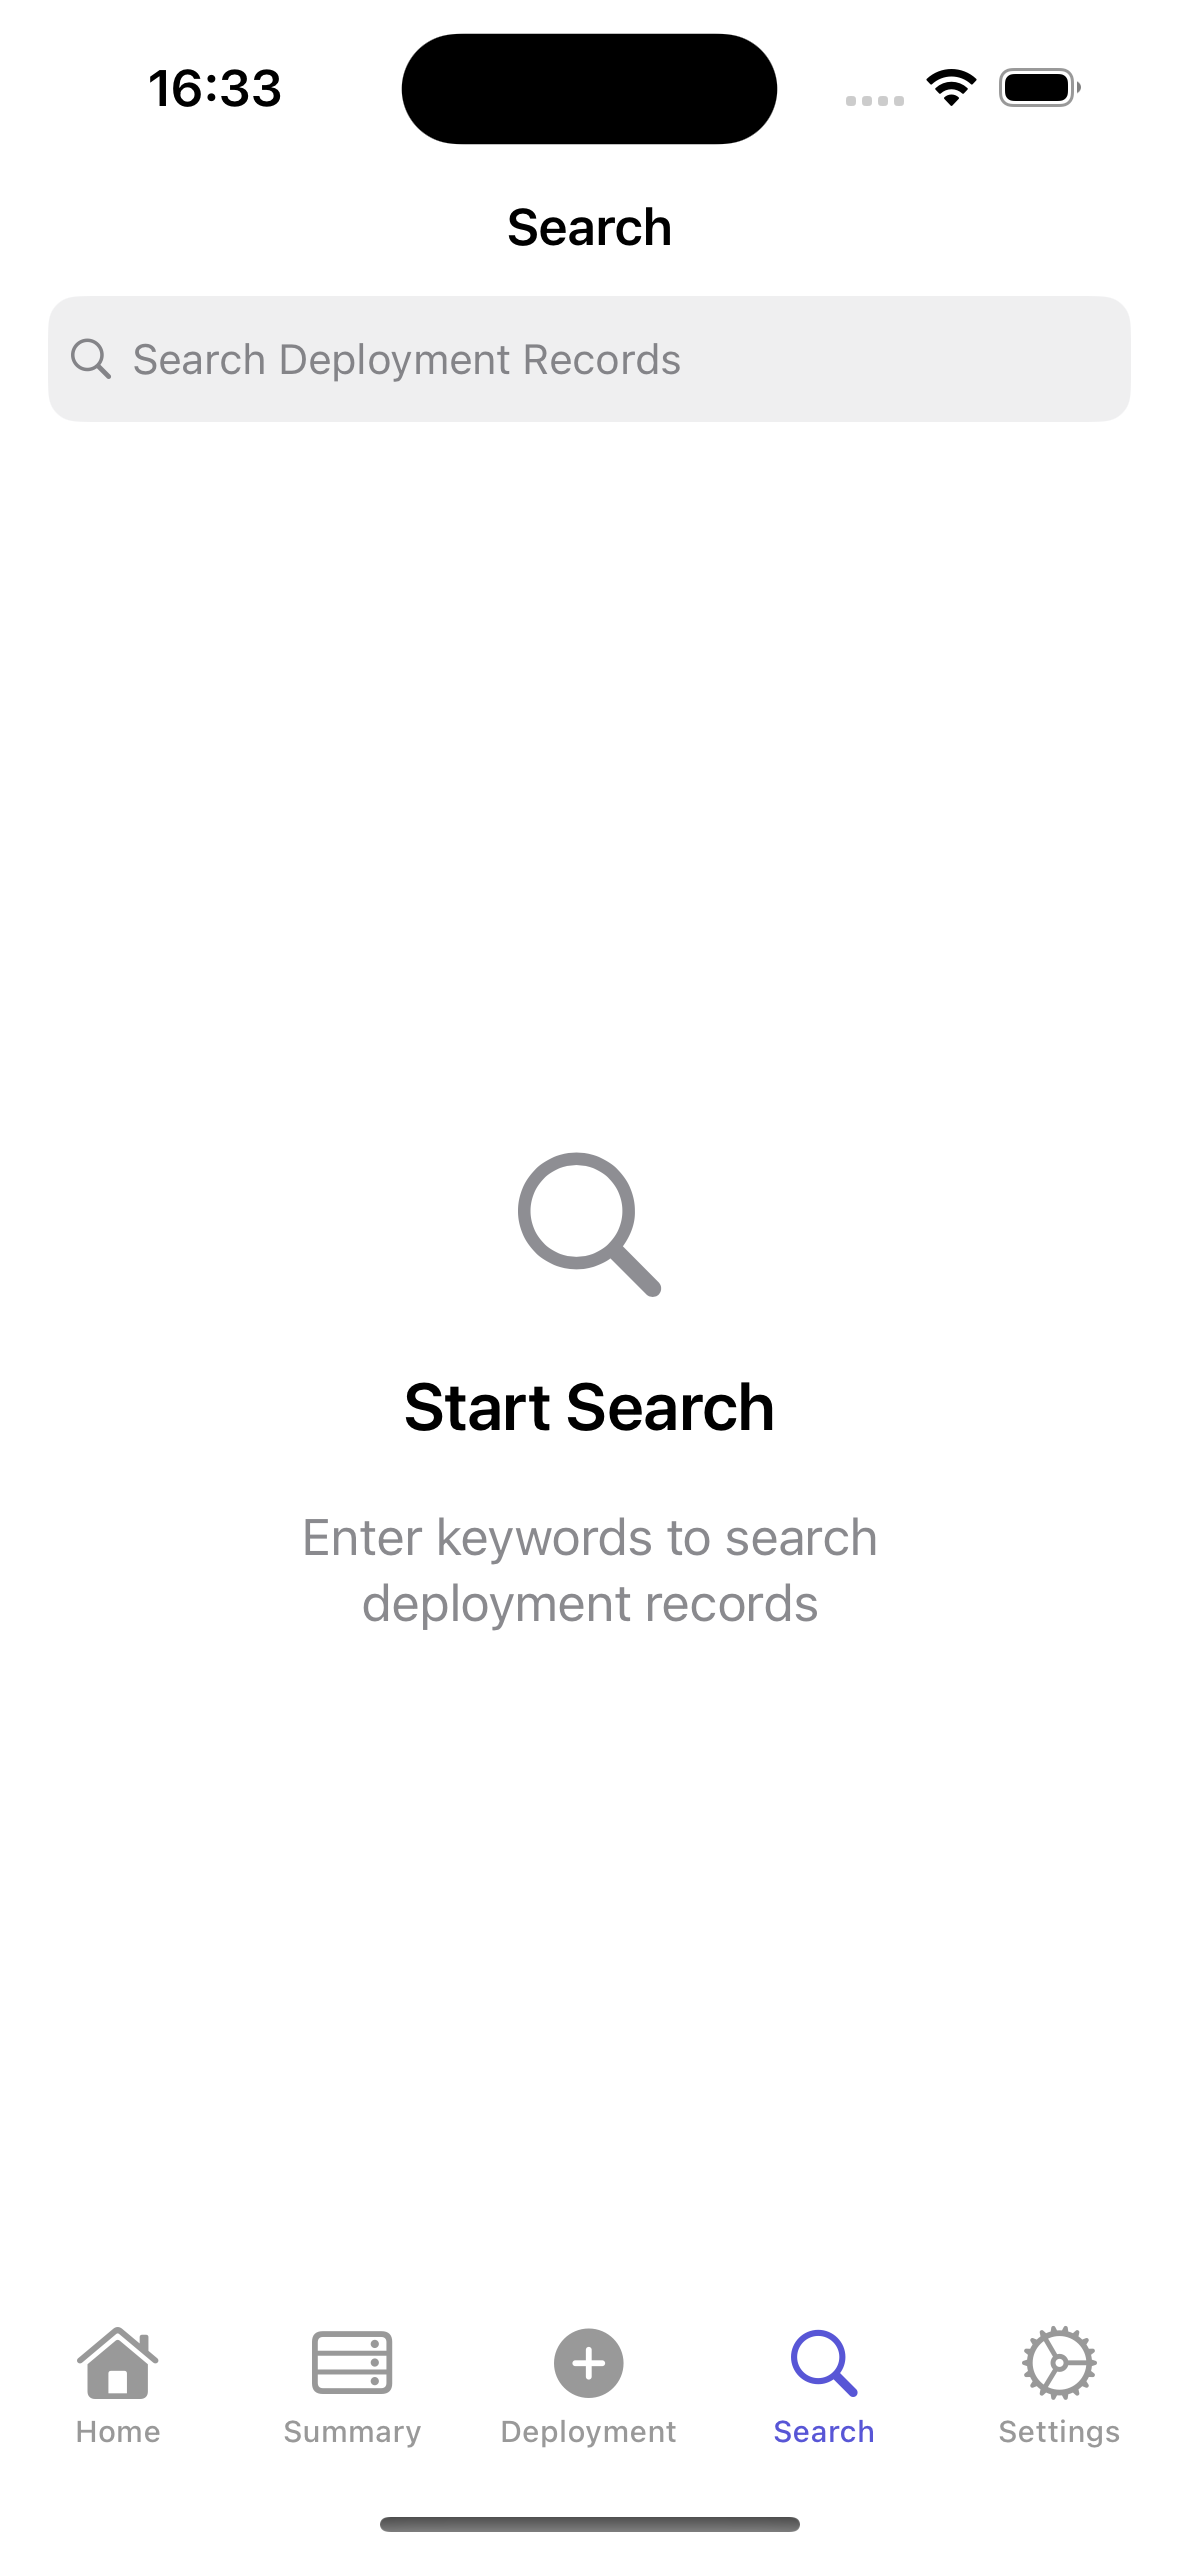
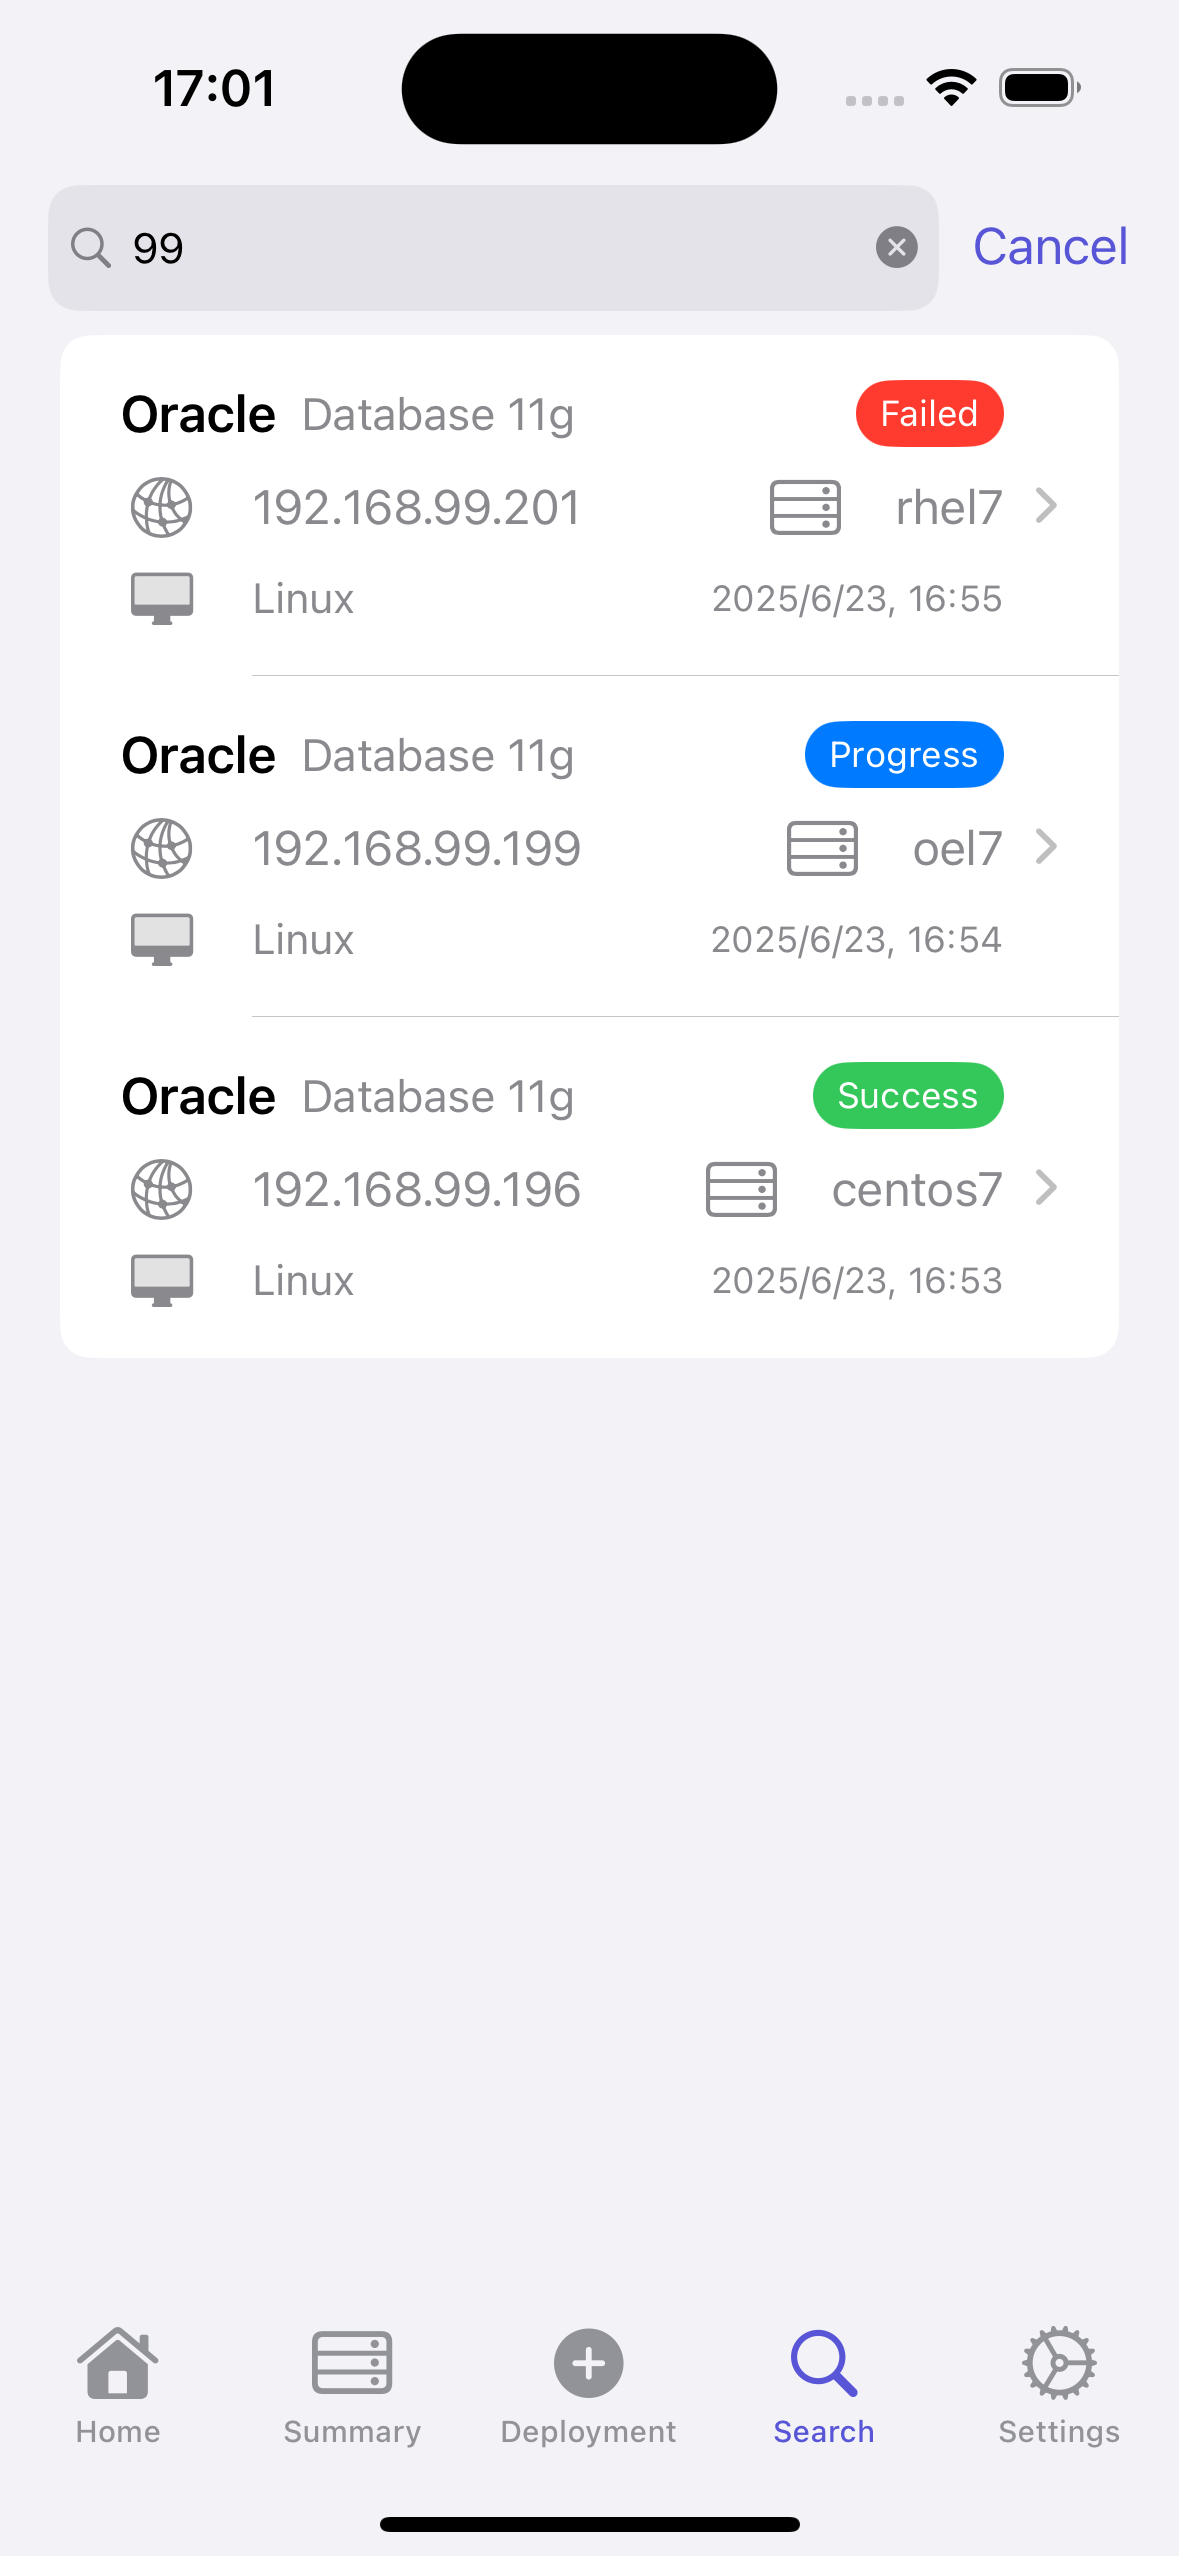
When we have many deployment records, we can search for desired deployment records by entering IP address, hostname, and other information, as shown above.
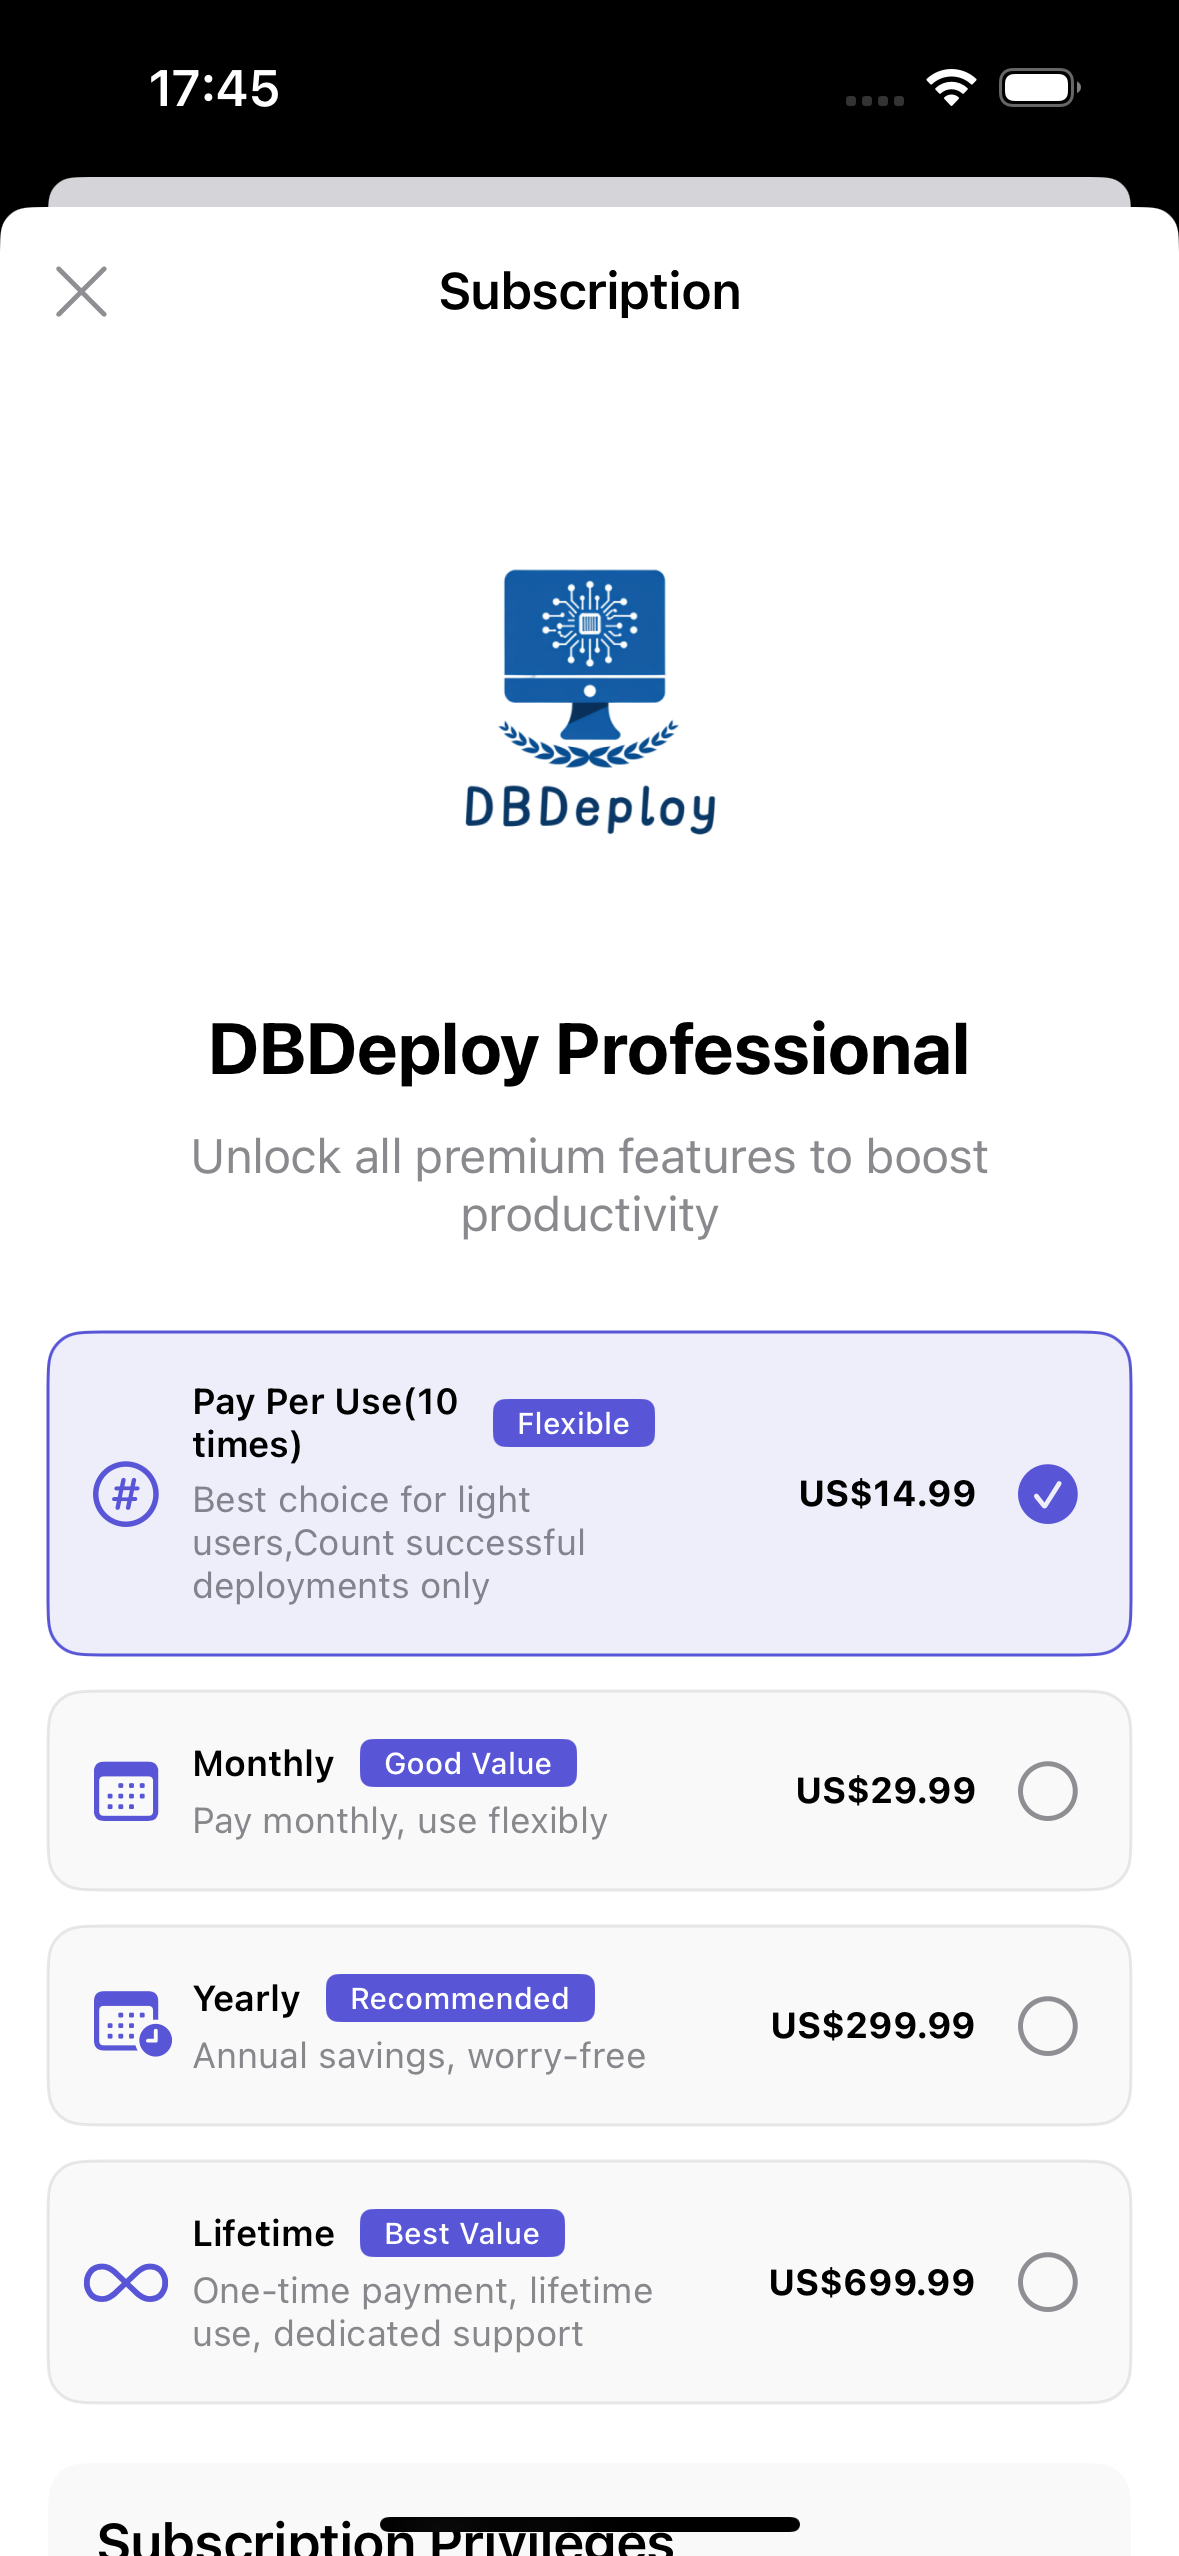
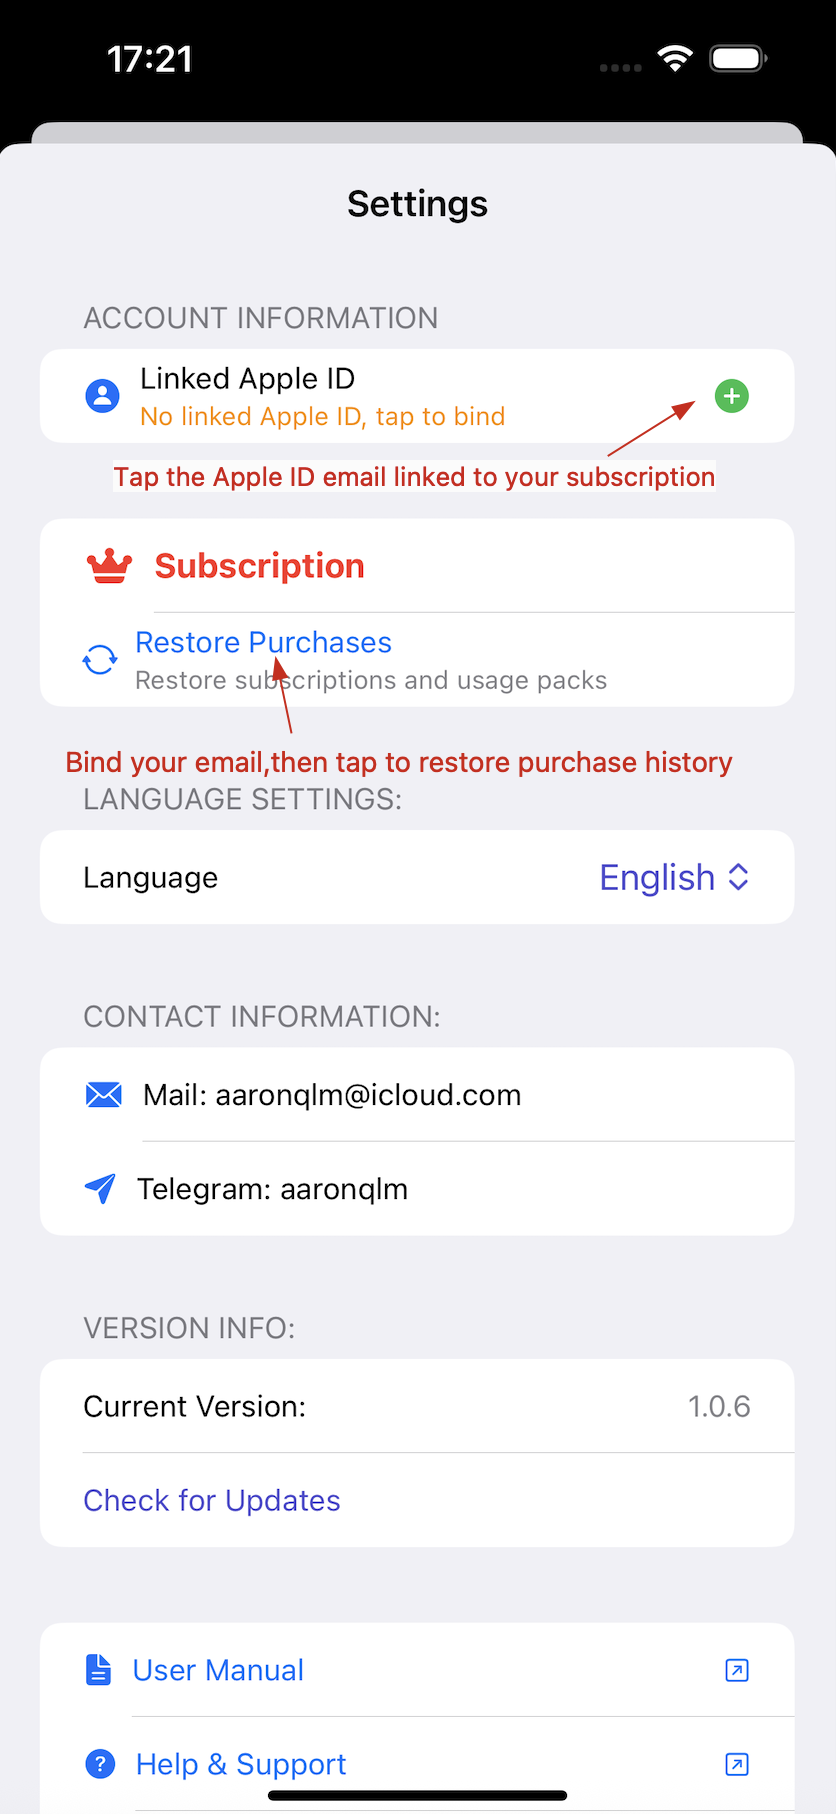
V. Settings

As a first-time user, you should first bind the email corresponding to your Apple ID, then purchase subscriptions according to your needs.